DIY Insect Hotel Made From Recycled Can That Helps Pollinators Thrive

This post contains affiliate links, and we will be compensated if you buy after clicking on our links. Read our disclaimer.
Read our editorial process
Is there anything more satisfying than turning an empty food can into something that helps nature? I don’t think so!
You can make this charming DIY insect hotel with a recycled can, colorful yarn, and a few natural materials.
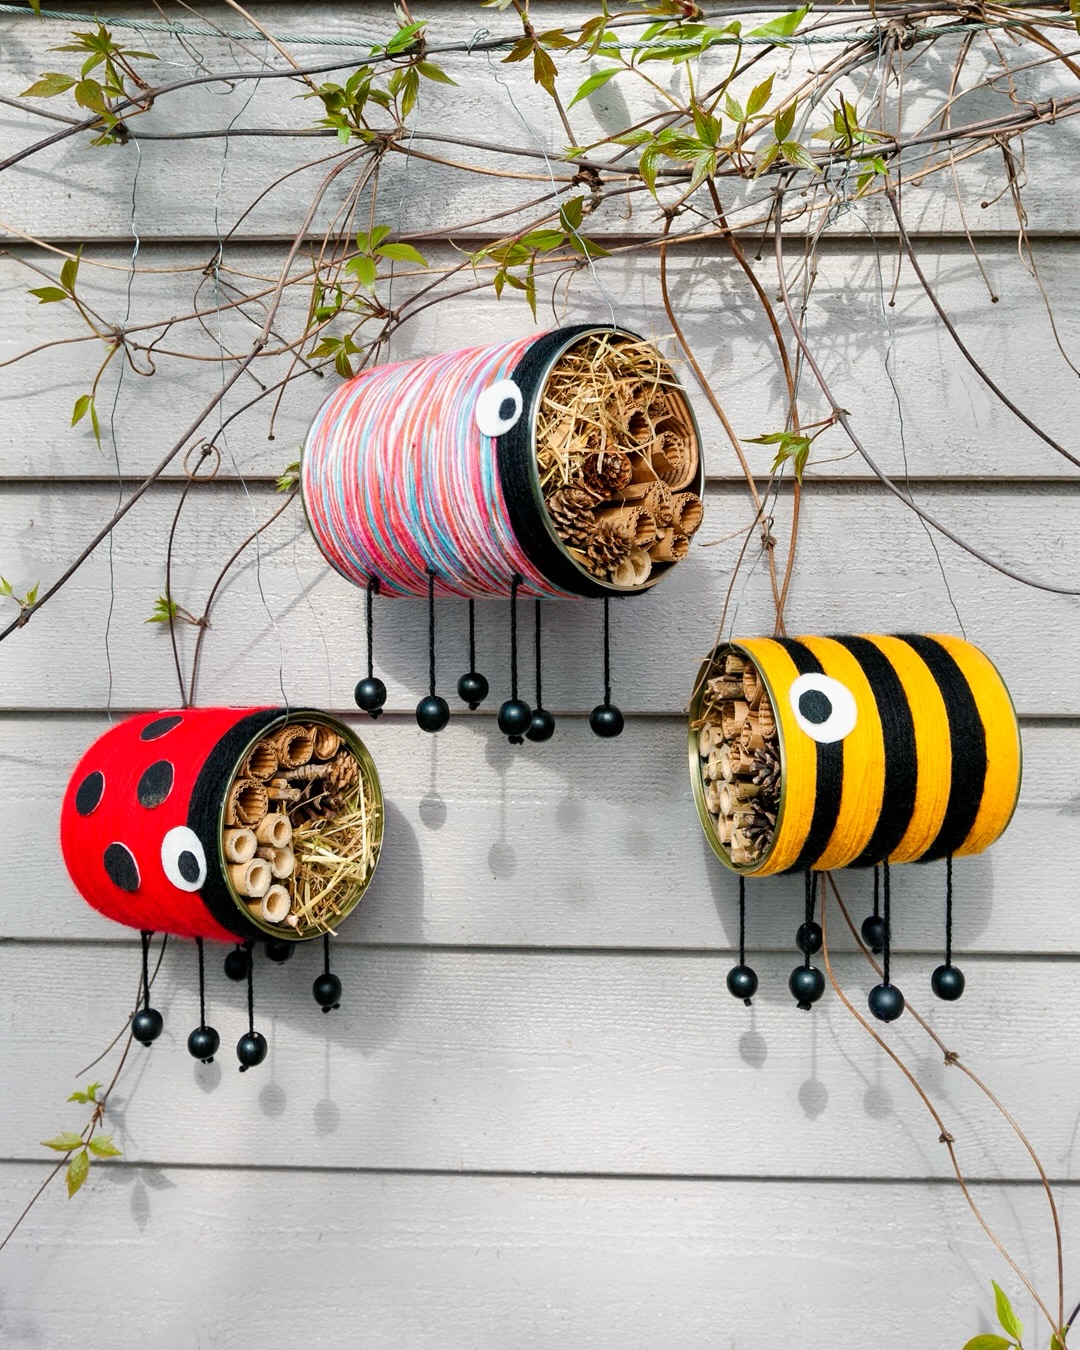
These insect hotels are one of my favorite garden crafts because they are simple to make and provide a safe shelter for bees and other beneficial insects.
This is the perfect spring project for gardeners, families, or anyone who enjoys eco-friendly DIYs. Hang it on a fence, shed, or sunny wall to add color while supporting local pollinators.
If you want to make one (or several) of your own insect hotels, keep reading. You’ll be surprised by how easy they are to create.
Let’s get started!
Supplies You’ll Need
Gather everything before you begin so the project comes together smoothly.
- Empty food can
- Yellow yarn
- Black yarn
- Black wooden beads
- White and black felt
- Hot glue gun
- Craft wire
- Bamboo stems or hollow reeds
- Drilled hardwood blocks (optional)
- Sandpaper or metal file
- Scissors
DIY Insect Hotel Made From Recycled Can Step-by-Step Guide
Making this insect hotel only takes a few simple steps. Each one adds either decorative character or practical function, creating a shelter that is both attractive and useful.
Step 1: Prepare the Recycled Can
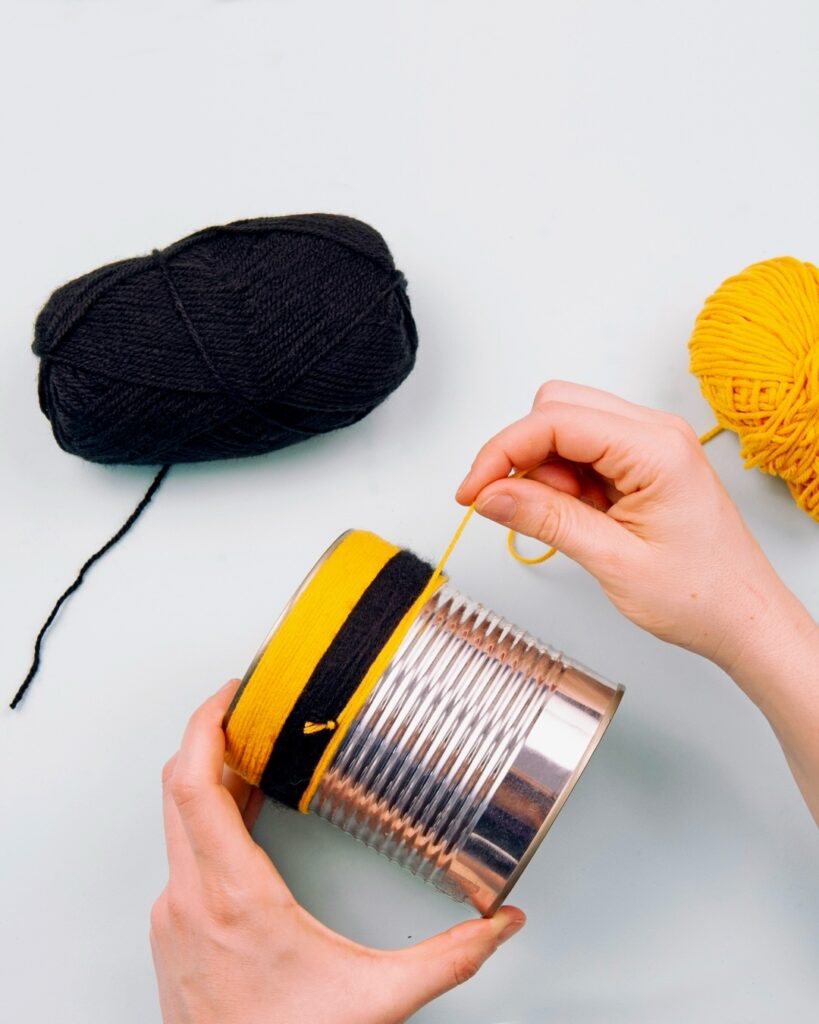
Wash the can thoroughly and remove every trace of the label. Allow it to dry completely before adding any decorative materials.
Next, inspect the rim carefully. Freshly opened cans often leave sharp edges that can damage delicate insect wings.
Use a metal file or fine-grit sandpaper to smooth every edge. This small step greatly improves the safety of the finished insect hotel.
Interestingly, the can itself never changes shape. The project simply gives an everyday object a completely different purpose.
Step 2: Wrap the Can With Yarn
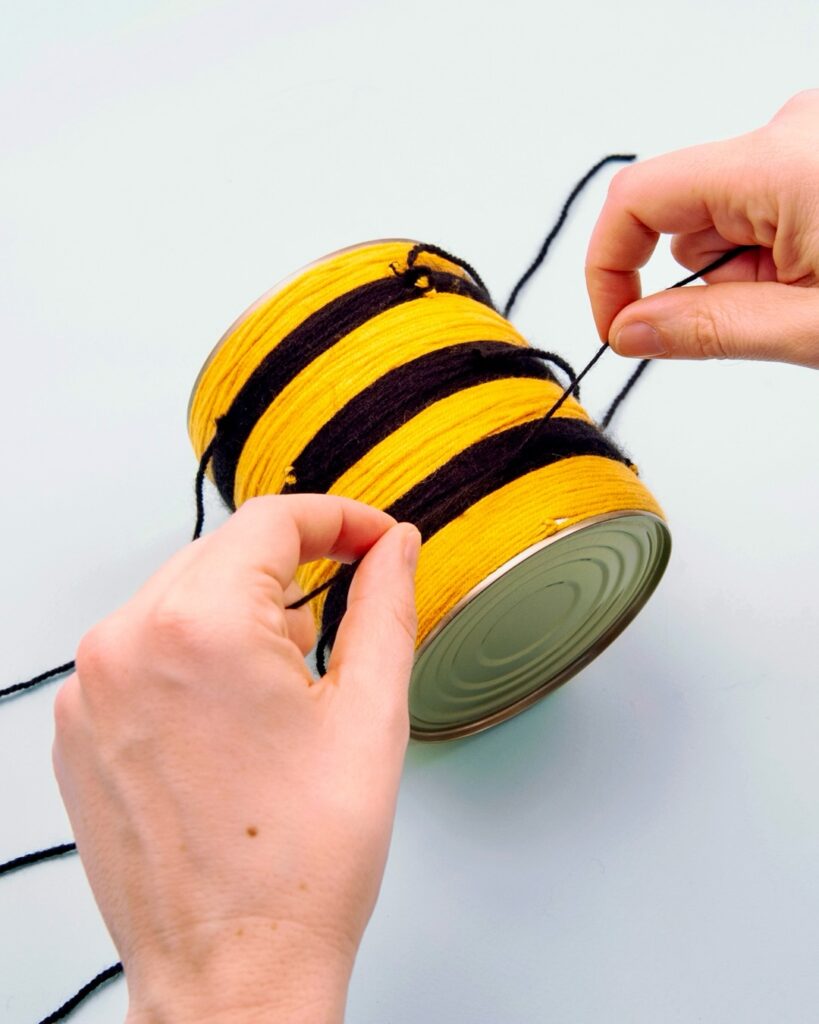
The hero decision behind this project is wrapping the can with yarn instead of painting it. The soft texture immediately makes the recycled metal feel more inviting.
Wrap the yellow yarn tightly around the can until no metal is visible. Add black stripes to create a playful bee-inspired pattern.
Besides adding color, the yarn hides scratches and old packaging graphics. The finished surface looks handcrafted rather than recycled.
Step 3: Add the Eyes
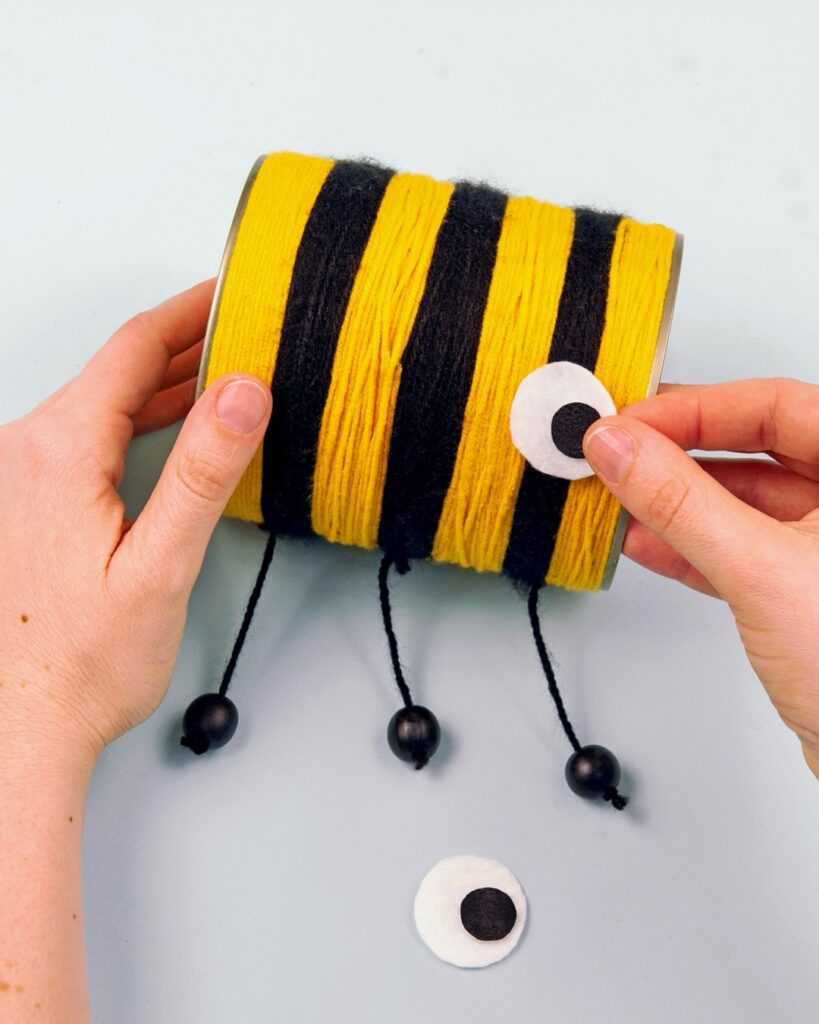
Glue large white circles onto the front of the wrapped can. Finish the eyes with smaller black circles placed in the center.
These oversized features instantly give the project personality. A few simple shapes make the insect hotel far more engaging without making it complicated.
Because every decoration stays on the outside, the opening remains clear for nesting materials. The project stays practical while becoming much more playful.
Step 4: Attach the Legs and Decorative Details
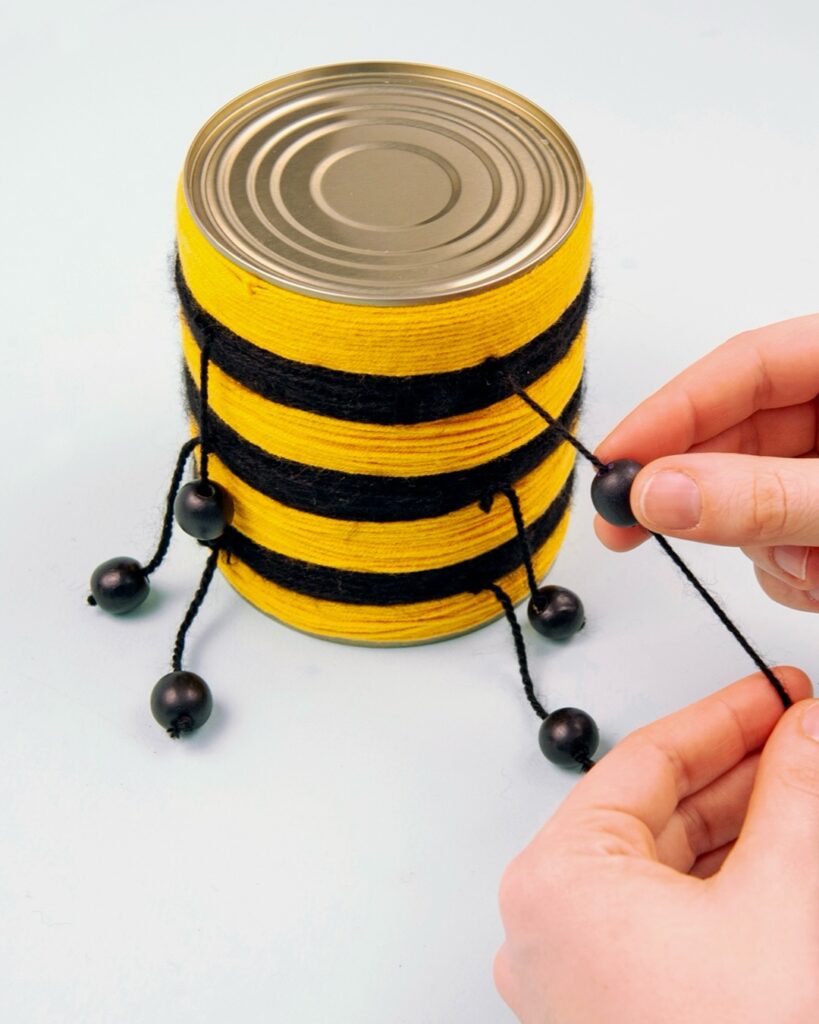
Tie small black wooden beads onto pieces of black yarn. Glue or thread them underneath the can to create simple dangling legs.
These details are decorative, but they make the finished project feel much more playful. A few small additions completely change how the recycled can is perceived.
The hanging legs also introduce movement. Even a light breeze brings the decoration to life without affecting the insect shelter inside.
Step 5: Fill the Hotel With Safe Nesting Materials
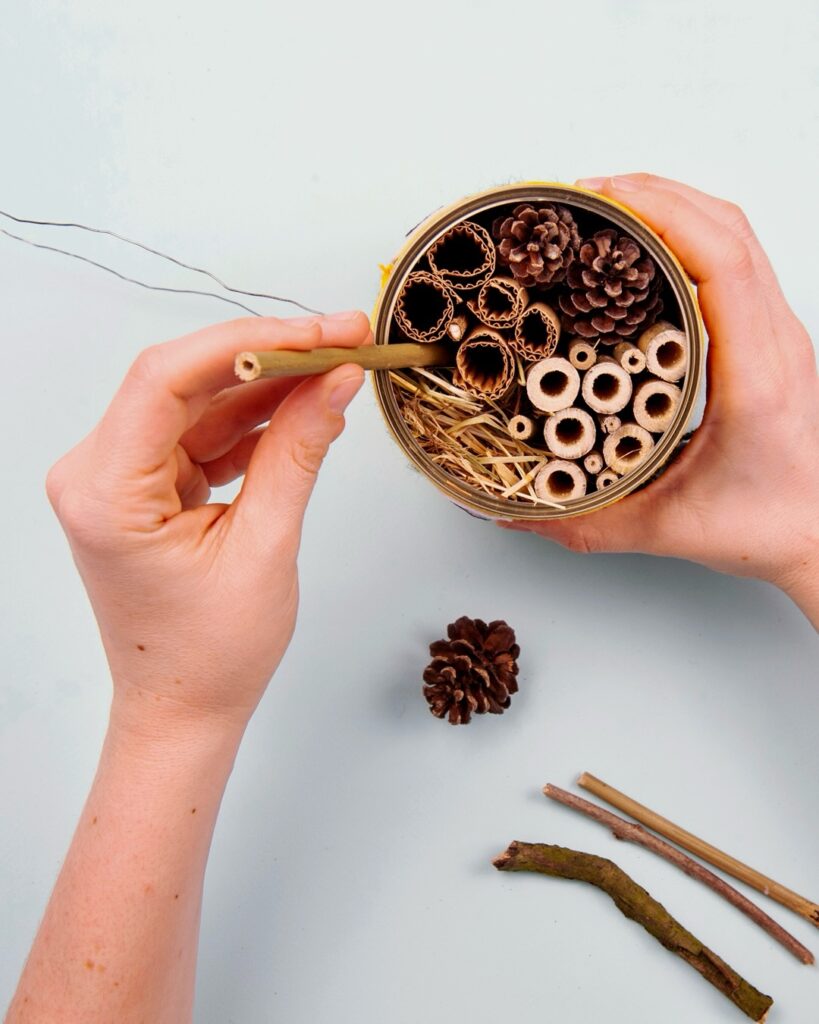
Once the outside is finished, it is time to prepare the nesting area. This is the most important part of the entire project.
Fill the can tightly with bamboo stems, hollow reeds, paper tubes, or drilled hardwood. Keep every tunnel smooth and cut the pieces so they sit flush with the front of the can.
Avoid using pine cones and loose straw. Although older tutorials often included them, they can hold moisture and create conditions that are less suitable for solitary bees.
Different tunnel sizes attract different insects. Including a variety of diameters helps support more beneficial species throughout the season.
Step 6: Add the Hanging Wire
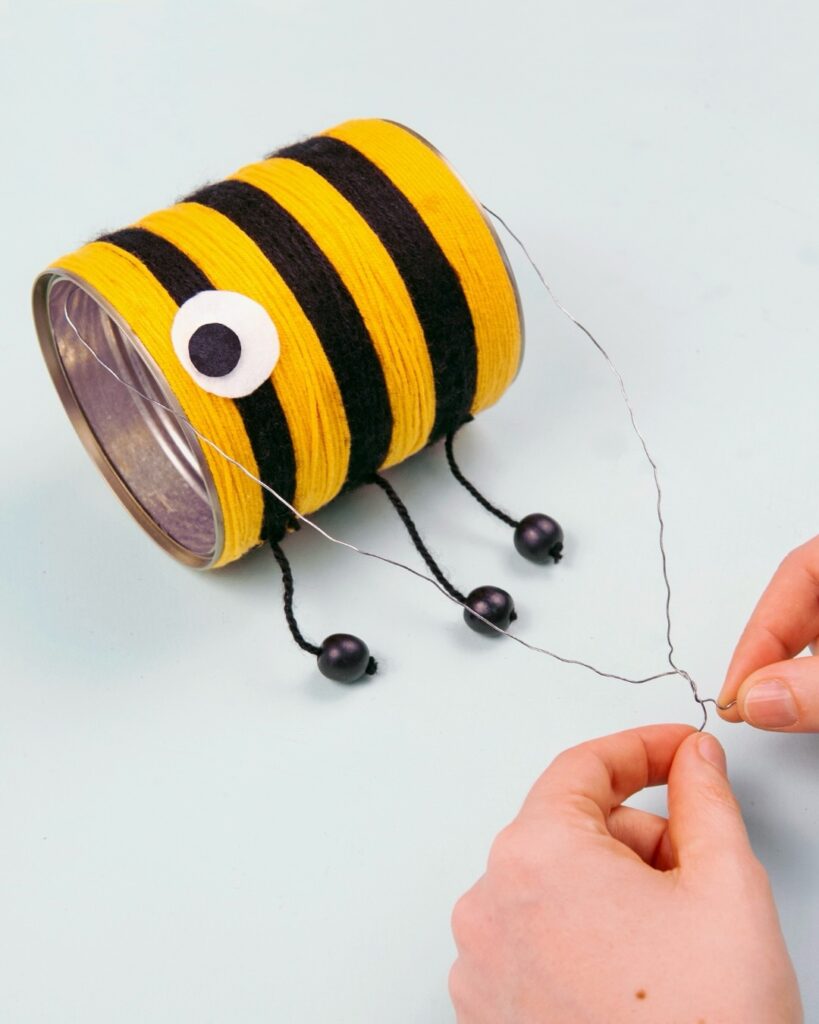
Twist a sturdy piece of craft wire through the top of the can to create a hanging loop. Make sure it is strong enough to support the finished insect hotel outdoors.
A stable hanger prevents the hotel from swinging in strong winds. Beneficial insects prefer nesting spaces that remain steady throughout the season.
Place the wire so the can hangs level. This helps keep the nesting tubes dry and prevents rainwater from collecting inside.
Step 7: Hang Your DIY Insect Hotel
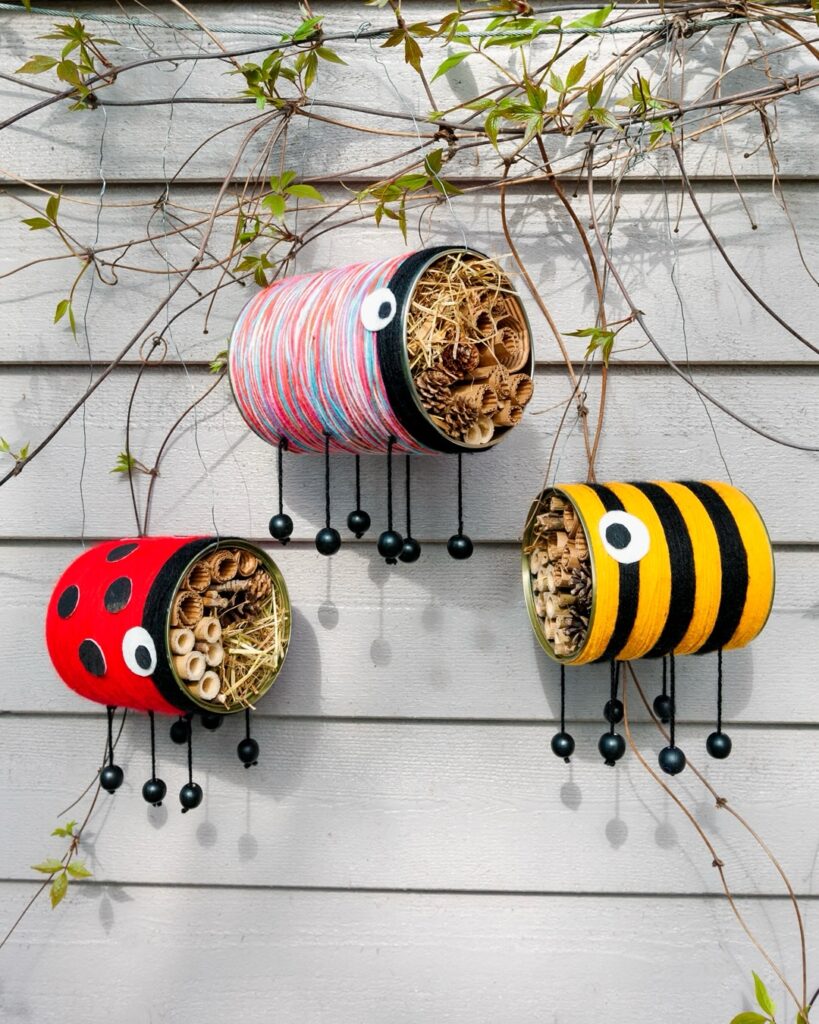
Choose a location that receives morning sun but stays protected from heavy rain. A fence, garden shed, or exterior wall often provides ideal conditions.
Hang the insect hotel about three to six feet above the ground. Secure it firmly so it does not move every time the wind blows.
The finished project proves that simple materials can have a meaningful purpose. What began as an empty food can now provides shelter for pollinators while adding handmade character to the garden.
How Long Does It Take to Make This DIY Insect Hotel?
This DIY insect hotel comes together fairly quickly. Most people can finish one in about 30 to 45 minutes, depending on how much time they spend decorating.
If you’re making several insect hotels in different colors or crafting with kids, expect the project to take a little longer. It’s a relaxing afternoon activity that’s both fun and rewarding, and you’ll end up with a handmade garden decoration that also helps local pollinators.
Where to Place an Insect Hotel
Location has a big impact on whether insects will actually use the hotel.
For the best results:
Image Credit: All project images courtesy of Instagram user @franzworks.
Create a More Wildlife Friendly Garden
• DIY Bird House Ideas
• DIY Garden Ideas
• DIY Outdoor Fairy Garden Ideas
• DIY Scarecrow For Garden