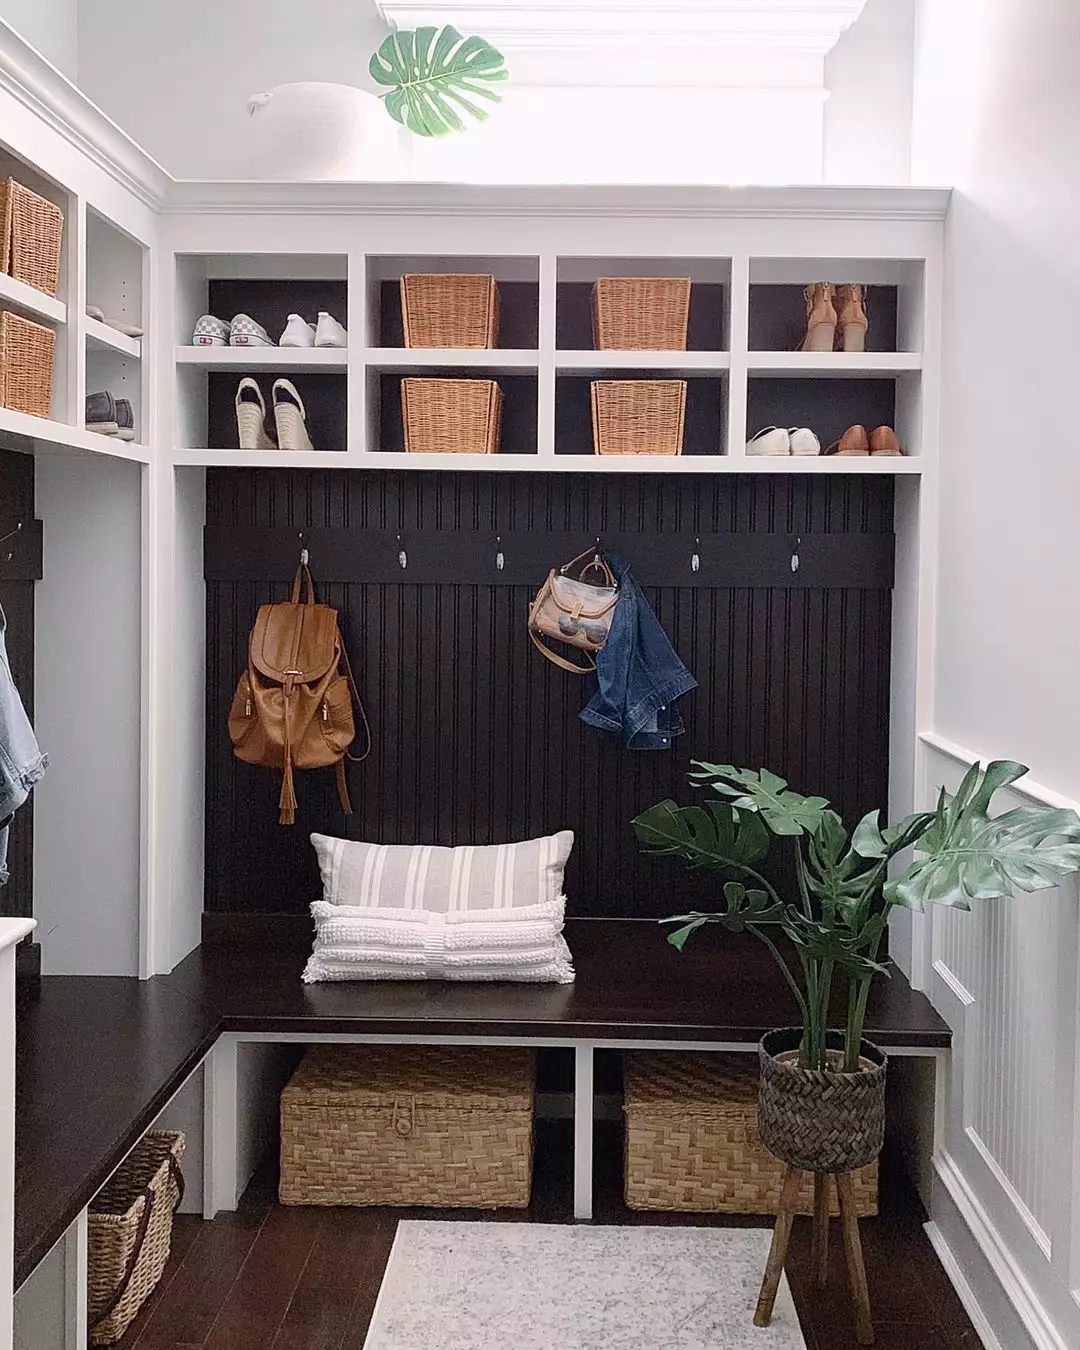
If your entryway looks fine from a distance but turns chaotic the second you step inside, chances are it is the shoes. They multiply overnight. They never line up neatly. And somehow the pair you need is always at the bottom of the pile.
Shoe clutter is one of those everyday frustrations that makes a space feel messy even when everything else is styled beautifully. You can have the perfect bench, the right rug, even a mirror in place, but if shoes are scattered across the floor, the whole area feels unfinished.
The problem is not that you need more space. It is that you need smarter storage.
A well-designed DIY shoe rack does more than stack footwear. It creates structure. It gives every pair a clear home. It keeps walkways open and daily routines smoother. Whether you are dealing with a narrow hallway, a small apartment entry, or a busy family mudroom, the right setup can completely change how the space functions.
And the best part is that many effective shoe rack designs are simple to build. With basic materials like wood planks, crates, pipes, or even repurposed furniture, you can create something custom to your exact dimensions.
Why Shoe Storage Feels So Hard?
Shoes come in different shapes and sizes. Sneakers, boots, sandals, heels. Some are tall. Some are bulky. Some are worn daily while others rotate seasonally.
That is why one generic rack often does not work for everyone. You need something that matches your lifestyle. Open shelves for grab-and-go convenience. Hidden compartments if you prefer a cleaner look. Vertical storage if floor space is limited.
When your storage matches how you actually live, the pile-up problem fades quickly.
Can You Build a Shoe Rack Without Advanced Skills?
Yes. Many of the most practical designs require only basic tools and straight cuts.
Stacked wooden crates, simple tiered shelving, wall-mounted rails, and slim vertical racks are all beginner-friendly projects. Even repurposing an old bookshelf or cabinet can turn into a functional shoe station with minor adjustments.
The key is measuring your space carefully and planning for airflow so shoes do not feel crammed.
27 DIY Shoe Racks to Bring Order Back to Your Entryway
Below, you will find creative and practical ideas designed to tackle shoe clutter head-on.
From compact solutions for tight spaces to larger storage systems for busy households, these DIY shoe rack ideas focus on what matters most: keeping your floors clear and your home feeling organized.
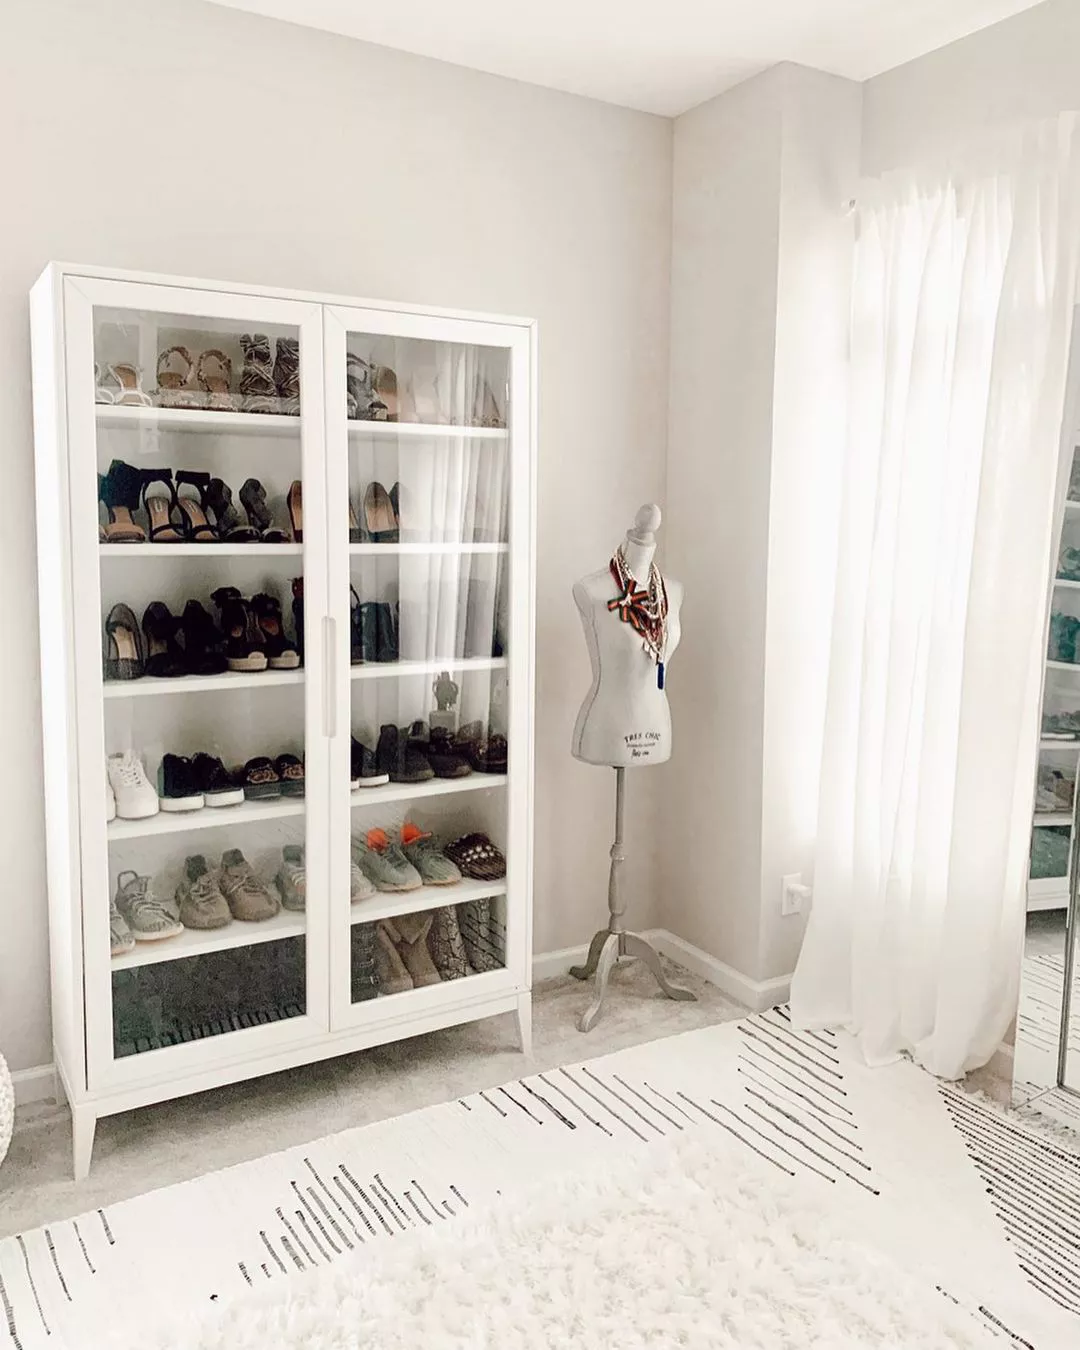
Clean and Classic White Shelving
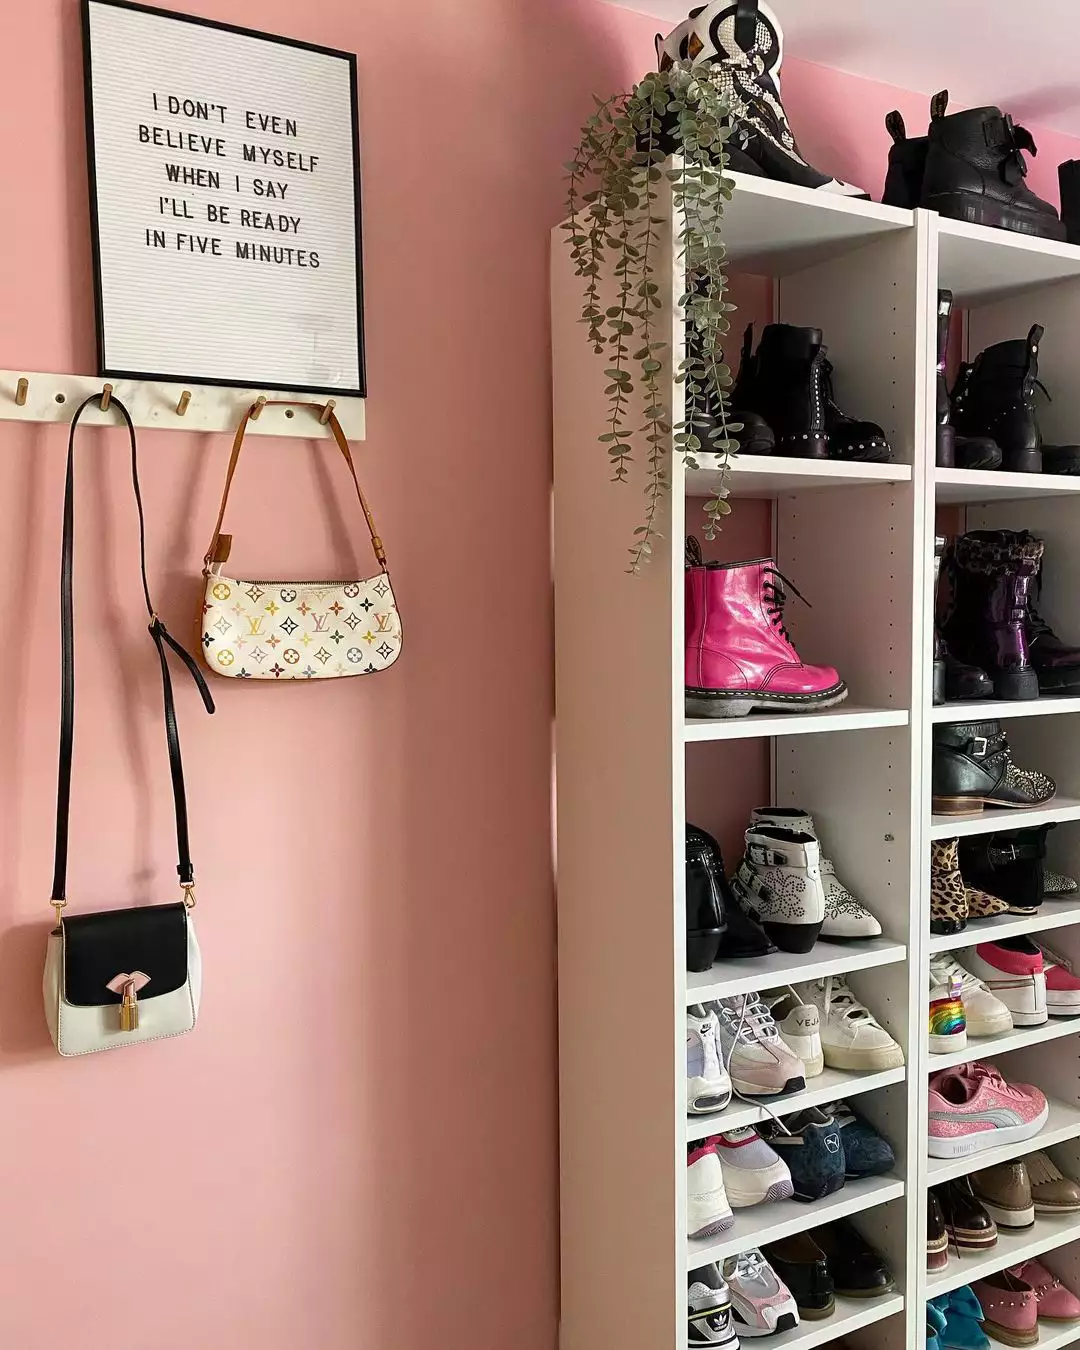
This setup uses tall, slender white bookcases to turn a collection of boots and sneakers into a legitimate focal point against a soft pink wall. By utilizing vertical space, it keeps the floor clear while displaying everything from hot pink Doc Martens to sparkly white booties.
The open design works because it treats your footwear like art rather than just utility items. It feels very “boutique closet” and adds a touch of glam to an otherwise unused corner. I’m honestly obsessed with how the trailing ivy on top softens the hard lines of the shelves.
You could easily recreate this with a basic flat-pack bookcase, just make sure to anchor it to the wall if you’re loading it up with heavy winter boots.
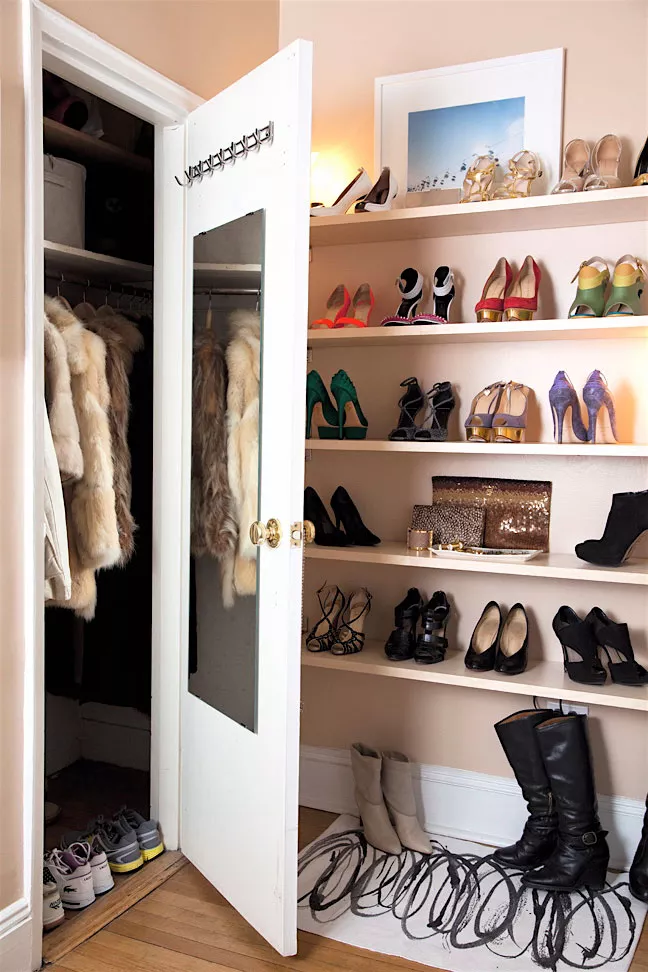
The Ultimate Utility Back-of-Door Station
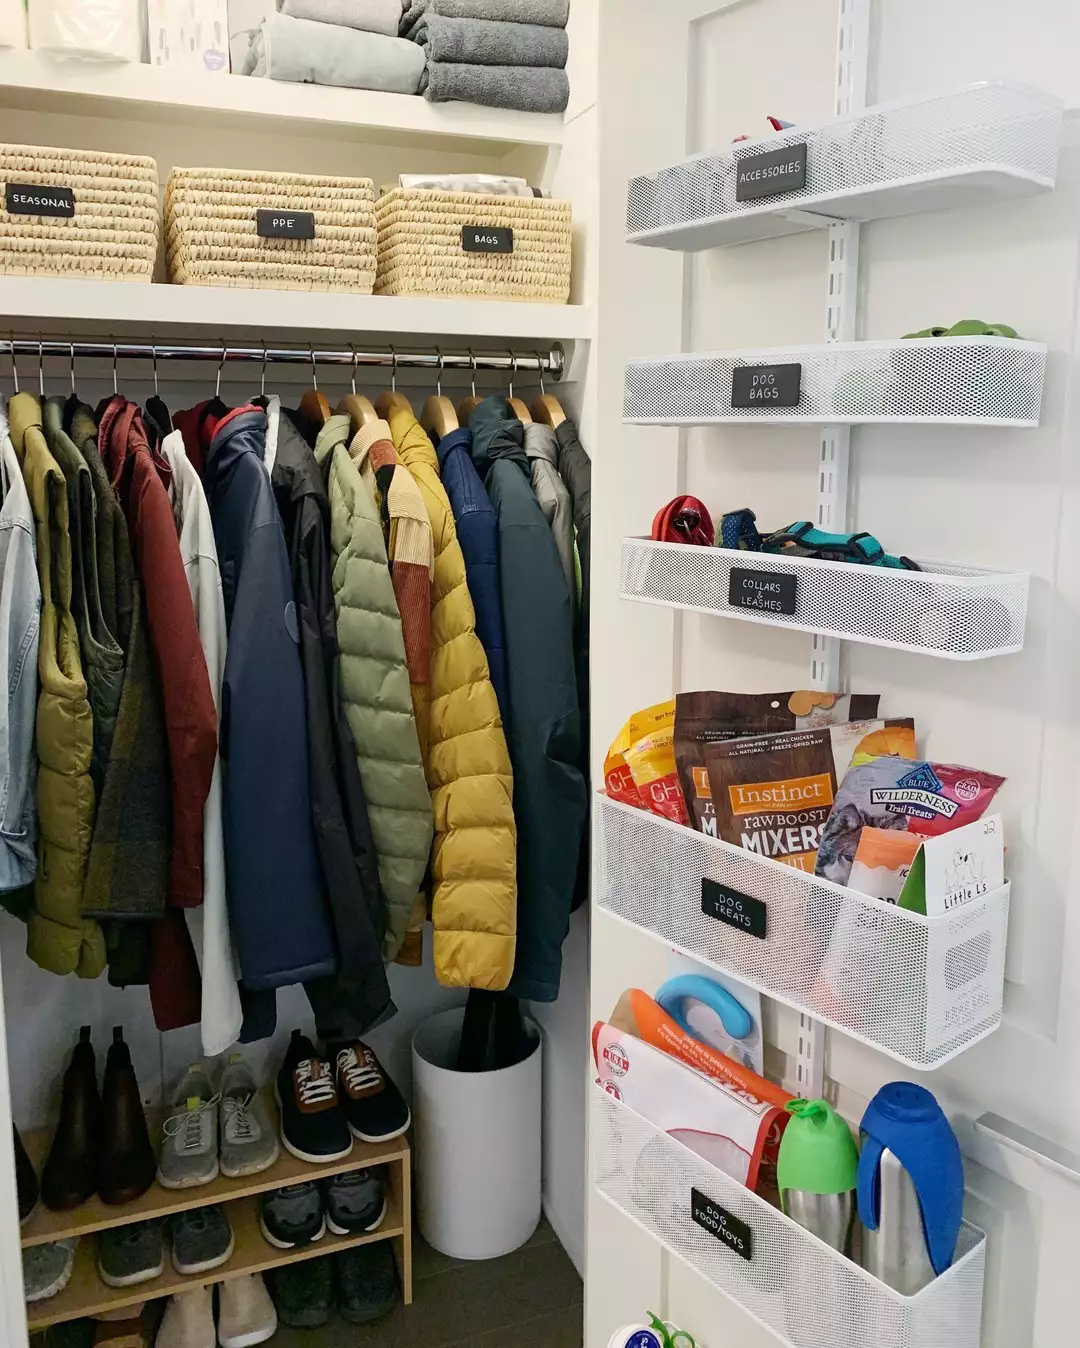
Check out this genius use of a pantry-style rack on the back of a closet door to hold everything from dog treats to accessories. Down below, a simple low wooden bench keeps the daily shoes tucked neatly under the hanging coats.
It is such a smart way to maximize a small mudroom or entry closet without feeling cramped. This vibe is all about being organized and prepared for the day, like a high-functioning “command center.” It makes the morning rush feel way less frantic when you know exactly where the leash and the sneakers are.
I’d suggest using clear bins or mesh baskets like these so you can see exactly what you have at a glance.
Rustic Stacked Crate Charm
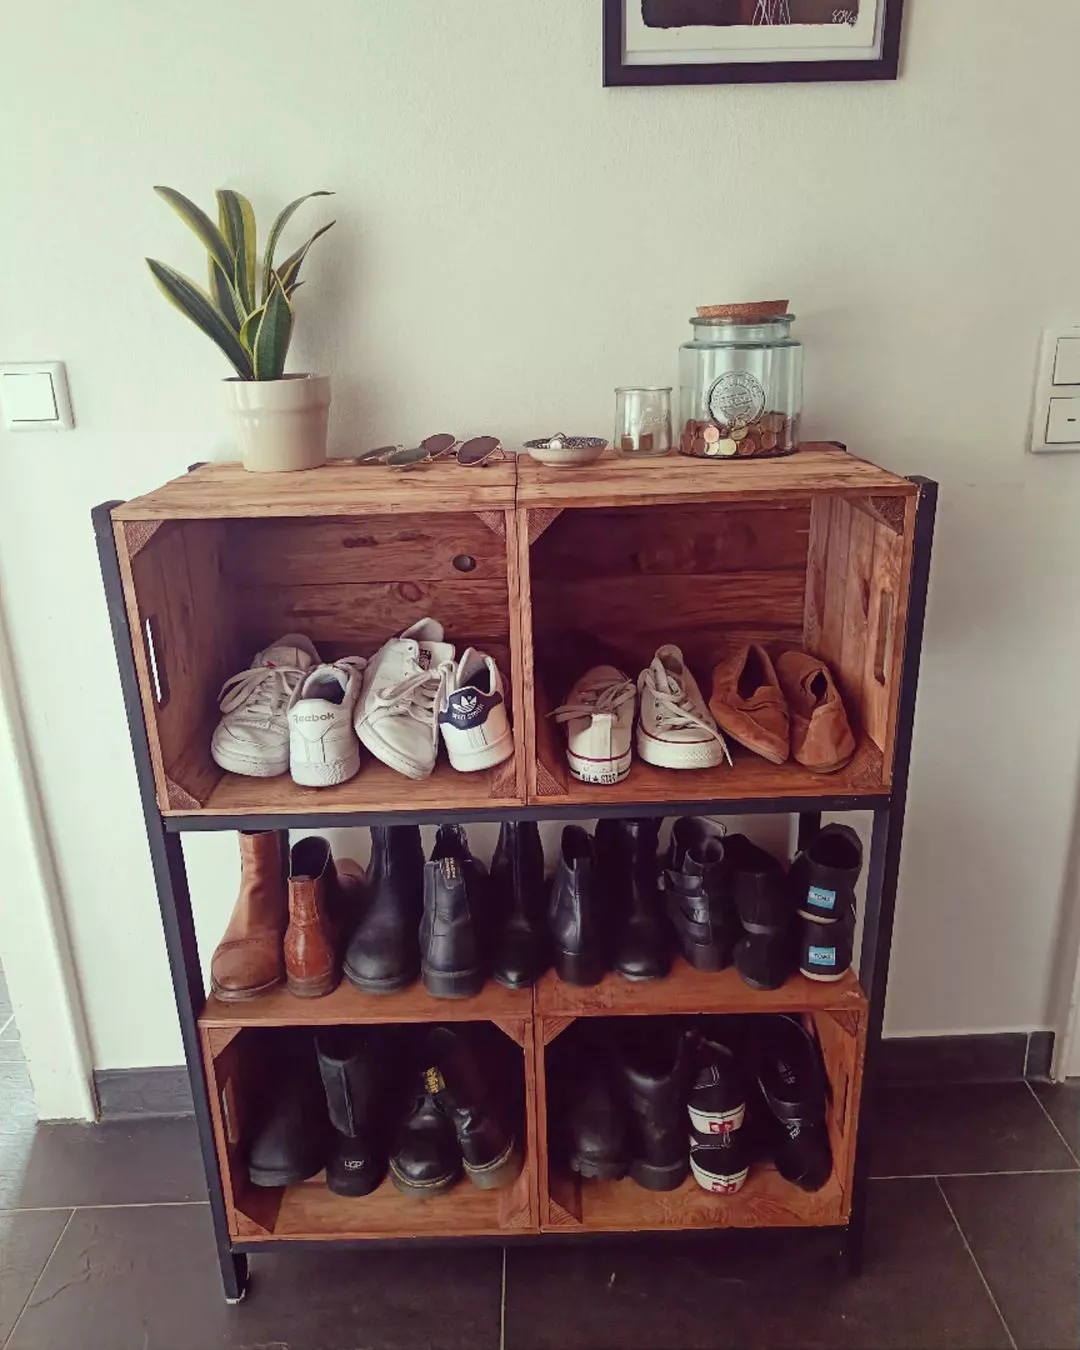
I am lowkey obsessed with this DIY look that uses reclaimed wooden crates stacked within a simple black metal frame. It creates these deep, cozy cubbies that perfectly fit bulky sneakers and leather boots while looking incredibly intentional.
The warm wood grain provides such a nice contrast against the white wall and dark tile floor. It feels very “modern farmhouse” with a side of effortless cool. I love how the top of the crates doubles as an entryway table for plants and a coin jar.
Try sourcing vintage apple crates for this if you want that authentic, weathered texture that smells faintly of old pine.
Sleek Garage Wall System
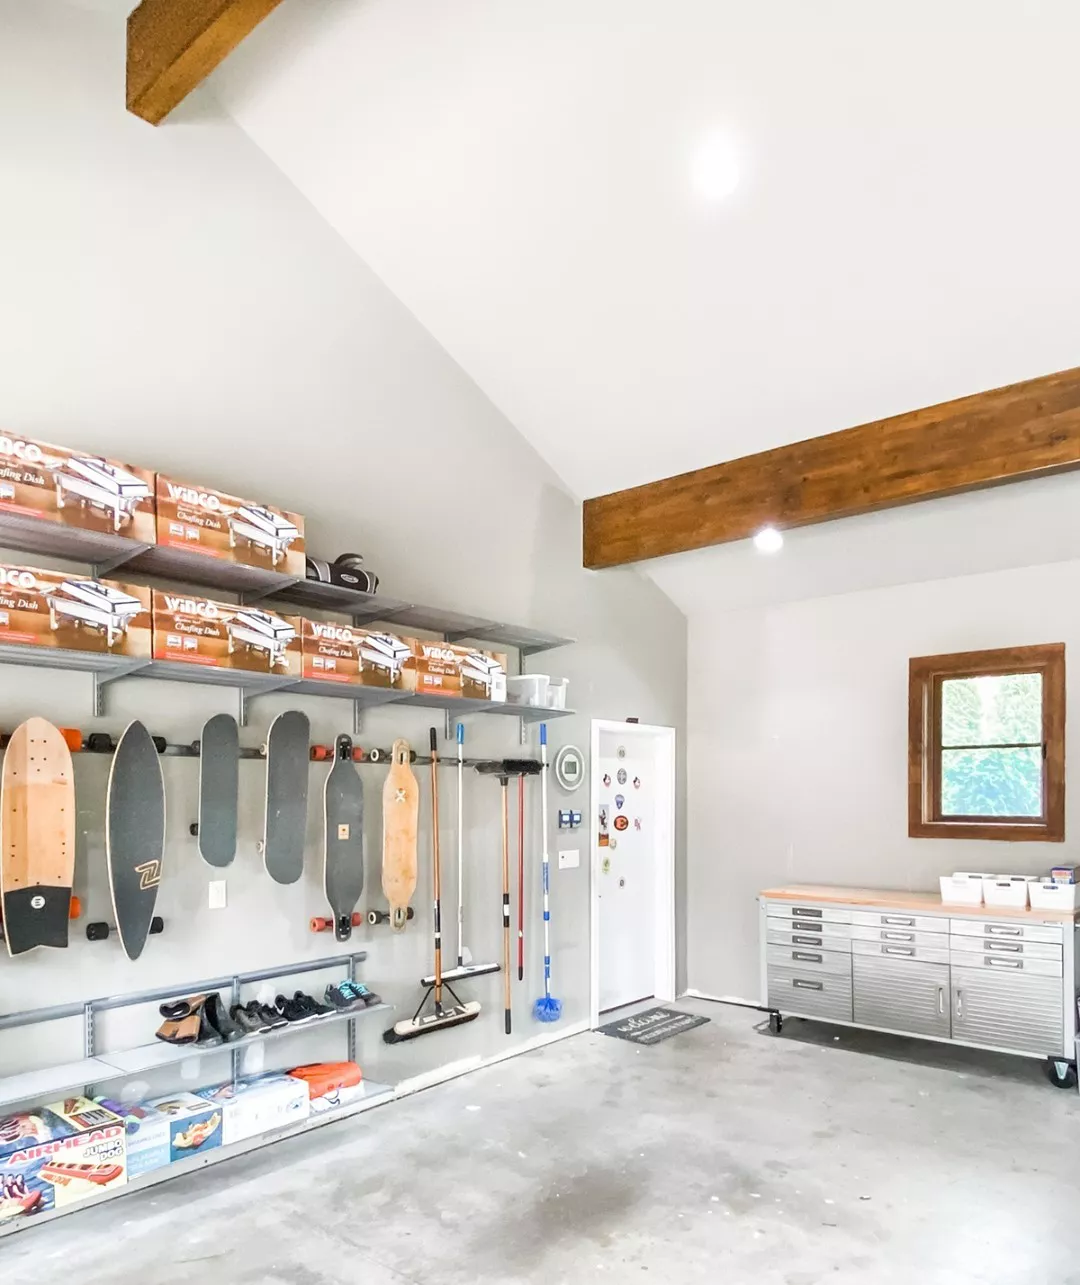
Who says the garage has to be a dungeon? This ultra-clean wall-mounted system features slim metal shelves for shoes right next to a custom rack for skateboards and longboards.
It works visually because it keeps everything off the floor, making the whole garage feel twice as big and much easier to sweep. The energy here is very active and “on the go,” perfect for a family that spends a lot of time outdoors.
I think the key to this look is the consistent grey and silver tones that keep it looking professional and organized. It’s the perfect project for a Saturday morning when you finally want to tackle that garage clutter.
Tucked Away Basket Storage
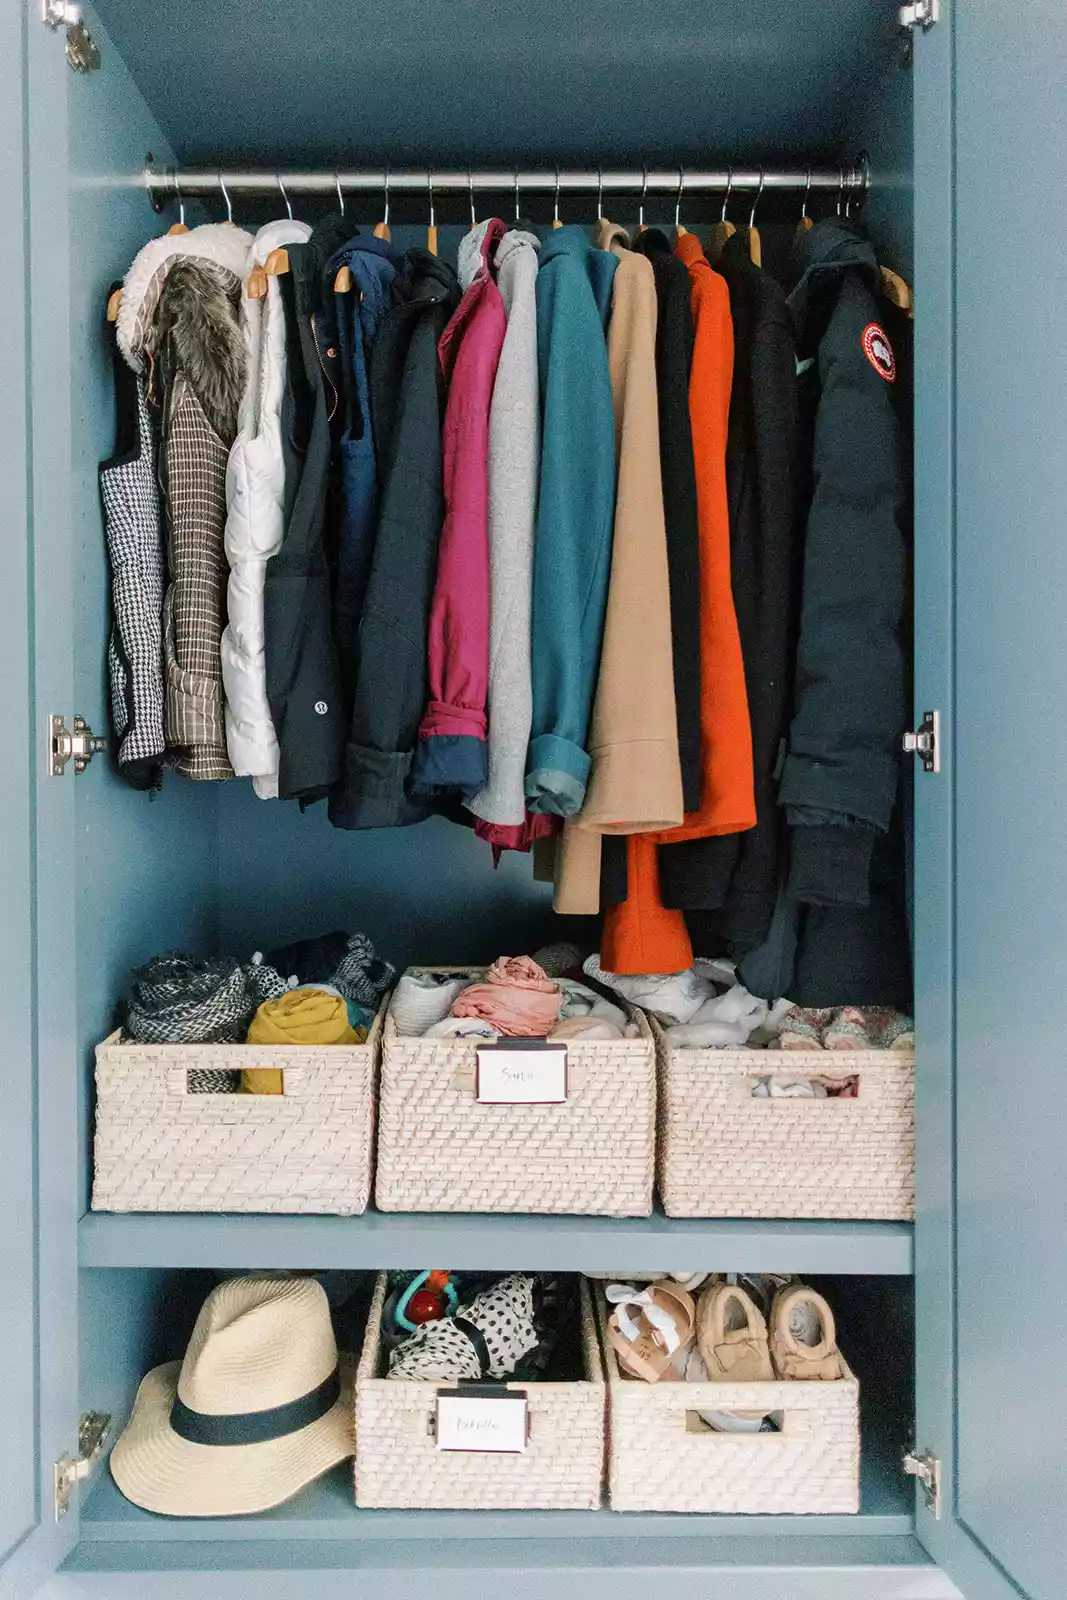
If you hate seeing shoes out in the open, this “hidden in plain sight” method is definitely for you. Woven wicker baskets are used on the bottom shelves of a gorgeous teal-blue cabinet to hide away hats, scarves, and little shoes.
The contrast between the earthy baskets and the bold, moody blue paint is such a vibe. This setup creates a feeling of calm and order because the visual “noise” of the items is tucked away inside the texture of the wicker.
It’s a great way to repurpose an old wardrobe or armoire into a dedicated hallway storage piece. Use little chalkboard tags on the baskets so the kids actually know where their sandals belong.
Personalized Photo Box Labels
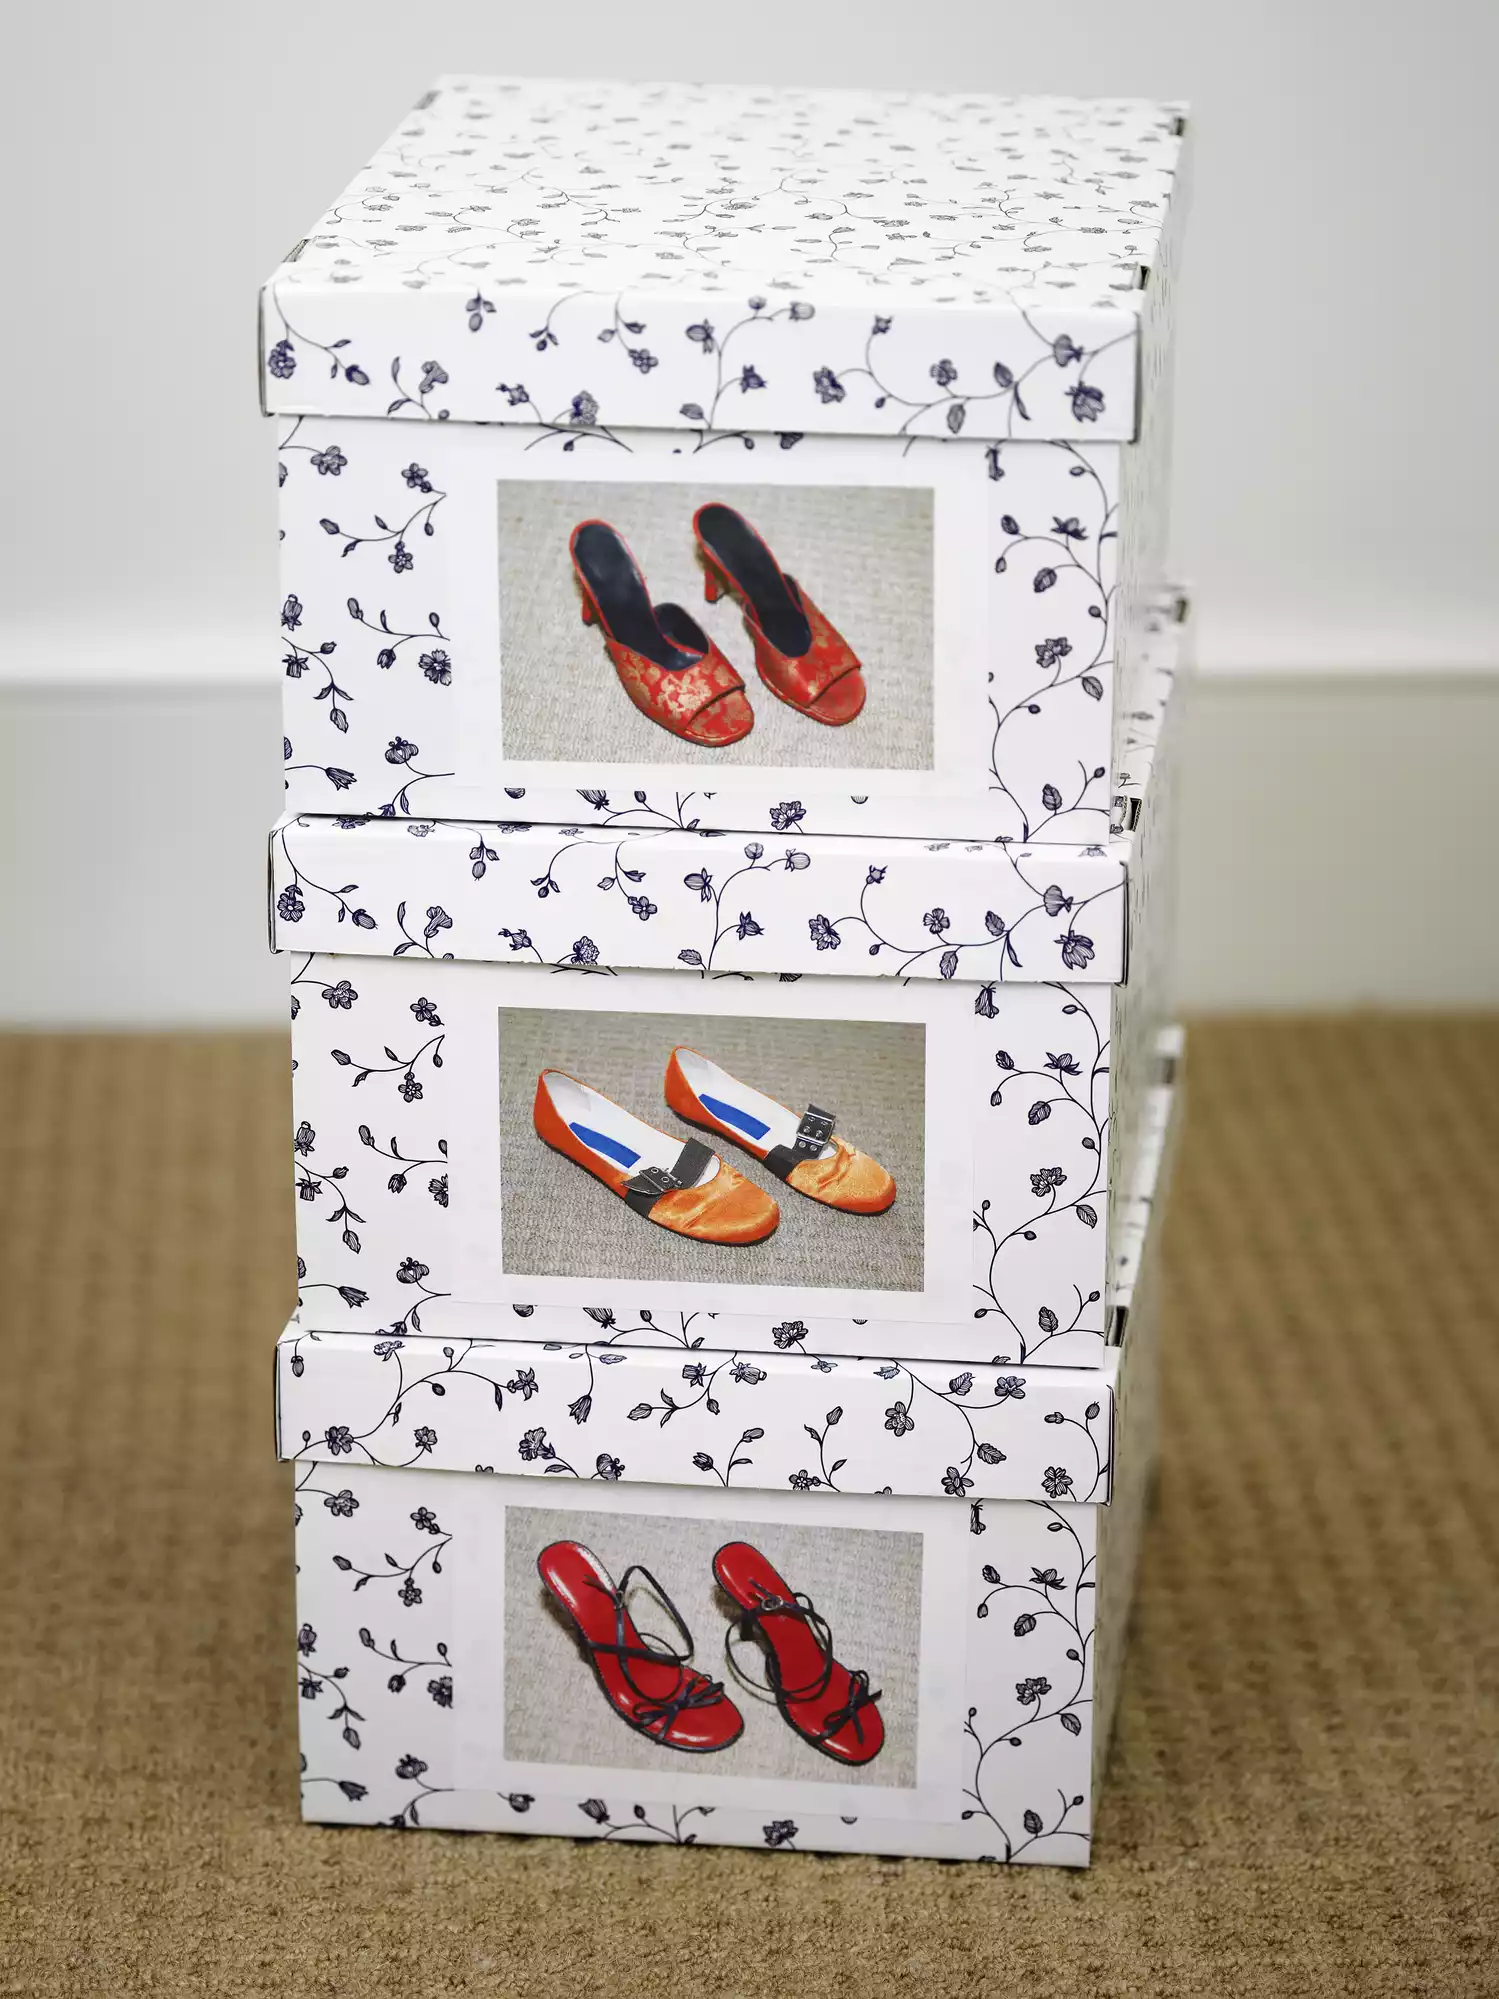
I didn’t expect to love this so much, but putting actual photos of the shoes on the front of the boxes is a total game changer. These patterned boxes keep the shoes protected from dust while looking uniform and pretty stacked on a shelf.
It eliminates that annoying “open every box” hunt when you’re looking for those specific red heels. This feels very high-end and curated, like a celebrity’s dressing room. It’s a dreamy solution for someone with a large collection of special occasion shoes that they don’t wear every day.
I’d pair this with a simple polaroid camera or just print out small 2×3 photos from your phone to stick on the front.
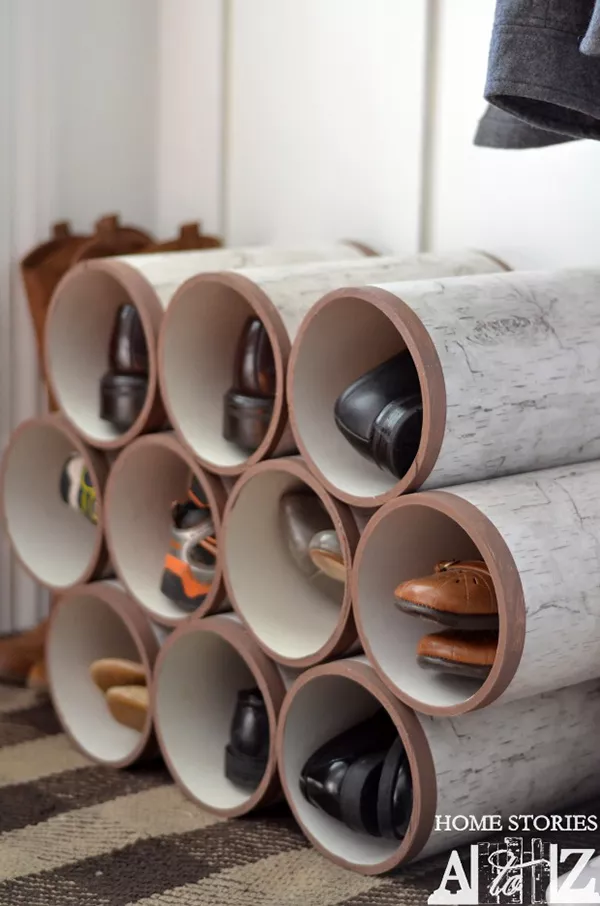
Recycled Bottle Shoe Slots
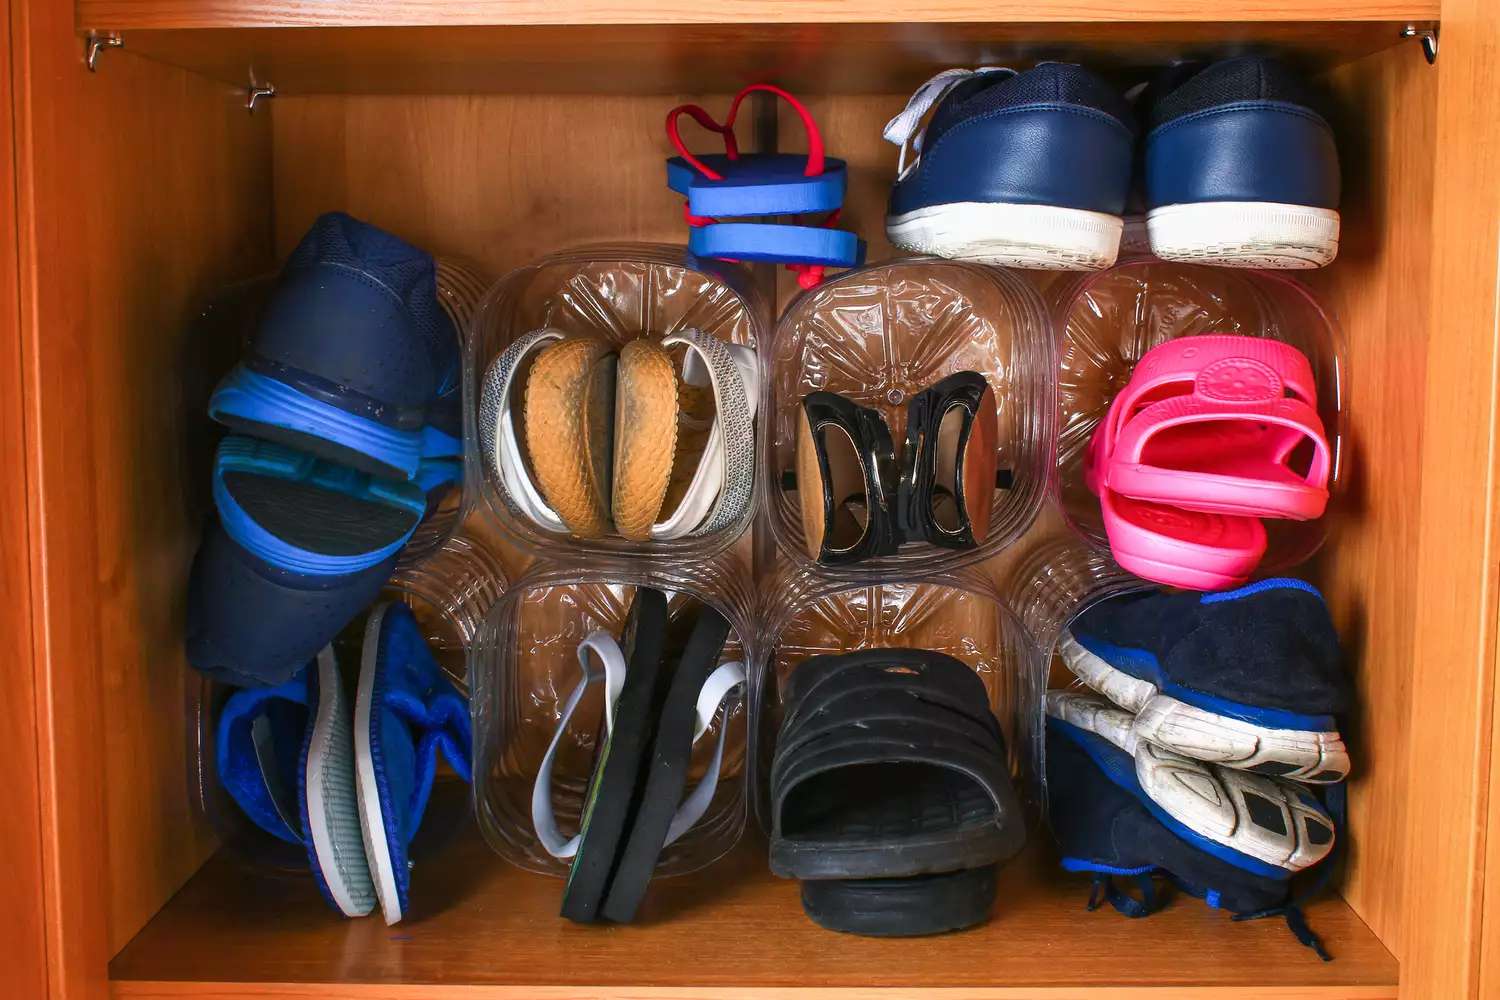
Talk about a clever upcycling win! This person used large clear plastic bottles, cut off the tops, and turned them into individual slots for sandals and flats inside a cabinet.
It is a brilliant way to prevent your flip-flops from becoming one giant, tangled mess at the bottom of a shelf. Visually, it’s very satisfying to see each pair in its own little transparent “garage.” This feels very resourceful and quirky, perfect for a dorm room or a tiny apartment where every inch counts.
It’s a fun way to feel good about your footprint while also keeping your shoes from getting scuffed up.
Industrial Pipe and Wood Bench
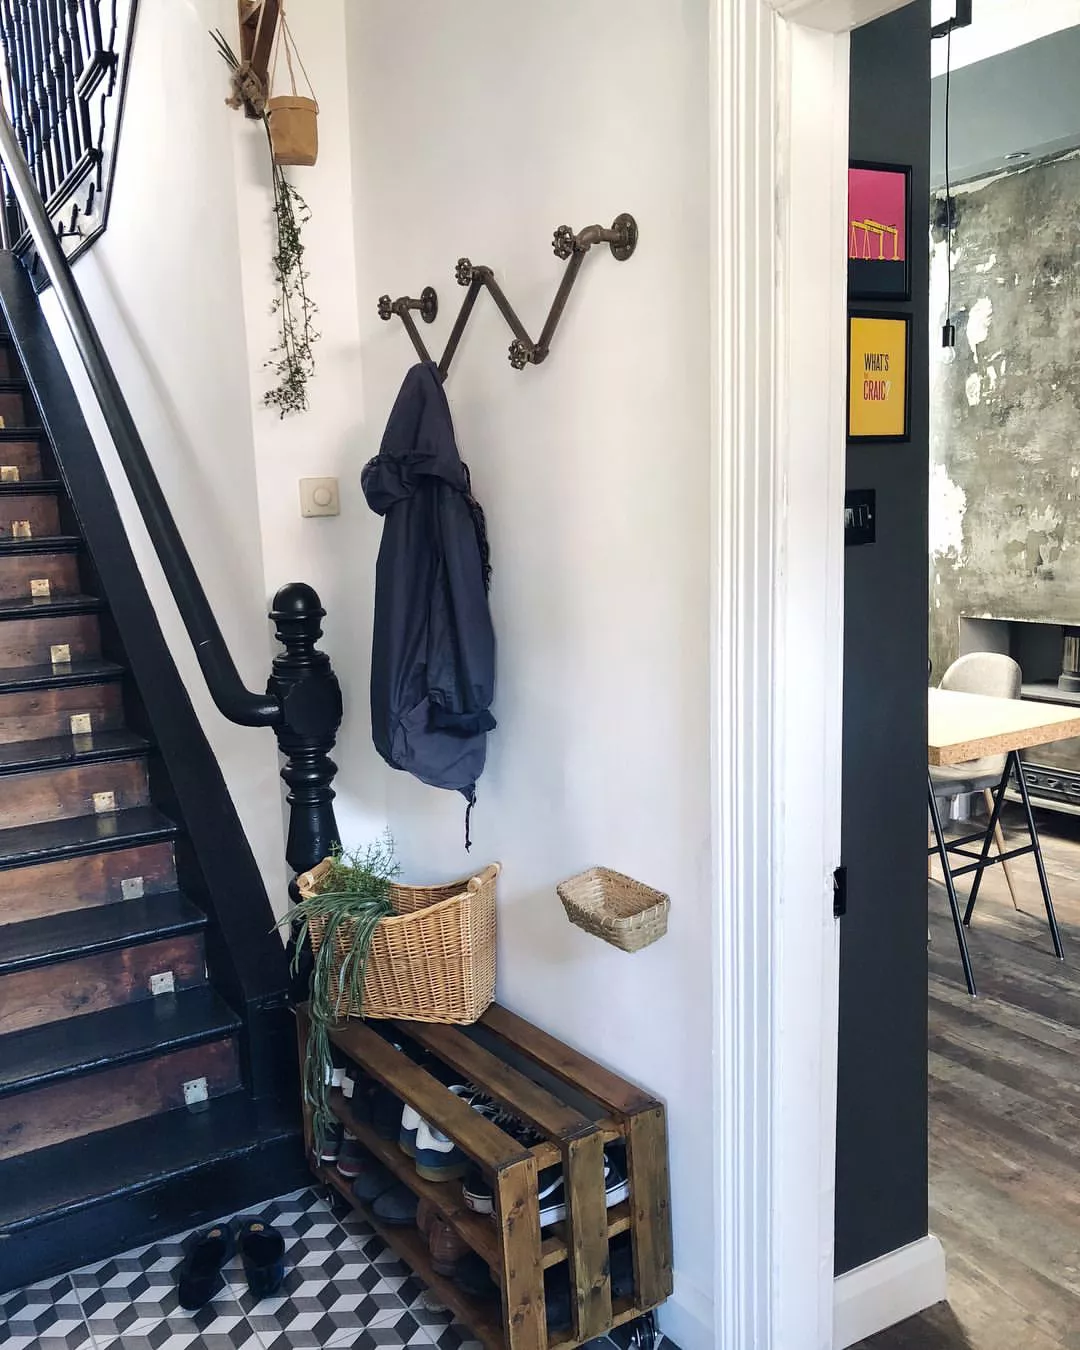
You have to try this if you love that edgy, industrial loft aesthetic. This entryway features a custom shoe rack made of thick wood slats and casters, tucked right under a unique zig-zagging coat rack made of black iron pipes.
The wheels on the bottom are so smart for when you need to clean the floor or move the rack closer to the door. This design feels very bold and masculine but is softened by the patterned floor tiles and the little hanging plant.
It creates a “cool kid” entryway that feels lived-in and super functional. I love the idea of using the top of the rack for a big basket of greenery to liven up the space.
Minimalist Porch Ladder
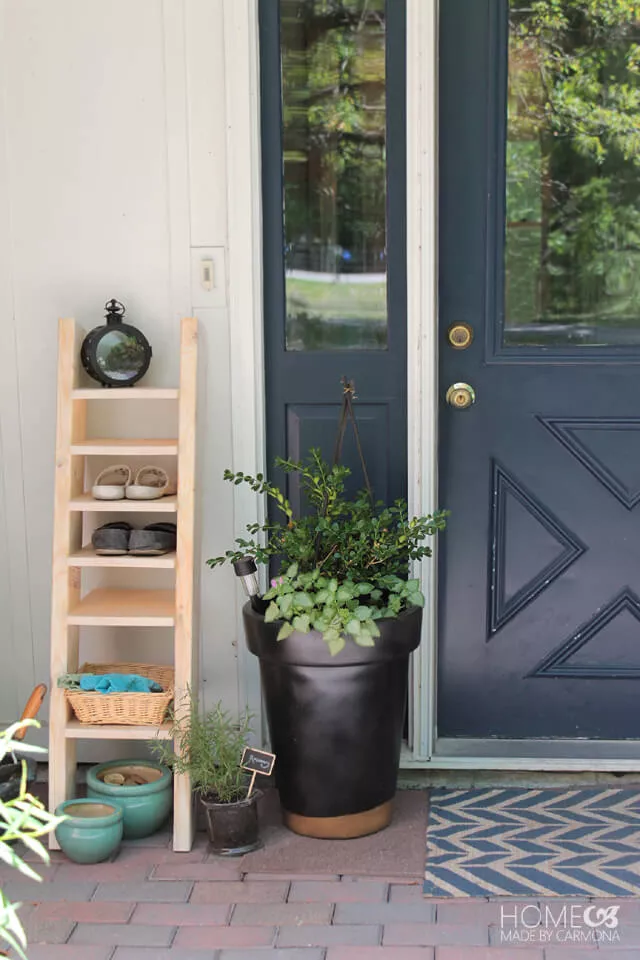
For the shoes that never quite make it inside, this slim wooden ladder-style rack on the porch is a total lifesaver. It takes up almost no floor space and provides a dedicated spot for garden clogs and muddy flats right by the blue front door.
The light, natural wood looks so fresh and clean against the siding. This vibe is very “summer cottage” and welcoming, keeping the dirt outside where it belongs. It’s such a simple, low-effort way to add a bit of character to your front entrance.
I’d suggest giving it a quick coat of outdoor sealant so it stays looking pretty through the rain and snow.
The Dreamy Floor-to-Ceiling Wall
Can we just take a second for this incredible built-in shoe wall? These long, floating white shelves turn a hallway into a high-fashion display for colorful heels and designer clutches.
By spacing the shelves out, there is plenty of room for tall boots at the bottom and smaller flats at eye level. It feels very sophisticated and chic, like you’re shopping in your own home every morning. The lighting is key here—it makes every pair pop and feel special.
If you have a narrow hallway that feels “dead,” this is a brilliant way to bring it to life and solve your storage problems at the same time.
Chic Floating Cubby Slots
I’m lowkey obsessed with how these individual wooden cubbies make every pair of shoes look like a piece of curated art. Instead of one big clunky unit, these floating slots are staggered across the wall, giving the whole room a light, airy feel that doesn’t overwhelm the floor space. It works visually because the natural wood tone adds warmth to the crisp white walls while keeping the pairs perfectly separated.
The energy here is super intentional and calm, almost like walking into a high-end designer boutique every time you get dressed. It turns your daily sneakers into a gorgeous display rather than a mess to be hidden. Try mounting these at different heights to accommodate everything from low-profile flats to those taller statement sneakers you love.
The Minimalist Wire Grid
Have you ever considered using a simple industrial wire grid to hang your heels? It’s such a clever, unexpected way to utilize vertical wall space, especially in a tight bedroom or a walk-in closet. The thin metal lines create a modern, edgy vibe that feels incredibly fresh and effortlessly cool.
This design works because it lets the shoes themselves provide the color and texture against a neutral background. It feels very “creative studio” and organized in a way that’s totally unique. I’d pair this with some rose gold or matte black S-hooks if you want to hang a few matching evening bags right next to your favorite pumps.
Reimagined Crown Molding Ledges
I didn’t expect to love this so much, but using strips of crown molding as shoe ledges is a total stroke of genius for heel lovers. The “lip” of the molding perfectly catches the heel of the shoe, allowing them to hang securely against the wall in neat, elegant rows. Visually, it’s stunning because it uses architectural details to create a very sophisticated, feminine storage solution.
The mood is totally “dream closet” vibes, making your footwear collection feel like a beautiful wall installation. It’s the perfect project for a lazy Sunday when you want to add some character to a bare wall without spending a fortune.
Dark and Moody Built-ins
If you’re craving something a bit more dramatic, these deep charcoal built-in shelves are exactly what you need. By painting the shelving the same dark hue as the walls, the shoes—especially the lighter sneakers and colorful boots—really pop and become the star of the show. This works because it creates a seamless, high-end look that feels very custom and expensive.
The energy is bold and moody, perfect for a modern bedroom or a dedicated dressing area. It makes even your oldest gym shoes look a little more sophisticated when they’re sitting on such a stylish shelf. You have to try adding some puck lights to the top of each shelf to really lean into that luxury showroom aesthetic.
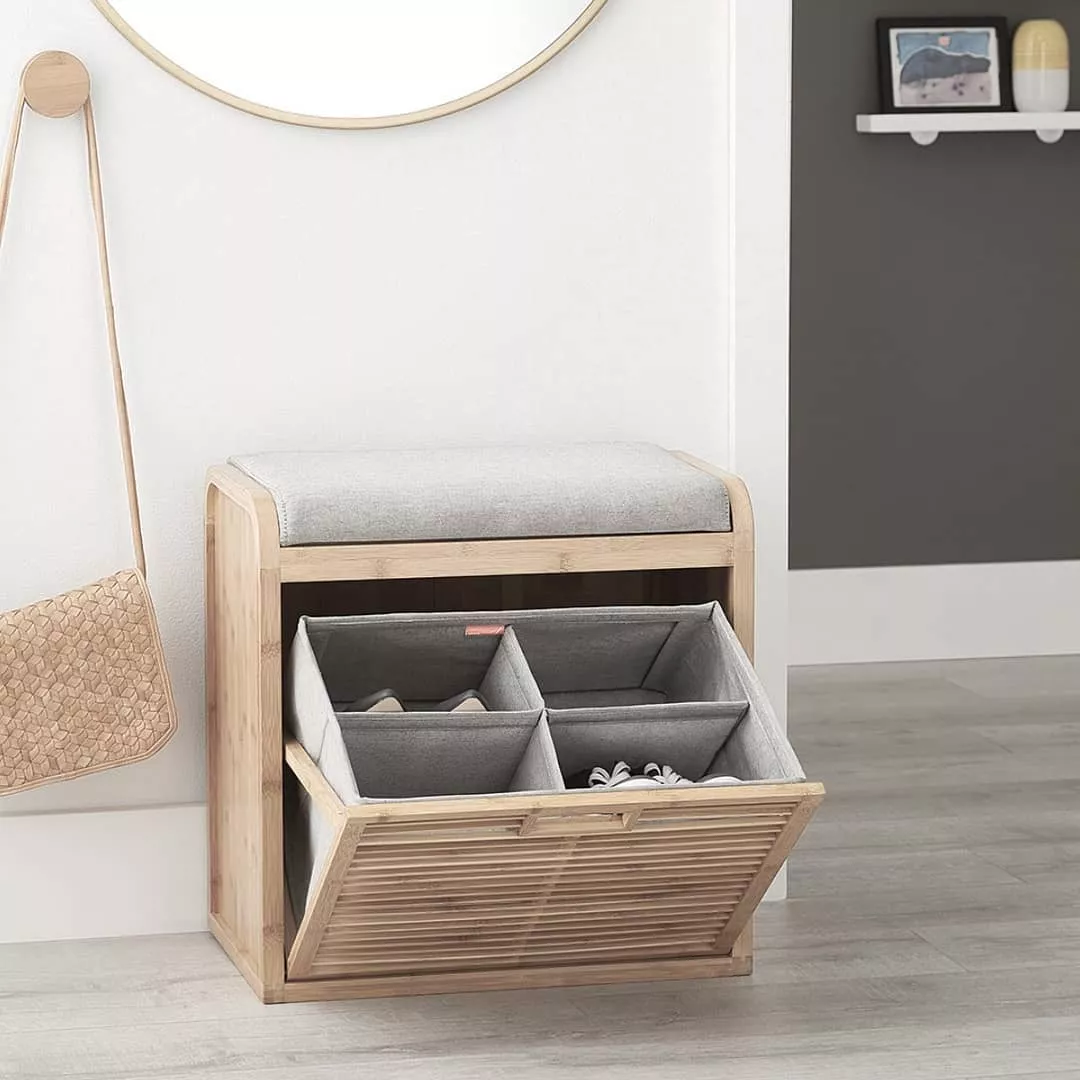
Hidden Bench with a Twist
You know those benches that look pretty but aren’t actually useful? This isn’t one of them! It’s a gorgeous wooden entryway bench with a hidden flip-top that reveals deep storage for all those bulky winter boots that usually clutter the rug. I love how the clean lines of the closed bench keep the entryway looking minimalist and tidy.
This setup creates such a welcoming, lived-in feeling while secretly being a workhorse for organization. It’s a total lifesaver for small homes where you need every piece of furniture to do double duty. I’d throw a couple of textured linen pillows on top to make it the perfect spot to sit while you lace up your shoes.
Copper Pipe Industrial Rack
I’m genuinely impressed by this DIY rack made entirely from copper piping and simple wooden planks. The metallic glow of the copper adds a touch of “industrial glam” that feels warm and modern at the same time. It works visually because the open structure doesn’t block light, making a small hallway feel much more open than a solid cabinet would.
The mood is very “urban loft” and creative, signaling that the person living here has a great eye for detail. It’s such a fun way to bring a little shine into a functional space like a mudroom. If you decide to build this, let the copper age naturally for a beautiful vintage patina over time.
Corner Carousel Magic
Why struggle to reach the back of a closet when you can just spin your shoes into view? This rotating corner carousel is the ultimate space-saver for those awkward “dead zones” in a walk-in closet. It’s incredibly satisfying to watch your collection glide by with just a little nudge.
The design is brilliant because it maximizes every single inch of a corner that would otherwise be wasted. It feels very tech-forward and efficient, taking the frustration out of your morning routine. I’d suggest organizing your shoes by color on the different tiers to make the spinning effect even more visually pleasing.
Pegboard Personalization
I am such a fan of using oversized pegboards for home organization, and using them for shoes is a total win. You can move the pegs around whenever you get a new pair, making it a completely customizable system that grows with your collection. Visually, the grid pattern is super clean and adds a bit of a “sporty” vibe to the room.
The energy here is playful and flexible, perfect for a kid’s room or a home gym area. It makes tidying up feel like a bit of a game rather than a chore. Try painting the pegs a bright, fun color like neon yellow or soft mint to give the board an extra pop of personality.
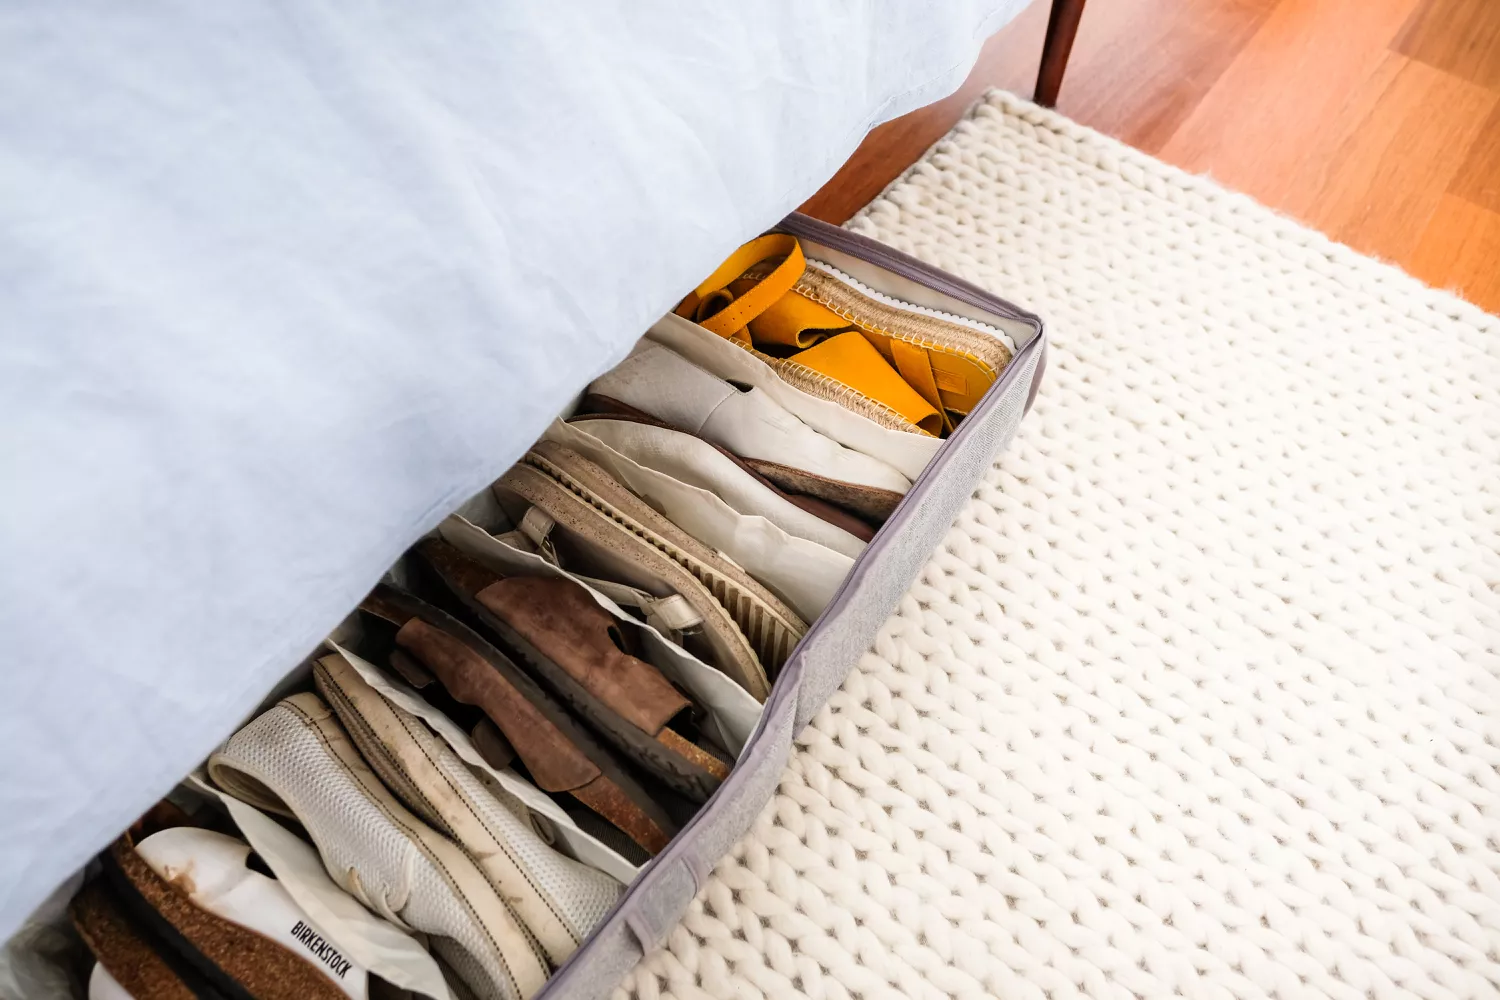
Under-the-Bed Rolling Drawers
For my fellow “small apartment” dwellers, these low-profile rolling drawers that slide right under the bed are a total necessity. They keep your out-of-season shoes out of sight but still easily accessible when the weather finally shifts. The drawers are usually made of light wood or clear plastic, so they don’t add any visual bulk to the room.
This creates a very peaceful, clutter-free bedroom environment where you aren’t tripping over heels in the middle of the night. It’s the ultimate “secret” storage hack that makes a tiny space feel way more manageable. Put your most-worn sneakers in the drawer closest to the edge of the bed for those mornings when you’re running a bit late.
Clear Acrylic Floating Shelves
If you want your shoes to literally look like they are floating on the wall, acrylic shelves are the way to go. These transparent ledges disappear against the wall, leaving only your favorite footwear on display. It works visually because it keeps the space feeling incredibly light and modern without any heavy furniture weighing it down.
The vibe is very “modern gallery” and clean, perfect for showing off limited-edition sneakers or those heels you bought just because they were pretty. It’s a chic way to turn a boring hallway into a conversation starter. I’d keep the styling minimal here—just one pair per shelf to let each design really breathe.
Vertical Skateboard and Shoe Fusion
Ever wonder how to handle a garage that’s overflowing with gear? This heavy-duty wall system uses vertical tracks to hang skateboards and longboards right alongside tiered metal shelving for athletic sneakers. It’s a brilliant way to turn a cluttered wall into a streamlined equipment station where everything has a specific hook or ledge.
The look is super industrial and organized, giving off major “professional workshop” energy. It makes the transition from coming home to heading back out for a ride feel so much smoother. If you’ve got a household full of skaters or runners, this setup is a total game-changer for keeping the floor clear.
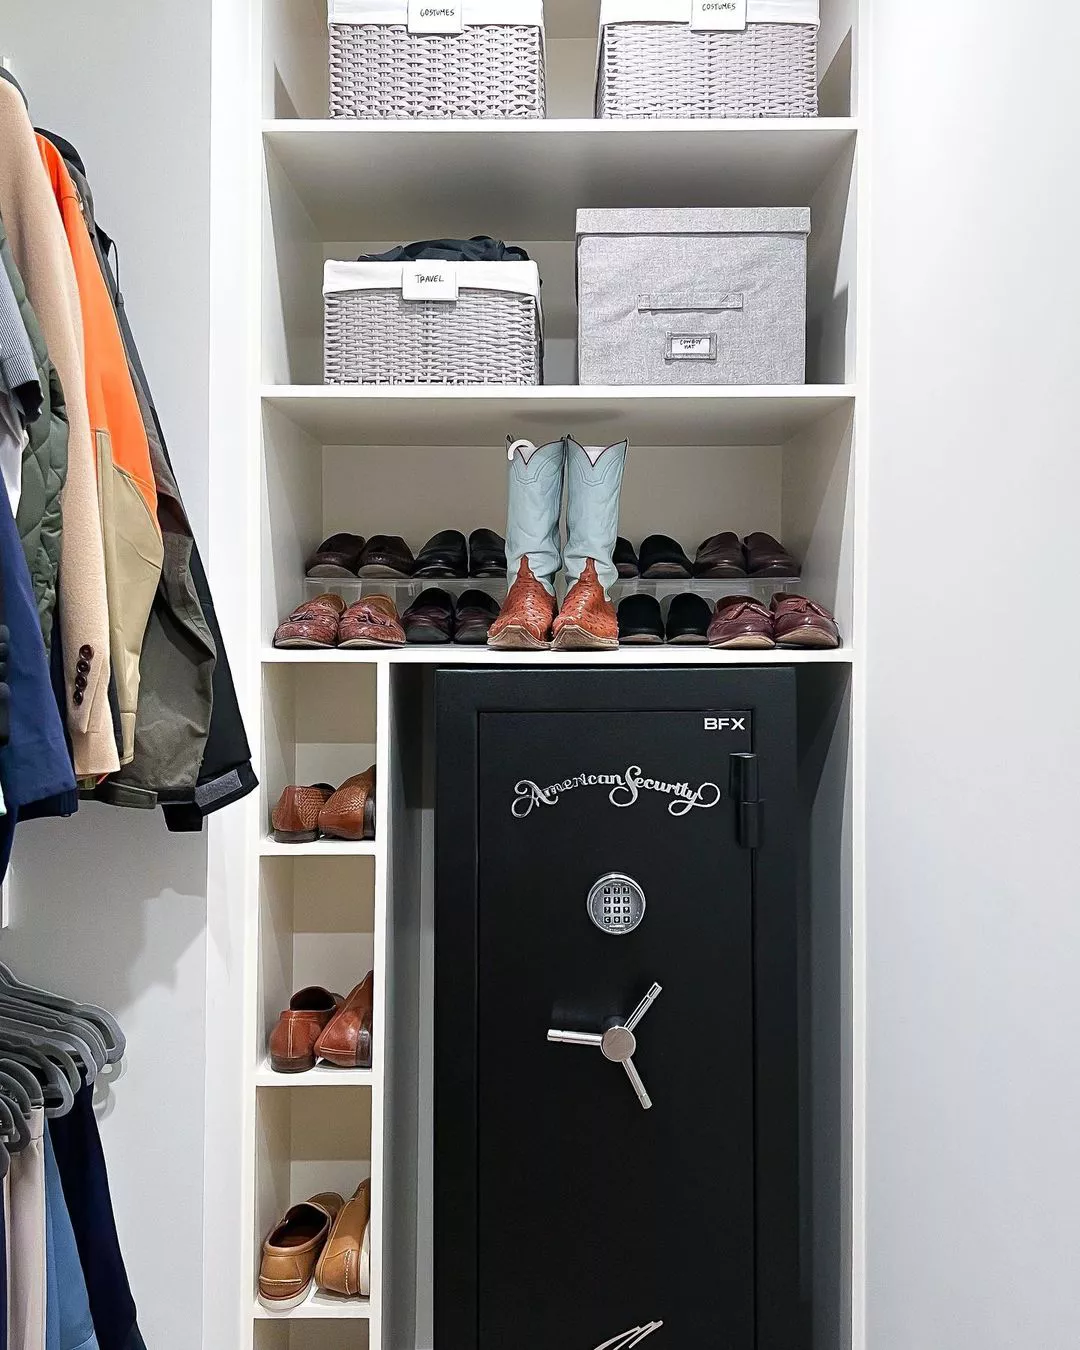
The Secret Closet Shelf
I’m obsessed with how this tiny nook was transformed into a hidden shoe sanctuary. By installing simple white shelves inside a recessed wall area, you get a clean, built-in look that hides your favorite pairs behind a door. It works so well because it utilizes that often-wasted “behind the door” space that most people just ignore.
The mood here is incredibly private and tidy, like a little hidden treasure chest for your footwear. It feels like a secret boutique hidden right in your bedroom. Try painting the back wall of the nook a fun accent color to make the shoes pop even more when you open the door.
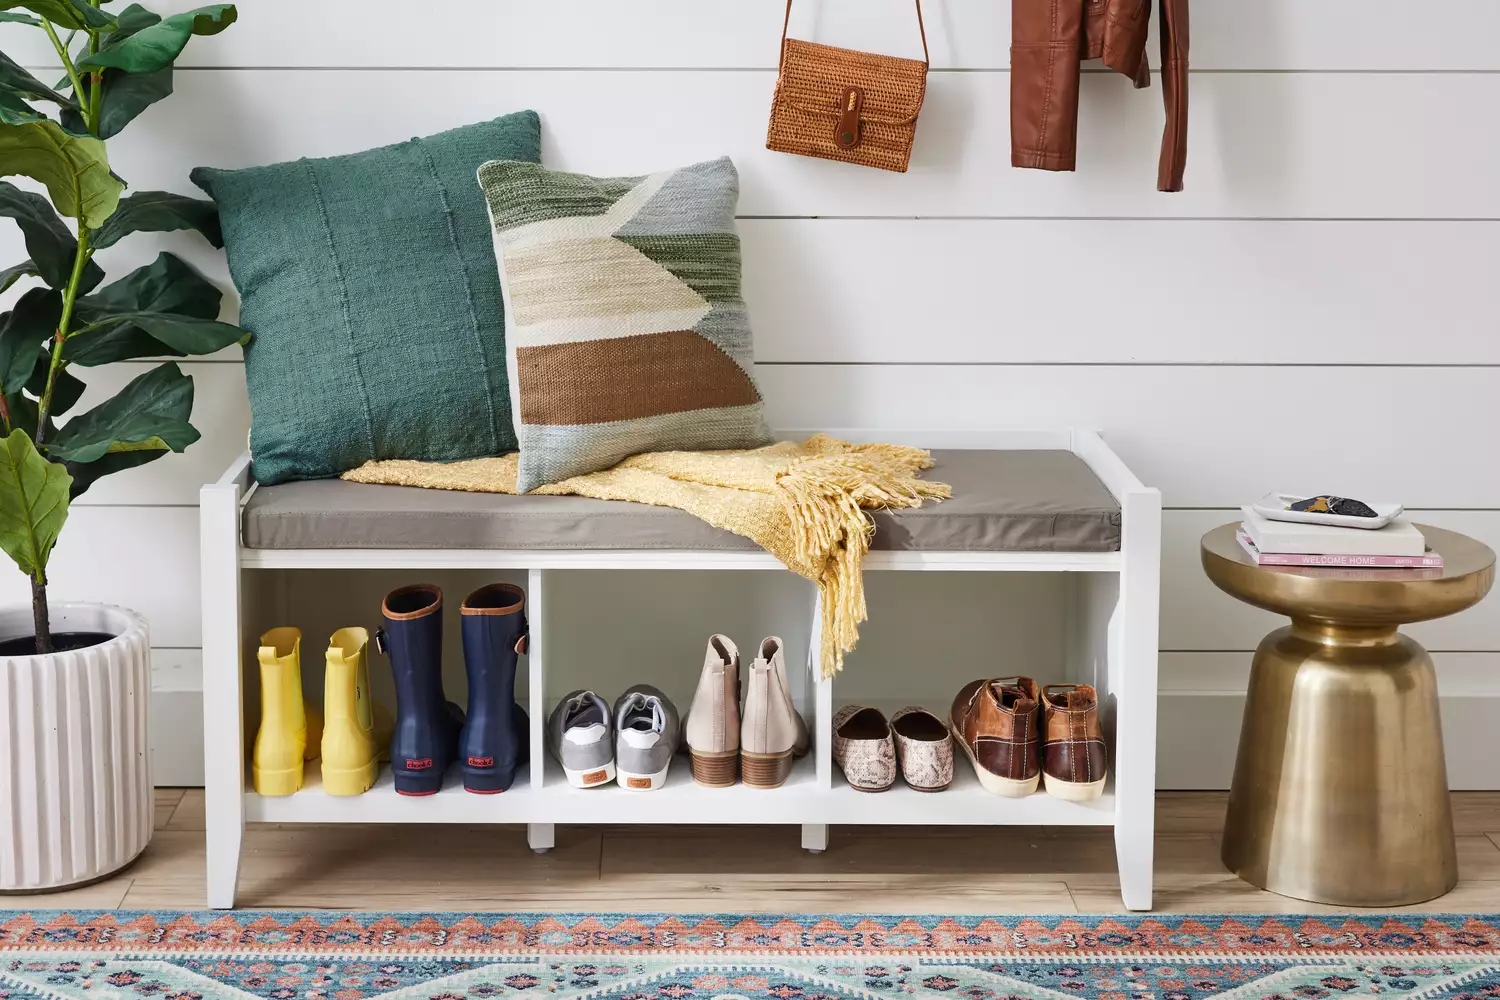
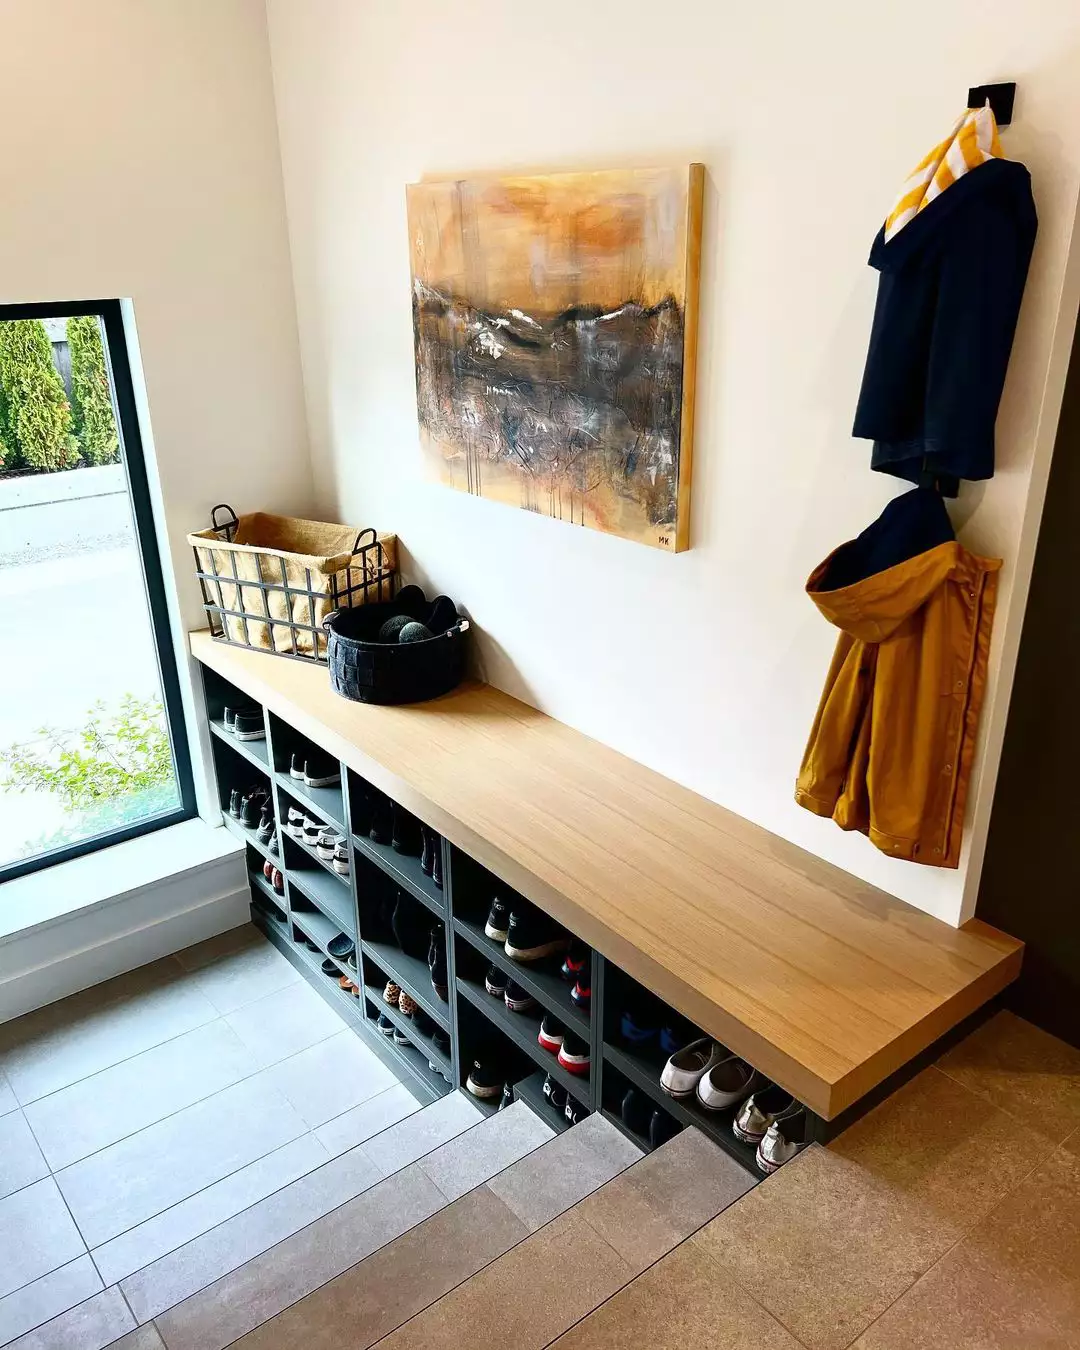
Multi-Functional Entryway Bench
This setup is the definition of “small but mighty” for an entryway. It features a sturdy wooden bench with open slats for shoe storage underneath, paired with a quirky, geometric metal coat rack above. The wood adds so much warmth and organic texture to the hallway, making it feel instantly more inviting.
I love how it feels very handcrafted and intentional, like something you’d find in a cozy modern apartment. It creates a grounded, settled energy right as you walk through the door. I’d suggest adding a small wicker basket on the end of the bench to catch loose umbrellas or shopping bags.
Outdoor Ladder Shelf
If you’re tired of the “no shoes in the house” rule resulting in a pile on the porch, you have to try this. A slim, light-wood ladder shelf leans against the exterior wall, providing a vertical home for garden clogs and sandals. It’s a very clever way to keep the porch looking decorated while being highly functional.
The vibe is very “summer garden” and breezy, blending perfectly with potted plants and outdoor decor. It feels like a thoughtful addition to the home’s exterior rather than just a storage fix. I’d keep a small brush on one of the lower rungs to knock the dirt off your soles before they even hit the shelf.
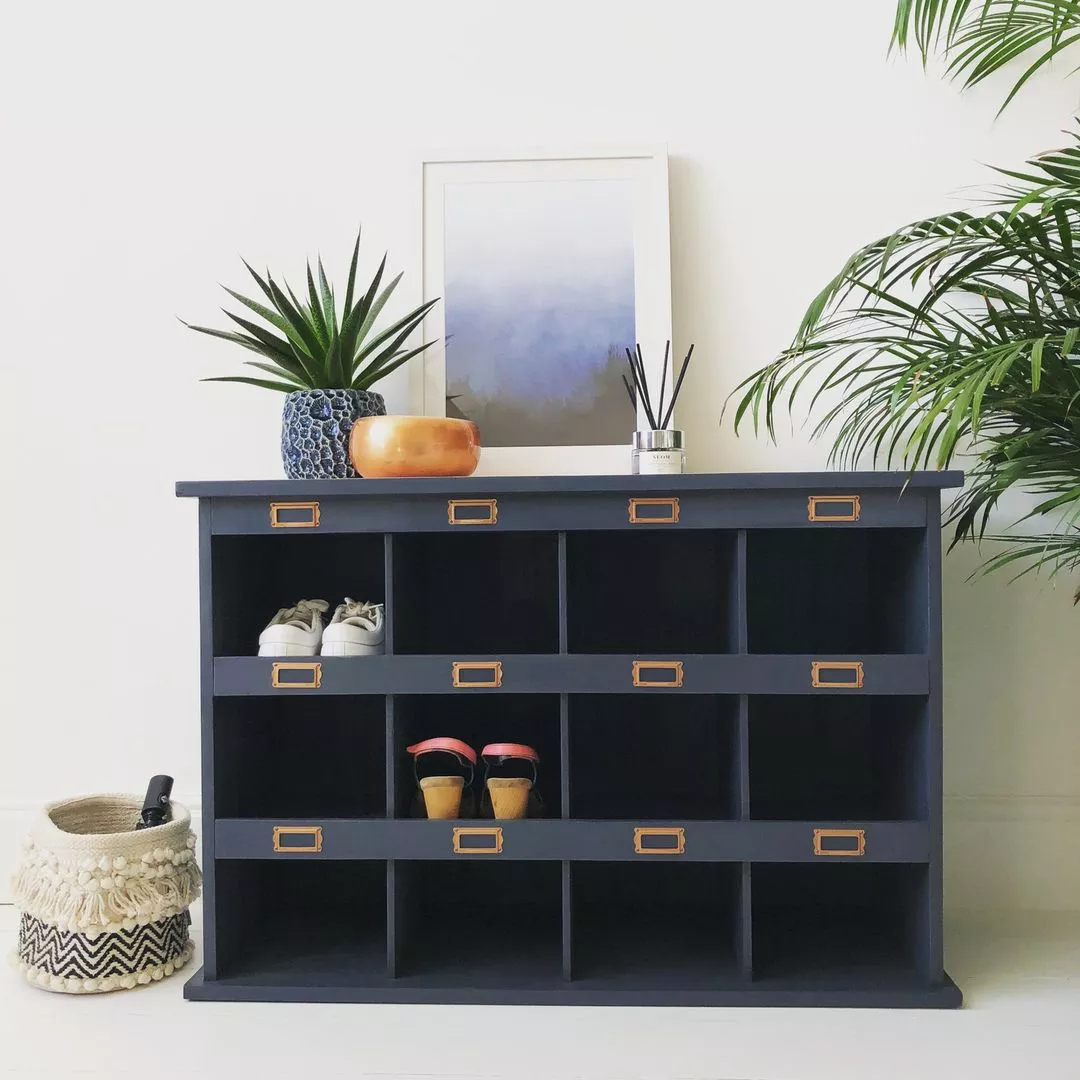
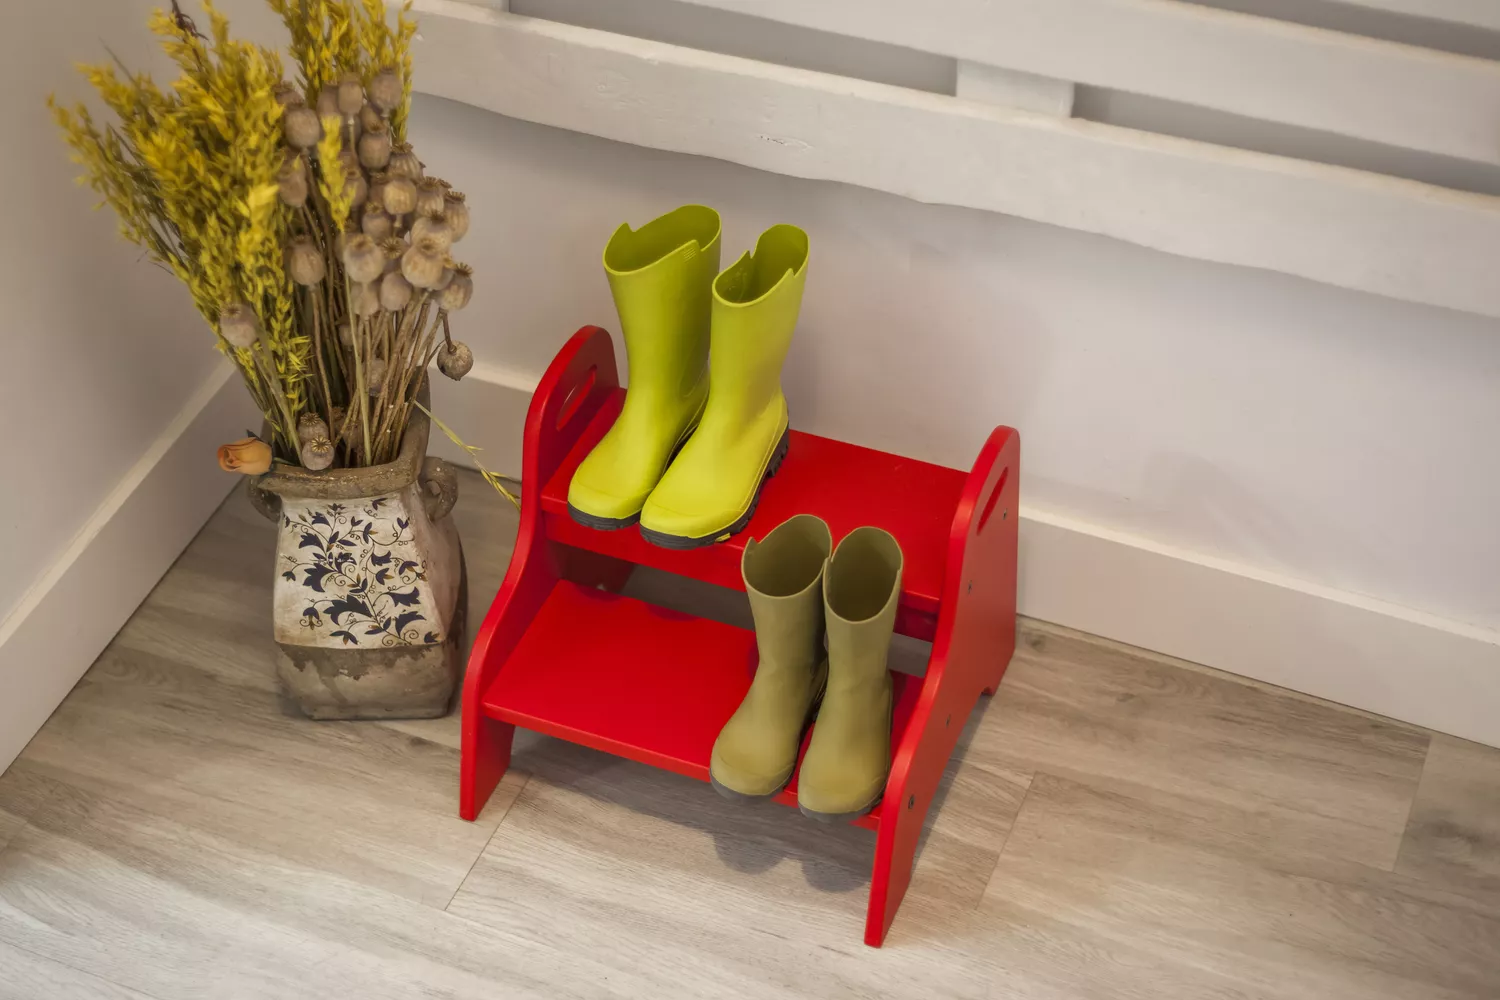
Tiered Utility Racking
Sometimes you just need a straightforward, high-capacity solution for a family mudroom. This tiered metal rack sits low to the ground, offering multiple levels for everyone’s daily sneakers and boots. It works because the open-wire design allows for plenty of airflow, which is a total must for active shoes.
The energy is very practical and no-nonsense, making it easy for kids to actually put their shoes away. It feels very reliable and sturdy, like it can handle the weight of heavy winter boots without flinching. To make it feel a bit more “homey,” try tucking it under a pretty console table or a row of wall hooks.
Bohemian Crate Stack
I didn’t expect to love this so much, but these rustic wooden crates stacked inside a black metal frame are a total aesthetic. The deep, warm wood tones look amazing against a white wall, and the open cubbies are perfect for oversized boots and bulky leather shoes. It’s a fantastic way to add some “industrial farmhouse” charm to your living space.
The mood is very relaxed and effortless, like you just threw it together but it somehow looks perfect. It turns your storage into a piece of furniture that actually contributes to the room’s style. I’d pair this with a snake plant on top to lean into those earthy, organic vibes.
High-Fashion Hallway Display
For the girl who treats her heels like diamonds, this floor-to-ceiling floating shelf wall is the ultimate dream. By using thin, white ledges that run the length of the wall, you can display dozens of pairs in a way that feels like a luxury showroom. It’s visually stunning because it uses the shoes themselves to create a colorful, textured pattern on the wall.
The energy is high-glam and sophisticated, making every morning feel like a special event. It’s the perfect solution for a long, narrow hallway that usually feels a bit boring or cramped. I’m honestly tempted to clear out my whole closet just to recreate this look and finally see all my shoes at once.
Frequently Asked Questions
How do I stop my shoe rack from smelling?
I always suggest placing a few cedar blocks or small sachets of dried lavender on the shelves. For those extra “loved” sneakers, a little sprinkle of baking soda inside the shoe overnight works wonders. Also, open-air racks (like the wire or slat styles) are great because they let everything breathe!
What is the best way to store tall boots without them creasing?
The struggle is real! I’ve found that using “boot trees” or even just rolled-up old magazines inside the shafts keeps them standing tall and prevents those annoying folds at the ankle.
Is it better to keep shoes in their original boxes?
It’s great for protection, but terrible for finding what you need! If you love the box life, try the photo-labeling trick we mentioned earlier. It keeps the dust off while saving you from a 10-minute search for that one specific pair of flats.
I honestly can’t wait for you to try out some of these ideas in your own home. There is something so satisfying about finally giving your favorite shoes a proper place to live. It’s such a simple way to bring a little more peace and style into your daily routine. Happy decorating, and remember to keep it fun!

Ethan Walker is the founder and editor of HandyCraftsHub. He oversees the editorial direction of the site and contributes in-depth home decor and DIY guides focused on practical, real-world application.
With experience in hands-on home projects and everyday design decisions, Ethan emphasizes livable spaces over short-term trends. His work prioritizes clarity, functionality, and long-term value, helping readers make informed choices with confidence.
As editor, Ethan reviews published content to ensure it meets HandyCraftsHub’s standards for accuracy, usefulness, and practicality.