Scrap wood has a way of piling up before you realize how much you’ve saved.
Leftover boards from old projects, fence repairs, or furniture builds often end up stacked in a corner with good intentions but no clear plan. The pieces may be mismatched in size, slightly worn, or irregularly shaped, which makes them harder to repurpose at first glance. Without direction, scrap wood can quickly turn into clutter instead of opportunity.
With a little creativity, those extra pieces can become functional and decorative additions to your home. Small shelves, wall art, organizers, plant stands, and simple furniture accents are all possible with minimal cutting and assembly. Sanding, staining, or painting can unify different wood tones and give the finished project a cohesive look.
There are many approaches depending on your skill level, from beginner-friendly builds that require only basic tools to more detailed designs that highlight craftsmanship. The key is working with the shapes and sizes you already have rather than forcing a complex plan.
If you’ve been holding onto leftover lumber and wondering what to do with it, these ideas will help you turn scrap wood into something useful and thoughtfully made.
Best Scrap Wood Project Ideas
In this guide, we’re going to walk you through 21 amazing scrap wood ideas that will spark your creativity and transform those leftover pieces into beautiful, practical items for your home and garden.
From decorative accents to organizational solutions, there’s something for every skill level. So, grab your toolkit, and let’s get started!
1. Wooden Wall Art: Personalize Your Home with Rustic Charm
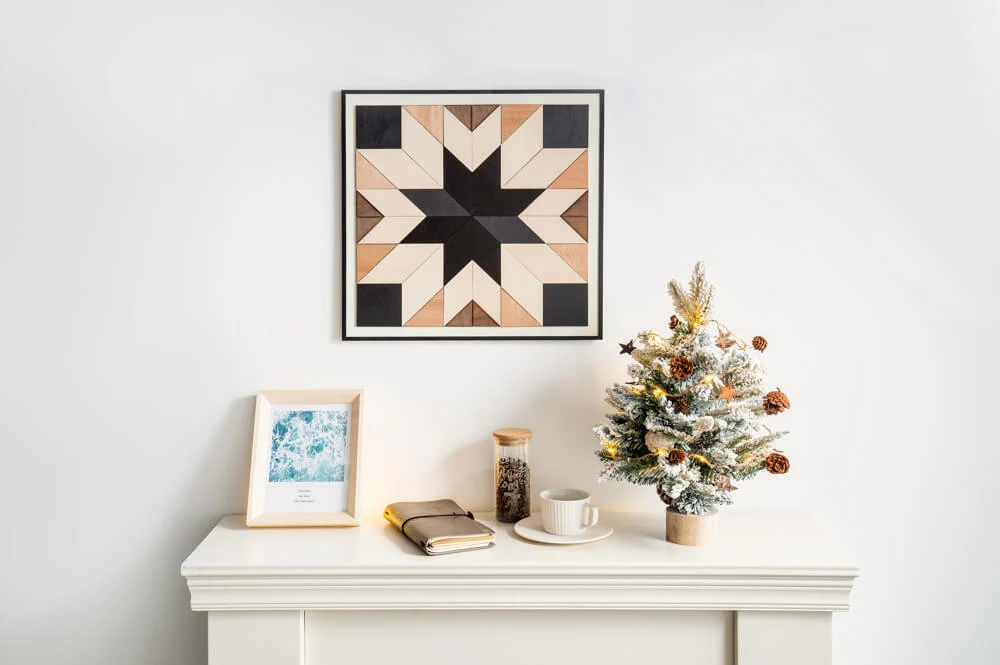
Wall art is one of the easiest ways to add personality to your home, and scrap wood offers a perfect medium for creating custom, rustic pieces. Whether you’re looking to add a simple geometric design or something more intricate, scrap wood can bring texture and warmth to your walls.
You can create a wooden wall art piece by arranging your scrap wood pieces in various shapes and sizes, mixing stained and raw pieces for contrast. You can even incorporate paint or wood burning to add details. For example, if you love nature, consider cutting your scrap wood into the shape of a tree or mountain range and adding your favorite quote in elegant lettering.
If you’re not comfortable with freehand designs, there are plenty of online templates available that you can print and trace onto your wood. The result? A one-of-a-kind wall hanging that reflects your unique style. And the best part is that you can mix and match various stains, paints, and finishes to suit your home decor. It’s an inexpensive way to personalize your space while utilizing scrap materials!
2. Scrap Wood Planter Boxes: Add Greenery to Your Space
Add some life to your home or garden with a DIY planter box made from scrap wood. Not only does it provide a stylish way to house your favorite plants, but it also adds a touch of rustic charm that perfectly complements outdoor and indoor spaces alike.
Building a planter box is simple. Cut your scrap wood to the desired length for the sides and bottom, then assemble them with nails or screws. If you’re feeling extra crafty, you can create multiple levels of stacked planters for a more dramatic effect. Staining or painting the wood can also make your planter box pop. For a more natural look, consider leaving the wood unfinished or using a light wood stain.
Planter boxes are perfect for anyone looking to add greenery to small spaces, such as balconies or even kitchen counters. They are a great way to grow herbs, succulents, or small flowers, and they provide the opportunity to get creative with design.
3. Wooden Coasters: A Fun and Functional Project
Protect your surfaces with a set of custom wooden coasters made from scrap wood. These coasters are an easy DIY project, even for beginners, and they make a wonderful addition to any home, especially if you’re hosting guests or just love to entertain.
To create your own, cut your scrap wood into square or circular shapes, and sand the edges to ensure they’re smooth. You can then personalize the coasters by painting them with your favorite colors or adding a decorative design. For a rustic touch, consider leaving the wood unfinished or applying a clear varnish to enhance its natural beauty.
Wood burning is another fun technique to try. You can use it to etch intricate designs, monograms, or even motivational quotes. It’s a great way to make these coasters truly one-of-a-kind. In addition to their aesthetic appeal, wooden coasters are also highly durable and make for excellent gifts for friends and family.
4. Picture Frames: Craft Beautiful, Custom Frames
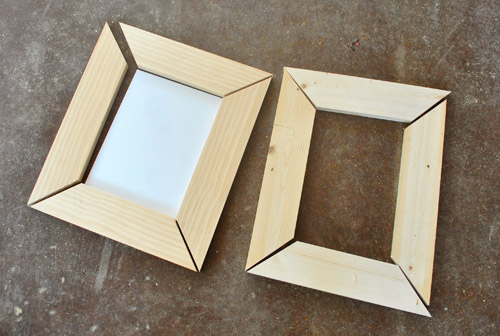
Instead of buying picture frames, why not make your own using scrap wood? This project is not only simple but also a fantastic way to give old photos and memories a special touch. You can customize the frames to match the colors of your room or the theme of the photos you’re framing.
Start by cutting the wood into strips that fit around the edges of your photo. You can either join the corners with miter cuts or create simple butt joints. For a personal touch, use wood stain or paint to finish the frame. You can also embellish the frame with decorations like twine, beads, or small wooden accents.
A fun twist on this idea is to create a multi-photo frame by combining several smaller frames into one larger piece, giving it a gallery wall feel. This is a perfect option for showcasing family photos or special occasions.
5. Wooden Shelves: Make Extra Storage with Style
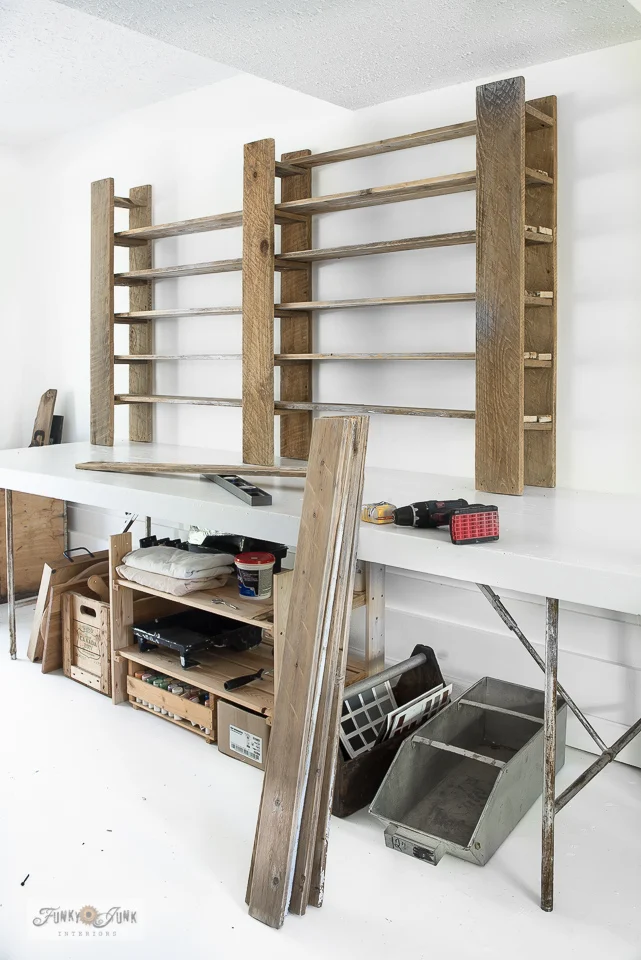
Wooden shelves are an essential organizational tool in any home, and scrap wood is a great material to create a custom storage solution that suits your needs. Whether you’re creating shelves for your living room, bathroom, or kitchen, scrap wood offers endless possibilities.
To make a simple shelf, cut your scrap wood to the desired length, then attach it to the wall using brackets or wall-mounted supports. You can add a personal touch by staining or painting the wood, or leave it in its natural state for a more rustic feel. If you’re looking to make floating shelves, consider installing brackets underneath the shelf to make it appear as though the wood is “floating” against the wall.
If you have multiple pieces of scrap wood, you can combine them to create tiered shelves, perfect for showcasing books, plants, or decor items. This is a great way to make the most out of small spaces.
6. Scrap Wood Jewelry Holder: Keep Your Pieces Organized
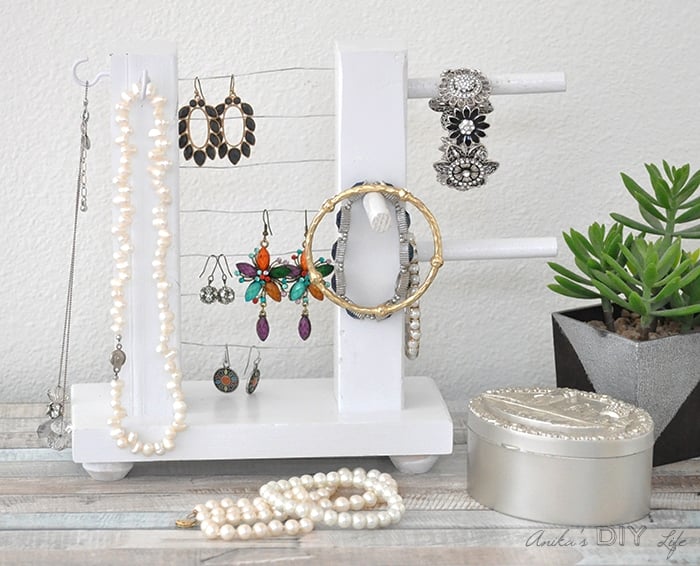
If you love jewelry but struggle with keeping it organized, a scrap wood jewelry holder can be a stylish and practical solution. You can make a simple holder by attaching hooks or small pegs to a scrap wood base. This allows you to hang necklaces, earrings, and bracelets in a way that is both functional and visually appealing.
For added flair, you can personalize the wood by staining or painting it. Adding small decorative elements like knobs, stencils, or even a mirrored backing can elevate the design. If you’re feeling creative, you could also build a small, multi-tiered display to hold rings or bracelets.
This project doesn’t just help with organization—it also makes a fantastic gift for friends and family who share your love of jewelry. Plus, you can customize it to suit anyone’s personal style!
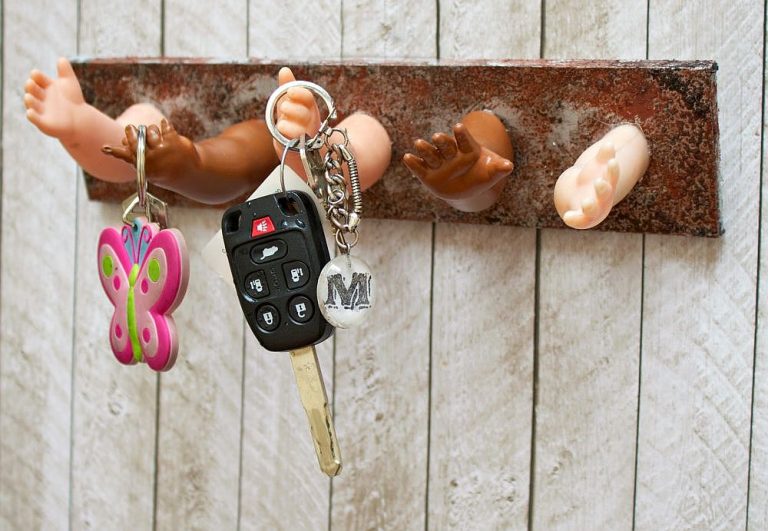
7. Wooden Key Hooks: Stay Organized with a Rustic Touch
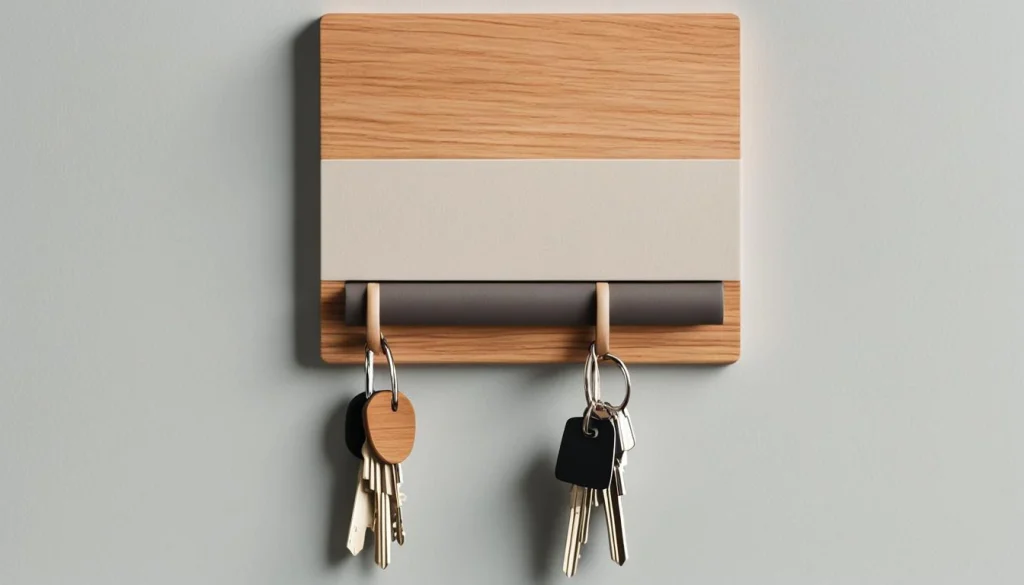
A key hook rack is an easy and practical way to stay organized while adding a rustic, personalized touch to your entryway. By turning scrap wood into a beautiful key holder, you can eliminate the clutter of misplaced keys while giving your home a unique, homemade accent.
To make your own, simply attach hooks or pegs to a scrap wood plank, ensuring they are spaced evenly apart for easy access. You can customize the wood by painting it, using wood stain for a more natural look, or even adding a fun design or quote with stencils or wood burning.
Consider creating a sign above the hooks with words like “Home Sweet Home” or “Keys” for a cute finishing touch. This project is quick, inexpensive, and highly customizable, making it a great choice for anyone looking to add functionality and style to their entryway.
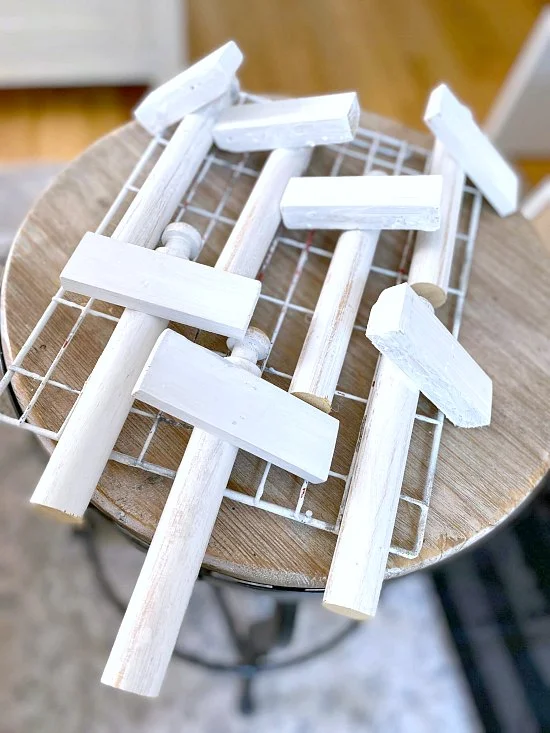
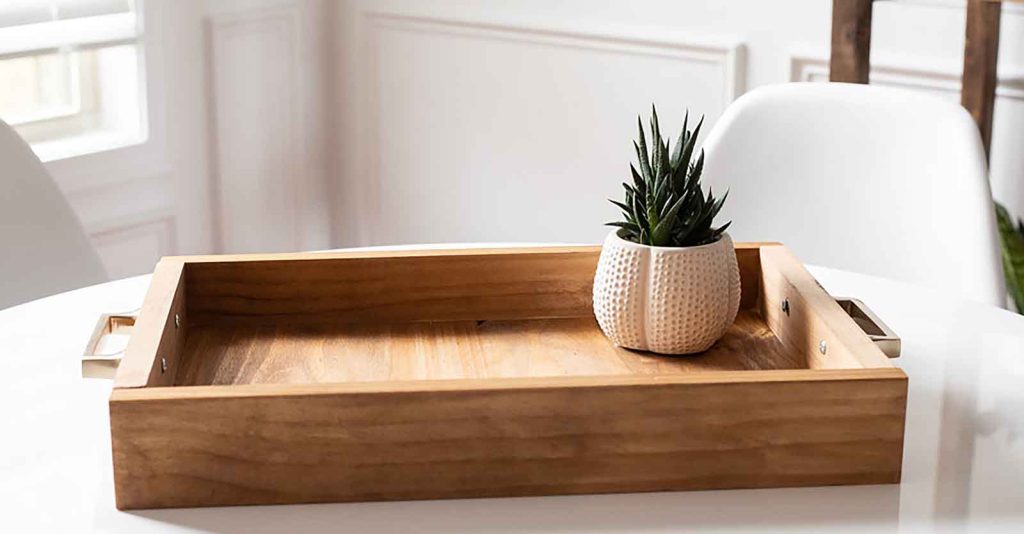
8. Wooden Serving Tray: Elevate Your Entertaining Game
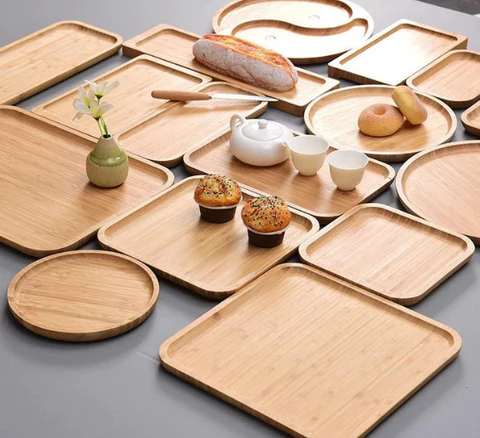
Wooden serving trays are both practical and stylish, making them a must-have for any home. Whether you’re serving drinks at a dinner party or bringing breakfast in bed, a scrap wood serving tray can add a touch of rustic charm to any occasion.
Start by cutting your scrap wood into the shape of a rectangle or square for the base, then add small wooden handles to each side. You can use wood glue and nails to secure the handles in place. To finish the tray, sand the edges smooth and apply a coat of wood stain or paint to match your decor.
Personalize your serving tray with wood-burning techniques or by stenciling a fun phrase, or simply leave it as-is for a clean, minimalist look. This project is simple to make, and the result is a beautiful piece that you’ll use time and time again.
9. Scrap Wood Garden Markers: Bring Order to Your Garden
For those who enjoy gardening, scrap wood garden markers are a great way to stay organized while adding a personalized touch to your garden. These markers help you easily identify what you’ve planted and provide a creative way to display your green thumb.
To make garden markers, cut your scrap wood into small, rectangular pieces and then write or stencil the name of the plant on each piece. You can leave the wood raw for a rustic feel or paint it with vibrant colors to make the labels stand out.
If you have a lot of plants to label, consider creating a themed set, like herbs, vegetables, or flowers. You can also make the markers weatherproof by sealing them with clear varnish to ensure they last through the seasons.
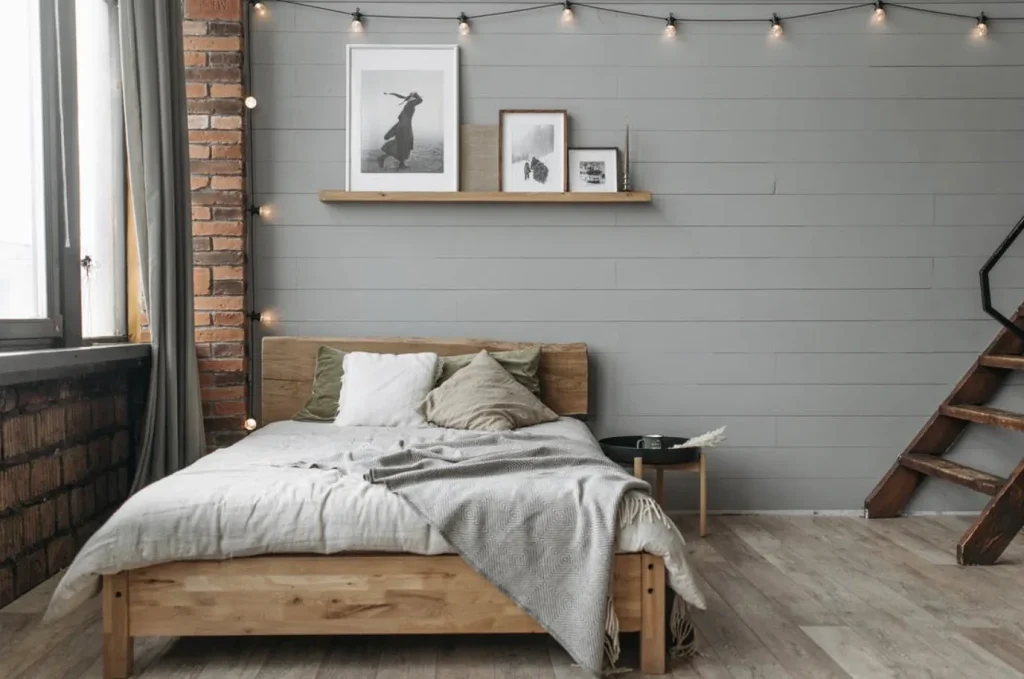
10. Picture Ledges: Display Your Favorite Memories
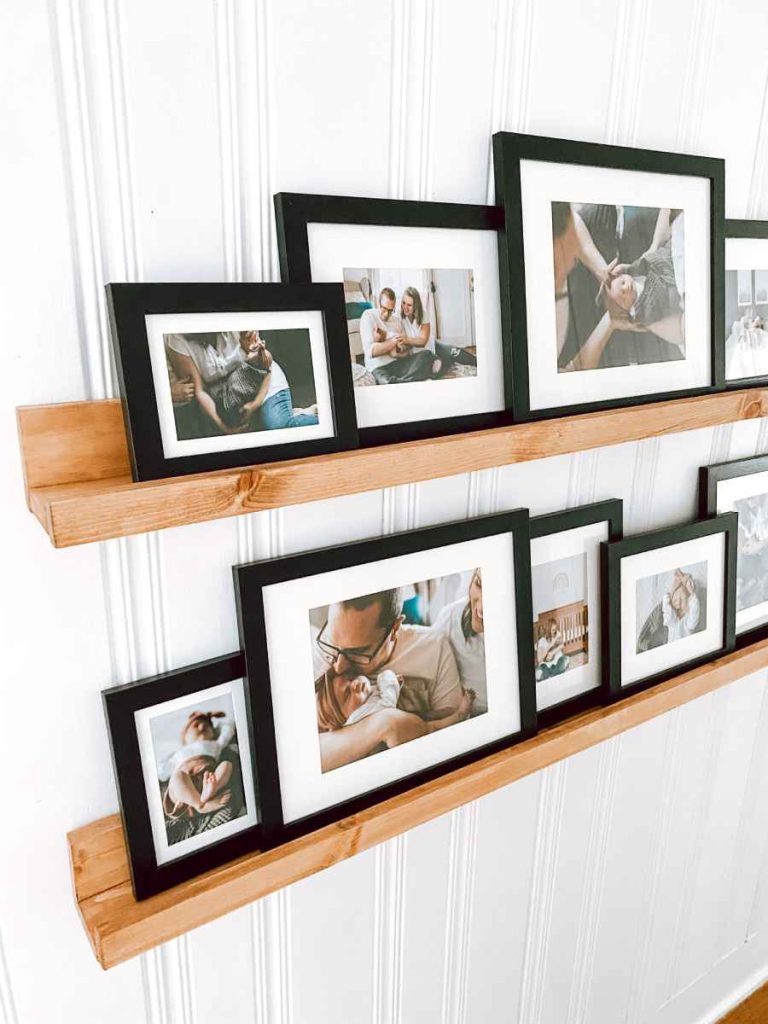
A picture ledge is a simple and stylish way to display your favorite photos, artwork, or decorative objects without the need for hanging individual frames. Scrap wood is perfect for creating a custom picture ledge that fits your style and needs.
To make a picture ledge, cut your scrap wood to the desired length, then attach it to the wall using wall brackets or screws. You can add a slight lip at the front of the ledge to prevent photos or items from sliding off. Personalize the ledge by staining or painting the wood, and even adding a decorative trim for extra flair.
This project allows you to easily switch out photos and artwork as you like, making it perfect for displaying family photos, seasonal decor, or small plants.
11. Scrap Wood Signs: Customize Your Space with Personal Messages
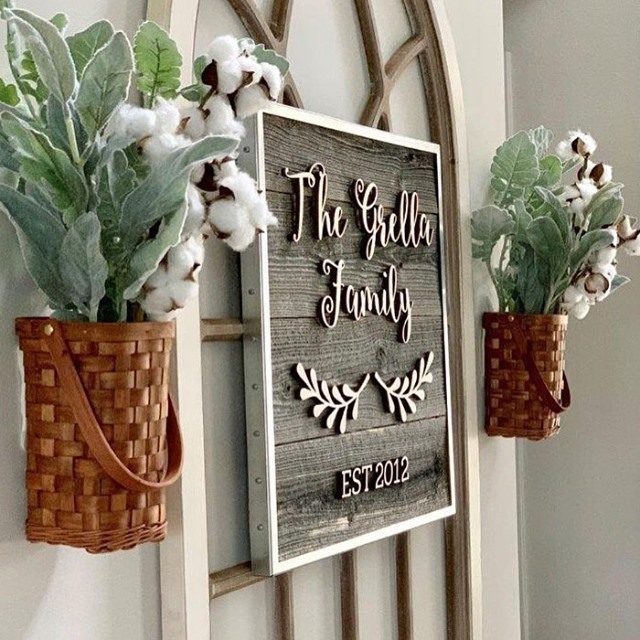
Add a personal touch to your home with a custom scrap wood sign. Whether you’re looking for an inspirational quote, a family name sign, or a fun saying for your kitchen, scrap wood can be transformed into a charming decorative piece.
Start by cutting your scrap wood into the desired size and shape, then apply a coat of paint or wood stain. You can use stencils to add words or paint a design by hand for a more personal touch. For a rustic look, leave the wood raw and use wood-burning techniques to add the lettering.
Wooden signs are great for both indoor and outdoor spaces, and they make thoughtful, handmade gifts for friends and family. You can place them above your front door, in the living room, or even in the kitchen to create a welcoming vibe.
12. Scrap Wood Clock: Keep Time in Style
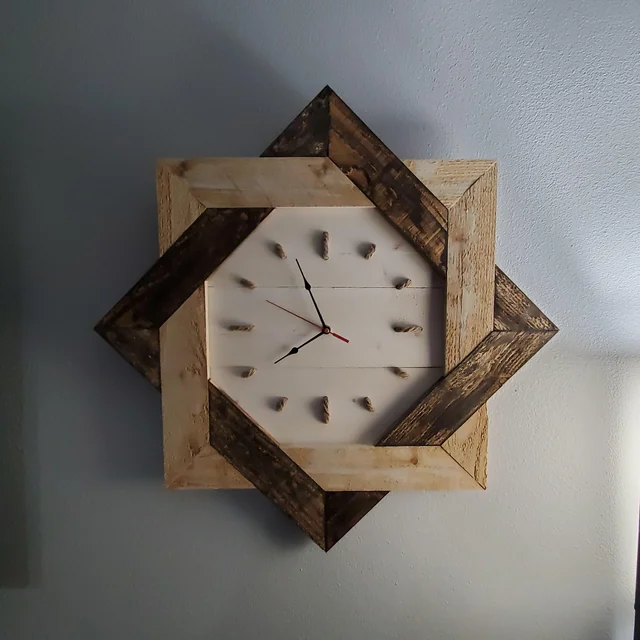
A scrap wood clock is a fun and functional project that adds a rustic touch to any room. Whether you’re looking for a statement piece for your living room or a more subtle design for your office, this project allows you to express your creativity while adding a practical element to your decor.
To make a wooden clock, start by cutting your scrap wood into a circular shape for the clock face. You can either leave the wood raw for a natural look or stain it for a more polished appearance. Add numerals or use wood-burning techniques to create markings for the hours. If you’re feeling creative, consider incorporating geometric patterns or even adding a painted design to the center of the clock face.
For the clock mechanism, you can easily find inexpensive clock kits online or at a local craft store. Attach the mechanism in the center of the wood and add the hands. Finally, finish your clock by adding a layer of clear varnish to protect the wood. A homemade clock makes for a great conversation piece, and it’s a perfect gift for anyone who appreciates unique home decor!
13. Wooden Candle Holders: Set the Mood with Handmade Candles
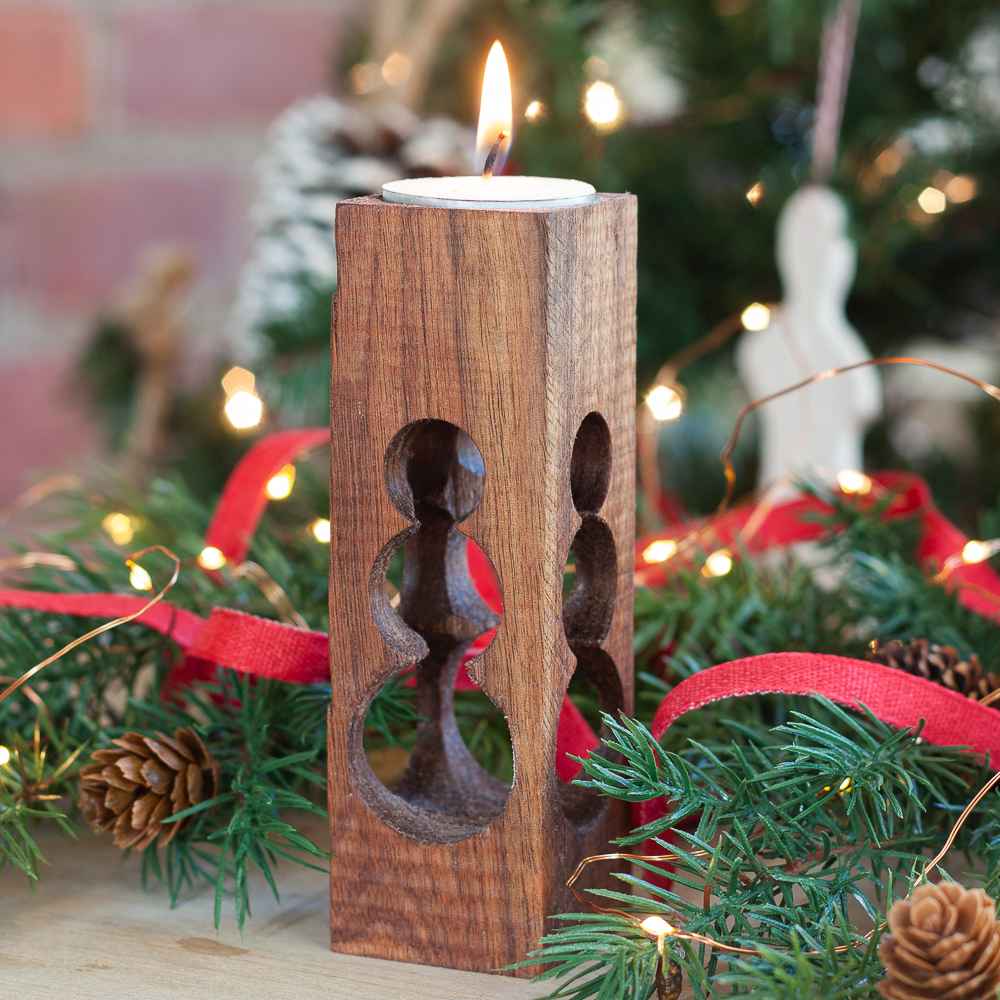
Create a cozy atmosphere in your home with handmade wooden candle holders made from scrap wood. These candle holders add a warm, rustic touch to any space and are incredibly easy to make with a few basic tools.
Start by cutting your scrap wood into small cylindrical or rectangular pieces, depending on the type of candle holder you want to create. For a traditional look, use a wood-burner to carve out indentations for tea light or pillar candles. You can also drill holes into the center of the wood to securely hold the candles in place.
Once your candle holders are assembled, you can customize them by staining, painting, or leaving the wood raw. You can even add decorative elements such as twine, beads, or lace for added charm. Wooden candle holders are perfect for creating a peaceful ambiance for dinner parties, relaxing evenings at home, or special occasions.
14. Picture Ledges: Display Your Favorite Memories
A picture ledge is an easy and stylish way to display your favorite photos, artwork, or decorative items without the hassle of hanging individual frames. Scrap wood is ideal for creating custom picture ledges that suit your style and storage needs.
Begin by cutting your scrap wood to the desired length for your ledge. Use wall brackets or screws to mount the ledge on your wall. To ensure your pictures or decor stay in place, add a small lip to the front of the ledge, which will act as a barrier. You can leave the wood in its natural state for a rustic feel or stain or paint it to match the rest of your decor.
Picture ledges are not only functional for displaying artwork but also give you flexibility, as you can easily change out the items you display. Whether it’s a mix of photos, plants, or small sculptures, this project is a great way to add personal touches to your living room, hallway, or bedroom.
15. Scrap Wood Tray Table: A Multi-Use Piece for Any Room
A scrap wood tray table is a versatile piece that can be used for many different purposes—whether you’re serving drinks at a party, using it as an accent piece, or keeping your remote controls and books organized in your living room. This simple yet functional project is a perfect way to use up your leftover wood.
To make a tray table, start by cutting a piece of scrap wood for the base of the tray. You can then attach four legs to create a small, portable table. To give the table some flair, stain or paint the wood to match your decor. If you want to add extra personality, consider adding handles to the sides for easy carrying, or even adding decorative stenciling.
This project is highly customizable in terms of size and design, so you can make it as small or large as you need. Whether you place it on your coffee table, by the bedside, or use it in your entryway, a wooden tray table will add character and functionality to your space.
16. Wooden Pet Bed: A Cozy Spot for Your Furry Friend
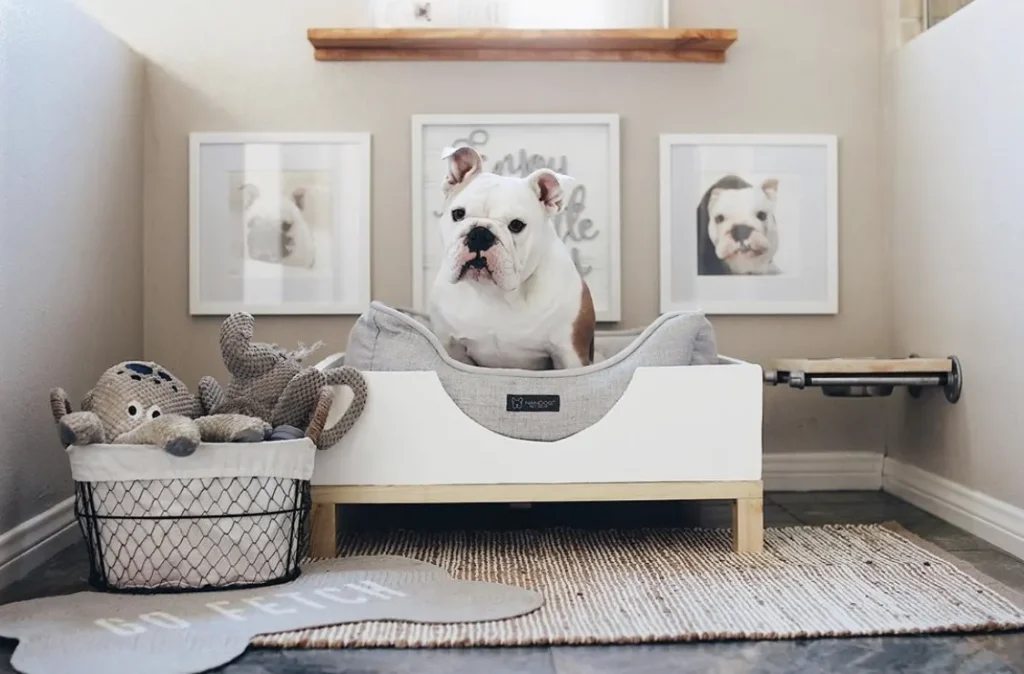
Pamper your pets with a cozy wooden pet bed crafted from scrap wood. This project allows you to create a functional and stylish bed that fits perfectly in your home while giving your furry friend a comfortable place to sleep.
To build a pet bed, start by measuring the size of your pet to determine the ideal dimensions. Cut the scrap wood to create a frame for the bed, and add a sturdy base. For comfort, you can create a soft mattress or cushion to fit inside the frame. If you want to make the pet bed even cozier, consider adding sides to give your pet a more enclosed space.
Customize the pet bed by staining or painting it to match your home decor, or add a cute nameplate with your pet’s name. Not only will your pet love it, but the bed will blend seamlessly into your living room, bedroom, or wherever your pet likes to relax.
17. Scrap Wood Wine Rack: Showcase Your Wine Collection
For wine enthusiasts, a scrap wood wine rack is the perfect way to organize and display your favorite bottles. Whether you’re an occasional wine drinker or a dedicated collector, this project is a stylish way to store your wine.
To create a wine rack, start by cutting your scrap wood into slats or rectangular pieces. Depending on the design you choose, you can create a freestanding rack or a wall-mounted unit. Be sure to cut the pieces to the correct size to securely hold the wine bottles. If you prefer, you can also add a small shelf for storing wine glasses or accessories.
After assembling your wine rack, you can stain or paint it to match your decor. Adding a rustic or industrial touch is a great way to elevate your dining room, kitchen, or home bar area. This DIY project is also an excellent gift idea for wine lovers!
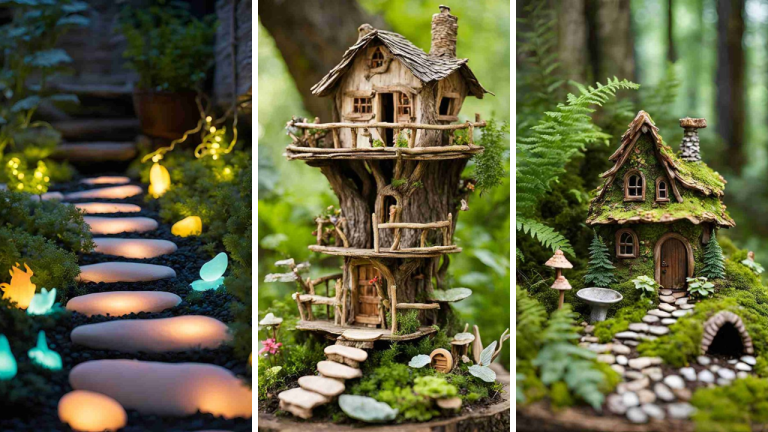
18. Wooden Plant Stand: Display Your Favorite Plants
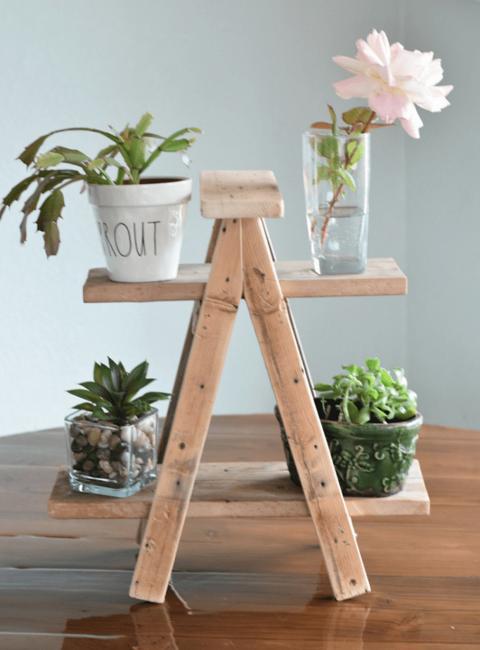
A wooden plant stand is a great way to add height and style to your indoor garden. Using scrap wood, you can build a simple yet elegant stand to showcase your plants, whether you have large indoor plants or a collection of smaller potted plants.
Start by cutting scrap wood into pieces to create a base and legs for the plant stand. Depending on the size of your plant, you may want to create a multi-tiered stand to display a variety of plants at different heights. For a modern look, consider leaving the wood unfinished or staining it a neutral color. You can also paint the wood to add a pop of color that complements your space.
These plant stands are perfect for displaying plants in your living room, balcony, or even in your home office. Plus, they are easy to customize based on your available space and your plants’ needs.
19. DIY Wooden Pallet Sign: A Creative Rustic Decor Piece
Wooden pallet signs are an excellent way to add rustic charm to your home or garden, and scrap wood is perfect for creating one-of-a-kind signs. These signs can be personalized with your favorite quotes, your family name, or even seasonal messages to welcome guests.
Start by disassembling a wooden pallet or cutting your scrap wood into pieces to form the sign. Once you have your base, sand the wood to remove any rough edges. You can then use stencils or freehand paint to create the lettering or designs.
A wooden pallet sign is perfect for your front porch, garden, or even as a home decor piece in your living room or entryway. It’s a fun way to add a personal touch to your space and will surely make a statement!
20. Scrap Wood Picture Hangers: Keep Your Walls Clutter-Free
Scrap wood picture hangers are a clever way to display your photos without having to put multiple holes in your walls. These simple hangers allow you to switch out photos and artwork with ease, making it an ideal solution for anyone who loves to change up their decor regularly.
To make a picture hanger, cut your scrap wood to the desired length and mount it on the wall. Add small hooks or pegs along the bottom where you can hang your pictures or artwork. You can paint or stain the wood to match your room’s decor, and even add some decorative accents like twine or beads.
This project not only keeps your walls free from multiple nails but also makes it easy to rotate your artwork and photos for a constantly fresh look.
21. Wooden Plant Pot Holders: Keep Your Plants Stylishly Raised
Wooden plant pot holders are a great way to add height and visual interest to your plants. These stands can be made from scrap wood and are perfect for displaying your favorite potted plants in an elegant way.
Start by measuring the height and width of your pots, then cut your scrap wood to create the base and legs. For a more modern look, try building a minimalist stand with clean lines, or go for a more traditional design with decorative elements. Once your stand is assembled, stain or paint it to match your home decor.
These plant pot holders are perfect for elevating plants in your living room, patio, or balcony. They create visual variety and help keep your plants healthy by allowing better air circulation.
Conclusion
And there you have it! 21 scrap wood ideas that will transform leftover wood into beautiful, functional pieces for your home and garden. Whether you’re a beginner or a seasoned DIYer, these projects are designed to inspire creativity, save money, and add a personal touch to your space.
Repurposing scrap wood is a fantastic way to reduce waste, unleash your creativity, and create unique decor that reflects your style. From rustic planters and picture frames to functional furniture and organizational solutions, the possibilities are endless. So, gather your scrap wood, grab your tools, and start crafting today!
We’d love to see how your projects turn out, so be sure to share your creations with us. Happy crafting!
This second part concludes the listicle while emphasizing the versatility of scrap wood and encouraging the audience to engage with the projects. It wraps up the blog post with a strong call to action, motivating readers to start their own scrap wood DIY adventures!

Ethan Walker is the founder and editor of HandyCraftsHub. He oversees the editorial direction of the site and contributes in-depth home decor and DIY guides focused on practical, real-world application.
With experience in hands-on home projects and everyday design decisions, Ethan emphasizes livable spaces over short-term trends. His work prioritizes clarity, functionality, and long-term value, helping readers make informed choices with confidence.
As editor, Ethan reviews published content to ensure it meets HandyCraftsHub’s standards for accuracy, usefulness, and practicality.