19 DIY Spring Crafts for Adults to Brighten Your Season
Spring has a way of making everything feel lighter. The days stretch a little longer. The air feels softer. And suddenly you want your home to reflect that shift.
But seasonal decor does not have to mean buying new pieces every year. Crafting your own spring accents can be more personal, more affordable, and honestly more satisfying.
If winter left your space feeling heavy or neutral, spring crafts offer an easy reset. A pop of pastel. Fresh florals. Light textures. Small handmade details that make rooms feel refreshed without a full makeover.
The beauty of crafting as an adult is that it can be both creative and calming. It is less about perfection and more about the process. Whether you prefer painting, arranging florals, working with wood, or experimenting with paper and fabric, there are plenty of approachable projects that look polished when finished.
Why Spring Is Perfect for DIY Projects
Spring naturally inspires color and texture. Florals, greenery, soft blues, gentle yellows, and warm neutrals all feel at home this time of year.
Many spring crafts also use simple, accessible materials. Mason jars, twine, paint, faux florals, wreath bases, and lightweight fabrics can be transformed into decor pieces that brighten shelves, tables, and entryways.
Because the season itself feels transitional, it is the perfect time to experiment without overcommitting.
How to Keep Your Crafts Looking Elevated
Choose a defined color palette before you start. Sticking to two or three complementary shades keeps the final result cohesive.
Focus on texture. Mix natural elements like wood and greenery with softer materials such as ribbon or fabric. Avoid overcrowding surfaces. Even a single well-styled handmade piece can make an impact.
Lighting also helps. Position your finished crafts near natural light to enhance their freshness and detail.
19 DIY Spring Crafts to Inspire Your Creativity
Below, you will find creative projects that range from floral arrangements and wreaths to painted decor and tabletop accents.
Whether you are refreshing your living room, brightening your entryway, or simply looking for a relaxing weekend project, these DIY spring crafts for adults will help you welcome the season with color, warmth, and creativity.
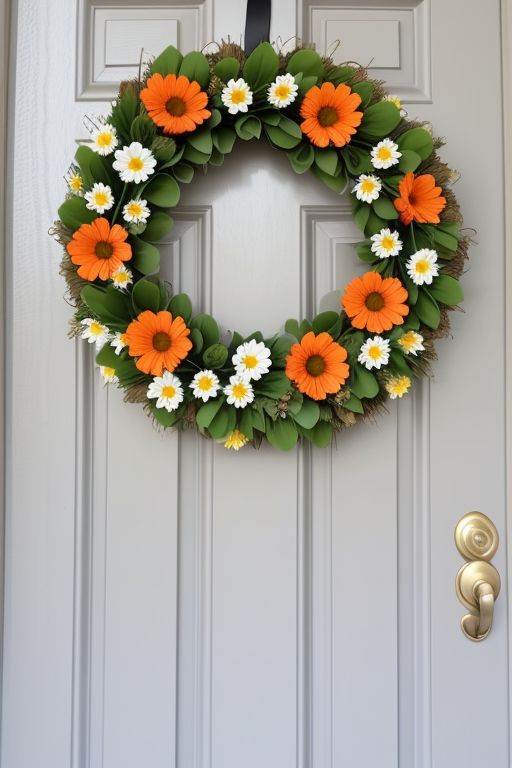
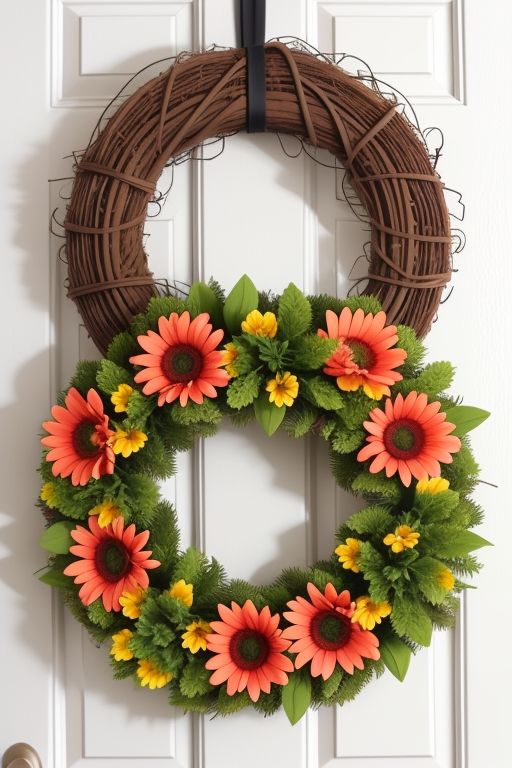
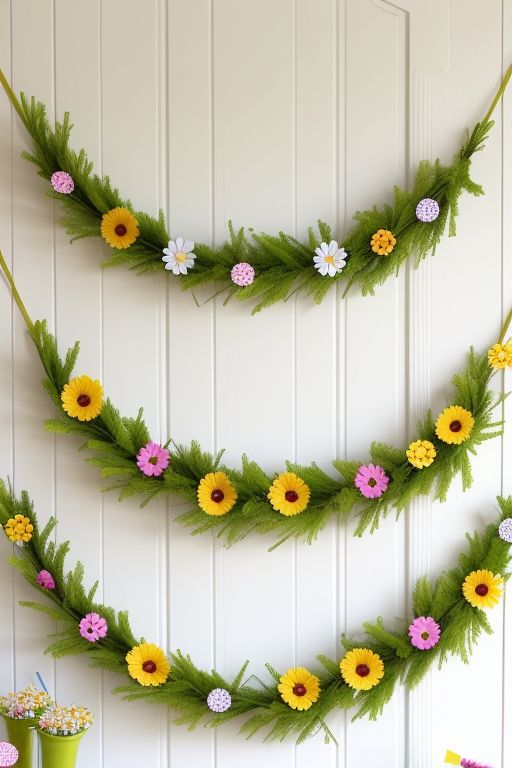
1. Floral Wreath for Your Front Door

A welcoming floral wreath is one of the easiest ways to spruce up your front door and signal the arrival of spring. Crafting a floral wreath allows you to experiment with colors, flowers, and decorative elements that suit your taste and home decor.
Materials:
- Wire wreath frame
- Faux flowers (or fresh if you prefer)
- Greenery (ivy, eucalyptus, etc.)
- Hot glue gun and glue sticks
- Floral wire or twine
Instructions:
Start by securing the greenery around the wire frame, layering it to create a full, lush base. You can mix different types of greenery for added texture. Once the base is in place, begin adding your floral elements. Arrange them symmetrically for a balanced look or go for a more organic style with scattered flowers.
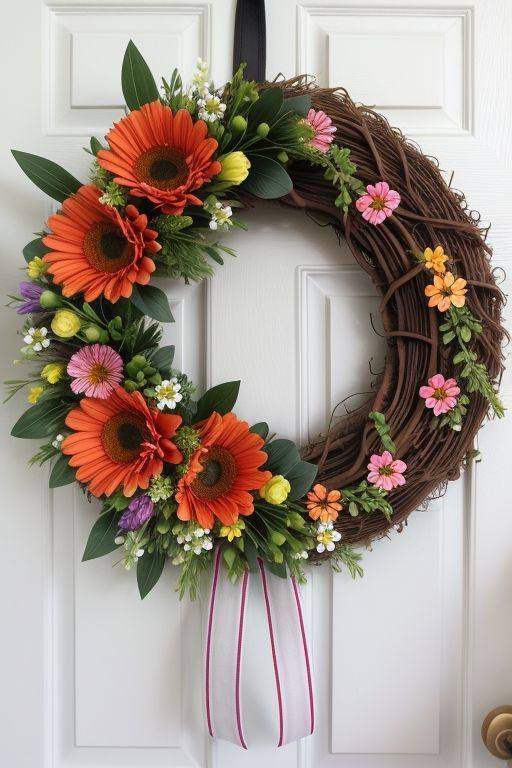
To secure the flowers, use a hot glue gun to attach each stem. For a more structured wreath, you can use floral wire to hold flowers in place while ensuring they stay firm. As a final touch, add a bow with ribbon or fabric that complements the flowers’ colors. Hang your finished wreath on your front door for an instant spring makeover.
This DIY craft allows you to personalize the wreath with seasonal flowers like tulips, daffodils, or peonies, giving your front porch a vibrant and cheerful look.
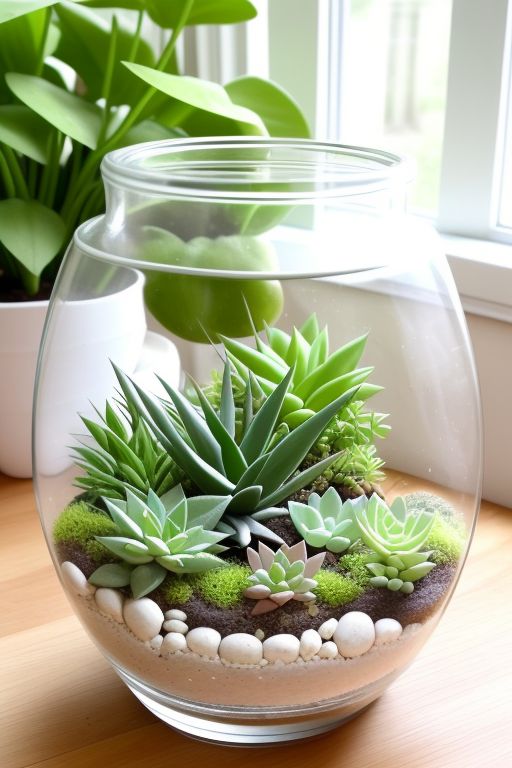
2. DIY Terrarium with Succulents

Terrariums are not just for those with green thumbs—they’re a fantastic way to bring a bit of nature into your living space, especially during the spring when everything feels fresh and new. Making your own terrarium can be a simple yet rewarding craft project. Plus, they make great gifts!
Materials:
- Clear glass container (vase, jar, or fishbowl)
- Small rocks for drainage
- Activated charcoal
- Potting soil
- Succulent plants
- Decorative stones, moss, or figurines (optional)
Instructions:
Start by placing a layer of small rocks at the bottom of your container for drainage. This helps prevent water from accumulating at the base, which can rot the plants. Next, add a thin layer of activated charcoal to keep the terrarium fresh and free of odors. Then, fill the container with potting soil, ensuring it’s deep enough for your succulents to root.
Carefully remove your succulents from their pots and plant them into the soil. Arrange them in a visually pleasing manner, leaving space for growth. You can add decorative touches, such as colored stones, tiny figurines, or even moss, to enhance the terrarium’s aesthetic.
Succulents thrive in bright, indirect light, so place your terrarium near a window but not in direct sunlight. This simple project brings a fresh, natural vibe into your home with minimal maintenance
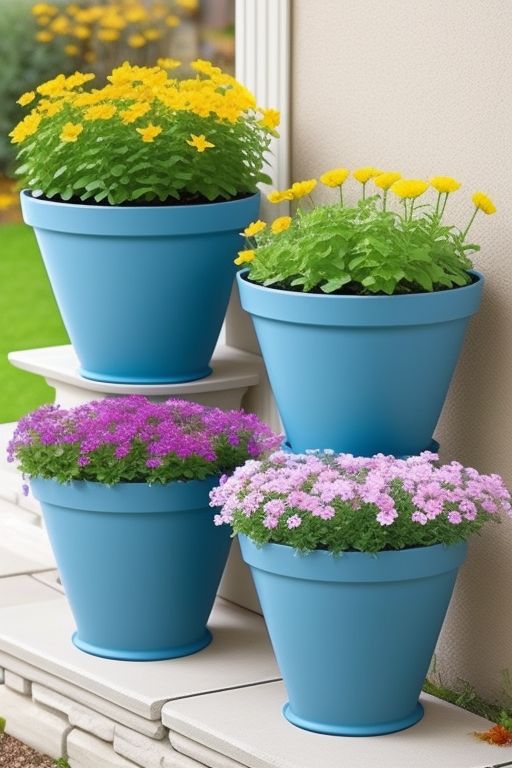
3. Hand-Painted Spring Planters
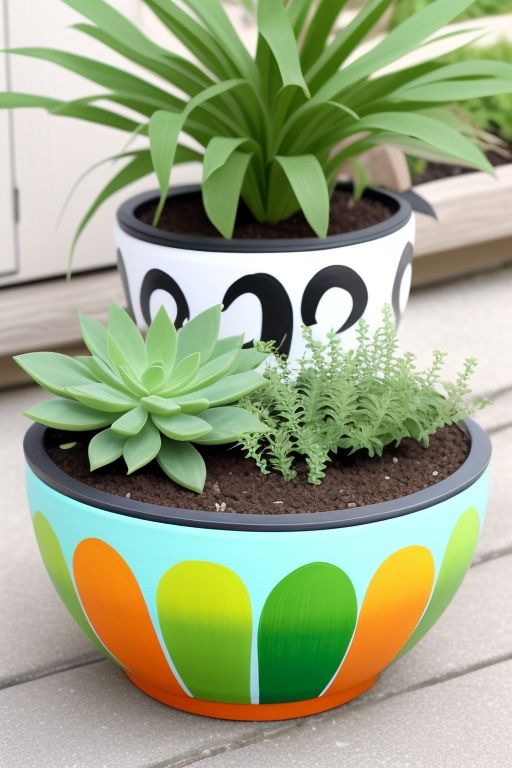
Personalized planters are a great way to add a burst of color and personality to your garden or indoor space. You can easily create one-of-a-kind planters with just a bit of paint and creativity. Whether you’re planting flowers, herbs, or succulents, painted planters add a touch of charm to any setting.
Materials:
- Terra cotta or ceramic pots
- Acrylic paint (your choice of colors)
- Paintbrushes
- Painter’s tape (optional)
- Clear sealant (optional)
Instructions:
Start by preparing your pots by cleaning them to remove any dirt or debris. If you want to create a clean, sharp line for your design, use painter’s tape to outline the sections of the pot you want to paint. This could be around the top, middle, or bottom of the planter.
Once taped, use acrylic paints to add color to your planter. You can experiment with different designs like geometric shapes, stripes, or even hand-painted flowers. For a more rustic look, consider using earthy tones or incorporating a distressed finish.
After the paint has dried, seal the pot with a clear spray sealant to protect it from the elements, especially if it will be used outdoors. Finally, plant your favorite spring flowers or herbs to bring your painted planters to life.
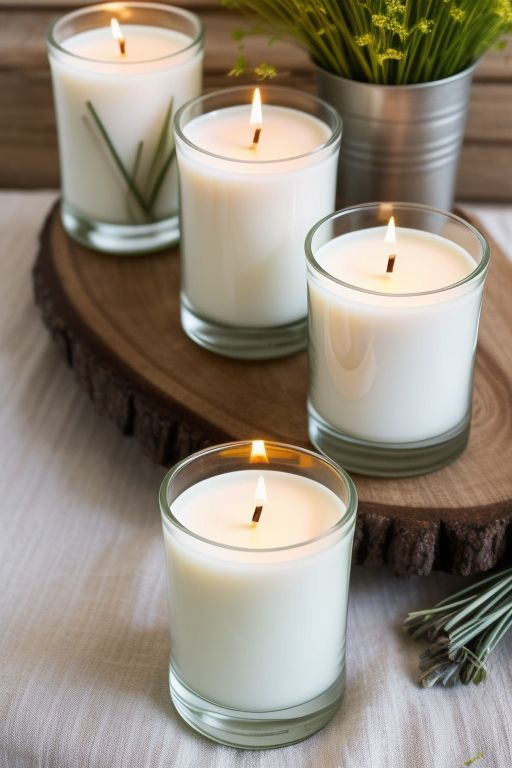
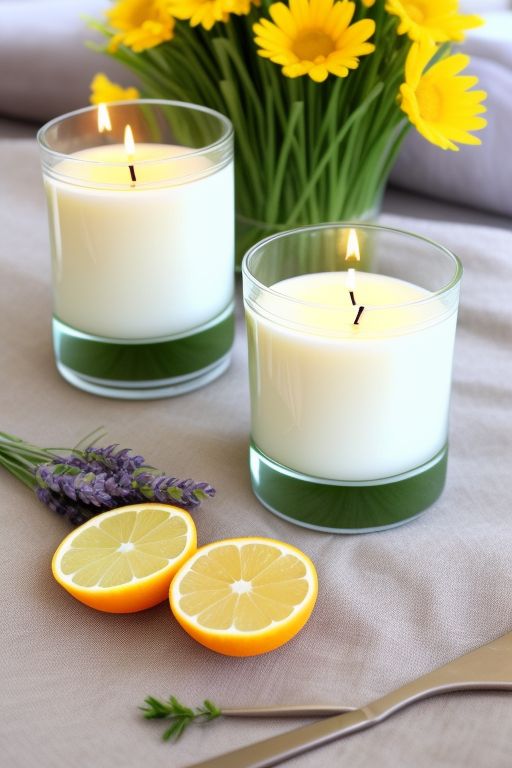
4. Spring-Scented Candles
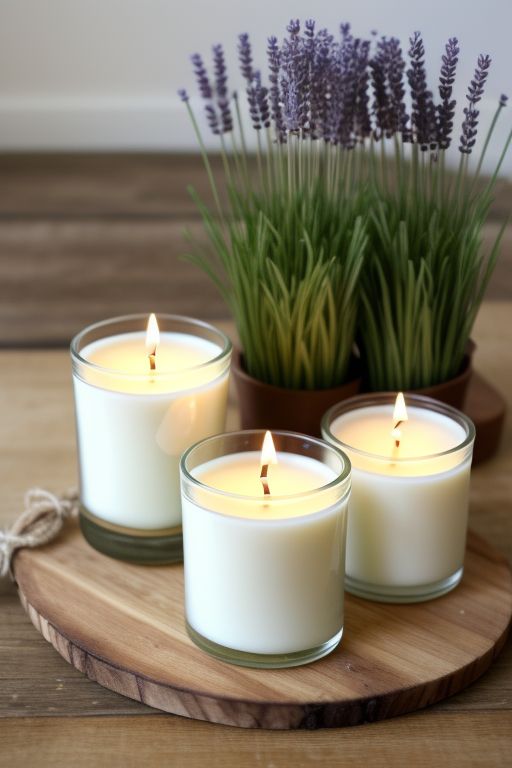
Spring is the season for fresh, uplifting scents, and there’s no better way to enjoy the aroma than with DIY candles. Creating your own candles gives you the freedom to choose scents that remind you of spring—like lavender, citrus, or fresh-cut grass.
Materials:
- Soy wax or beeswax
- Candle wicks
- Essential oils (lavender, lemon, eucalyptus, etc.)
- Containers (mason jars, teacups, or ceramic bowls)
- Double boiler or microwave-safe bowl
- Stirring stick
Instructions:
Begin by melting the soy wax in a double boiler or microwave-safe bowl. If using a microwave, heat in short bursts and stir in between to avoid overheating. Once melted, add 10-15 drops of your favorite essential oils to the wax, stirring to combine.
Next, secure the candle wick to the bottom of your container using a bit of melted wax. Carefully pour the wax mixture into the container, ensuring the wick remains centered. Allow the candle to cool completely, which may take several hours.
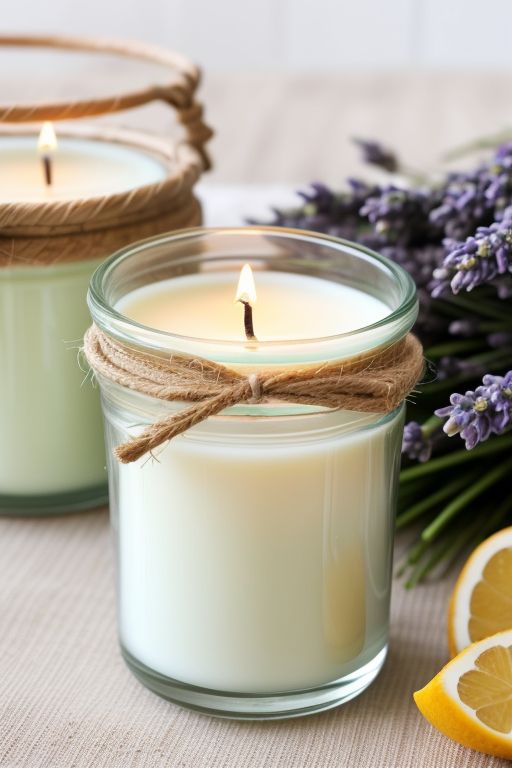
Once cooled, trim the wick to about 1/4 inch above the surface of the candle. Now you have a custom-scented candle that will fill your home with the fresh and relaxing aromas of spring!
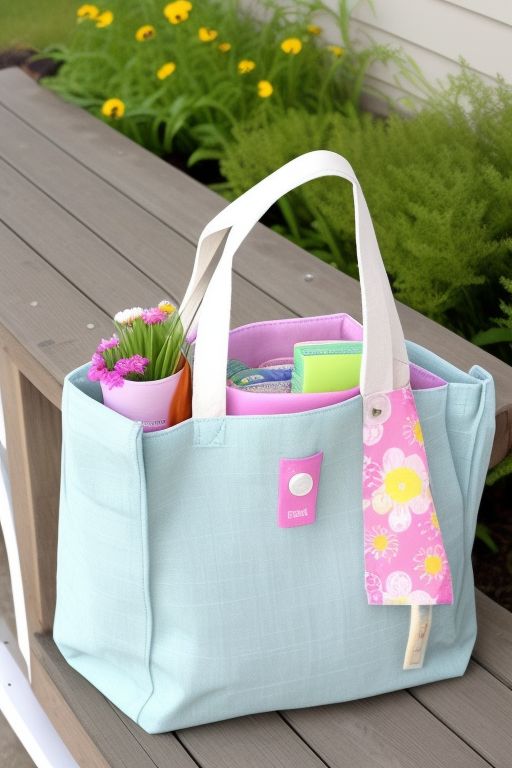
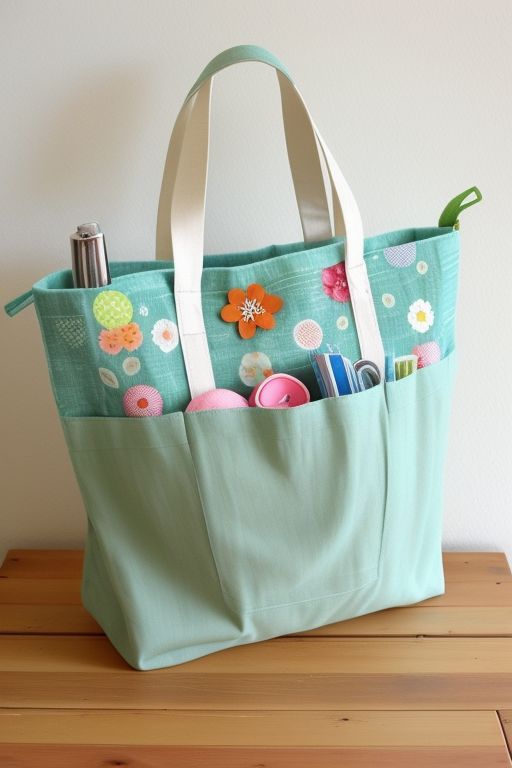
5. Upcycled Spring Tote Bag

Upcycling is a fantastic way to create something new and eco-friendly from old materials. A DIY spring tote bag is not only practical but also a fun way to express your personal style. Perfect for carrying groceries, beach essentials, or books, this project gives new life to an old item.
Materials:
- Old tote bag (fabric or canvas)
- Fabric paint or embroidery thread
- Stencils or fabric markers
- Patches or buttons (optional)
Instructions:
Start by choosing an old tote bag you no longer use. If the fabric is plain, you can create designs with fabric paint or embroidery thread. To use fabric paint, first create a stencil of your desired design or pattern—flowers, geometric shapes, or quotes work well for spring.
Use a paintbrush to apply the paint in even layers, allowing each layer to dry before adding another. Alternatively, if you prefer embroidery, stitch simple spring designs such as flowers, birds, or butterflies.
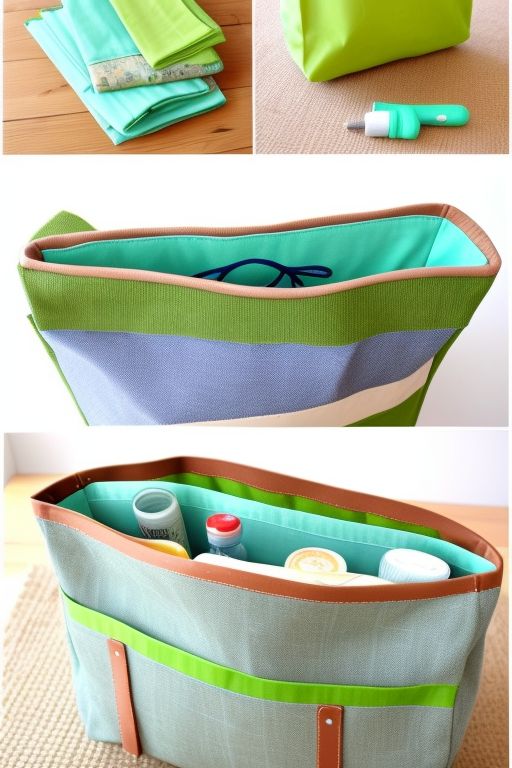
For an extra touch, you can add patches or buttons to personalize the bag further. This project is simple but results in a functional and fashionable accessory.
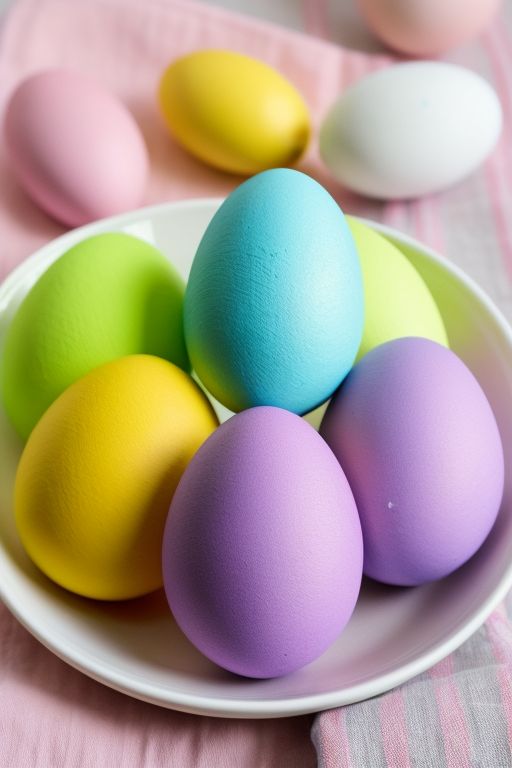
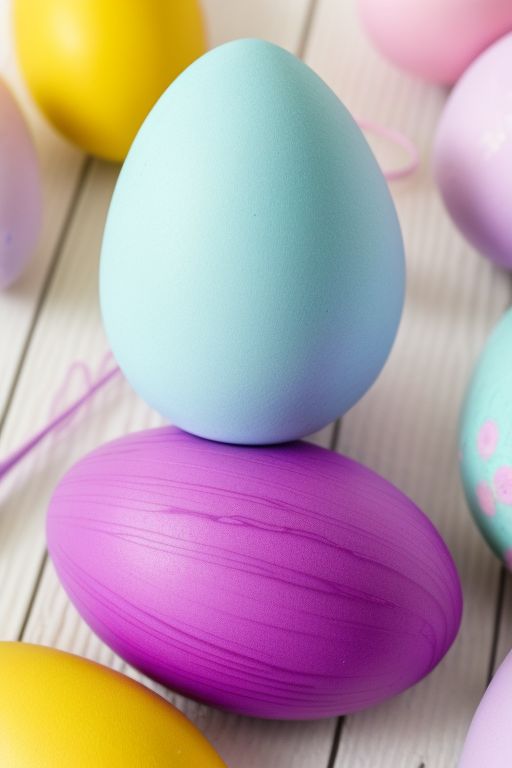
6. Easter Egg Dyeing (With a Twist)
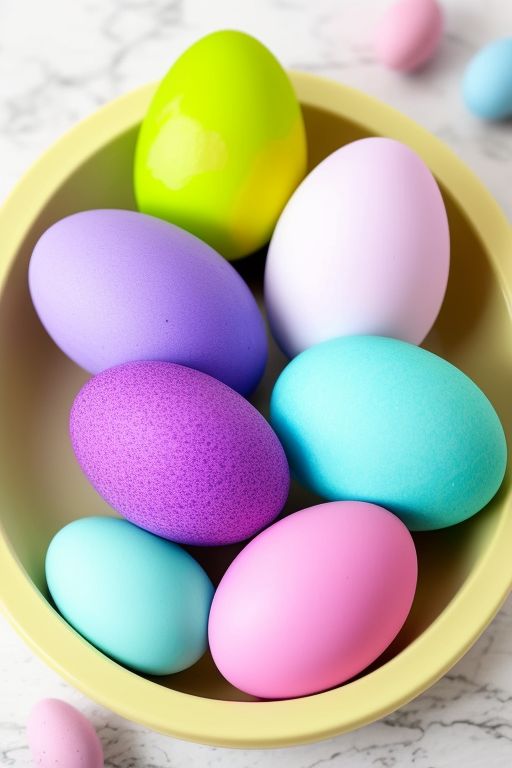
Easter egg dyeing is a classic spring activity, but why not give it a fresh twist this year? With a few unique techniques, you can create stunning, one-of-a-kind Easter eggs that stand out from the usual pastel colors.
Materials:
- White eggs
- Natural dye (such as turmeric, beet juice, or spinach for color)
- Metallic paint or markers
- Rubber bands (optional)
Instructions:
Start by boiling your eggs and letting them cool. Prepare your natural dyes by using ingredients like turmeric for yellow, beet juice for pink, or spinach for green. Once the dyes are ready, immerse the eggs into the dye for 5-10 minutes, depending on how dark you want the color.
For a creative twist, you can wrap the eggs with rubber bands before dyeing them to create fun, striped patterns. After the eggs dry, use metallic paints or markers to add small details like dots, lines, or even small illustrations of flowers or birds.
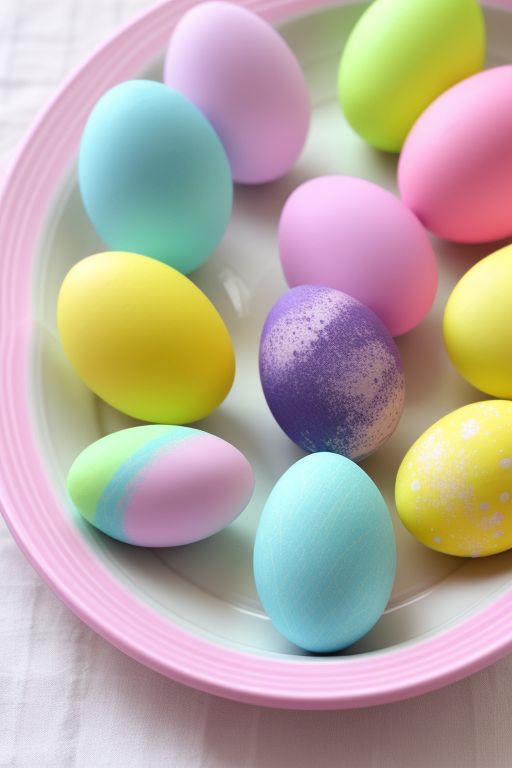
These unique eggs will add a modern, artistic touch to your Easter celebration.
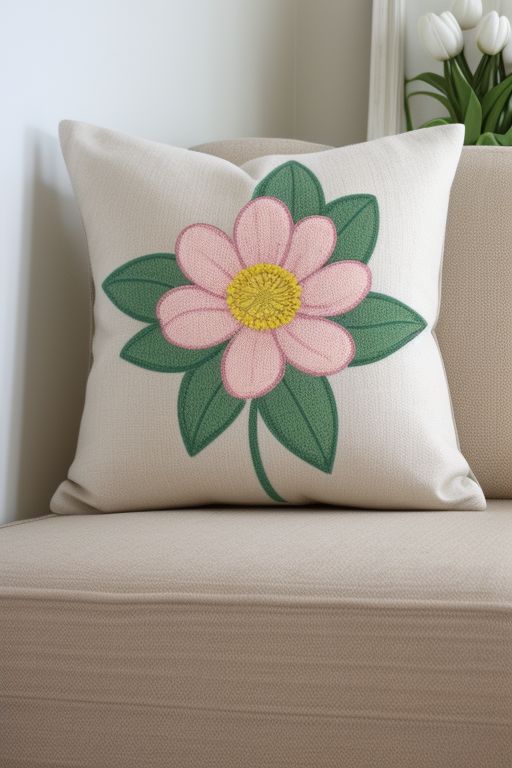
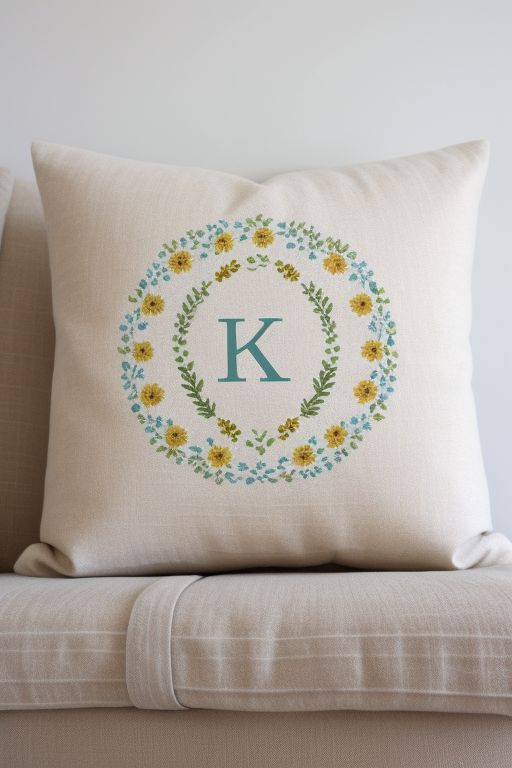
7. Personalized Spring-Theme Throw Pillows
A quick and simple way to update your home for spring is by creating personalized throw pillows. Whether you’re into minimalist designs or bold floral patterns, this project lets you express your unique style while adding comfort and color to your living space.
Materials:
- Blank pillow covers
- Fabric paint or fabric markers
- Stencils (optional)
- Sewing machine or needle and thread (optional)
Instructions:
Start by choosing a blank pillow cover in a neutral color that will complement your decor. If you want to add a design, use fabric paint or markers to create patterns. For a simple look, you can paint stripes or geometric shapes; for something more intricate, consider painting flowers, butterflies, or abstract designs.
If you have some sewing skills, you can also sew your own pillow covers using fabric with a spring-inspired print like gingham, floral, or botanical patterns. This adds a personal touch to your home without breaking the bank.
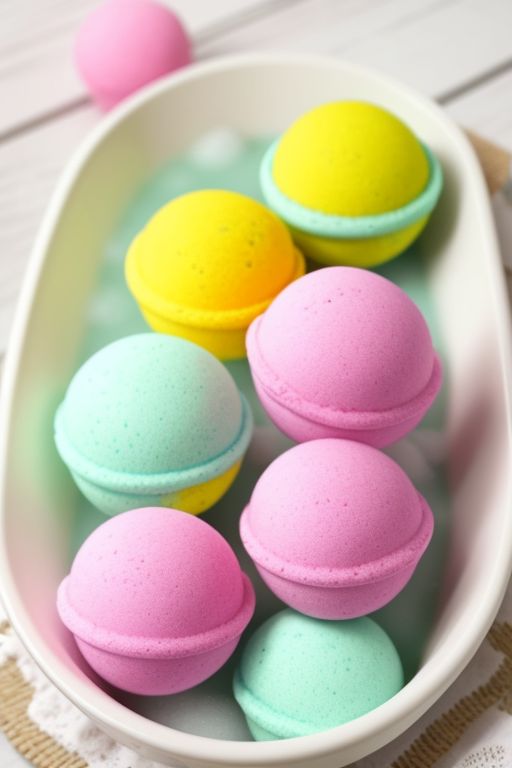
8. DIY Spring Bath Bombs
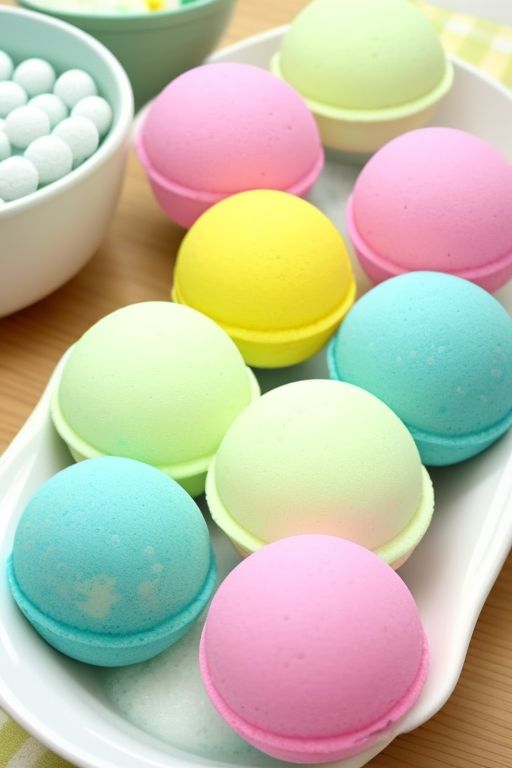
For those who love pampering themselves, making your own bath bombs is a fun and relaxing spring craft. You can customize the scent and appearance of your bath bombs to suit the season.
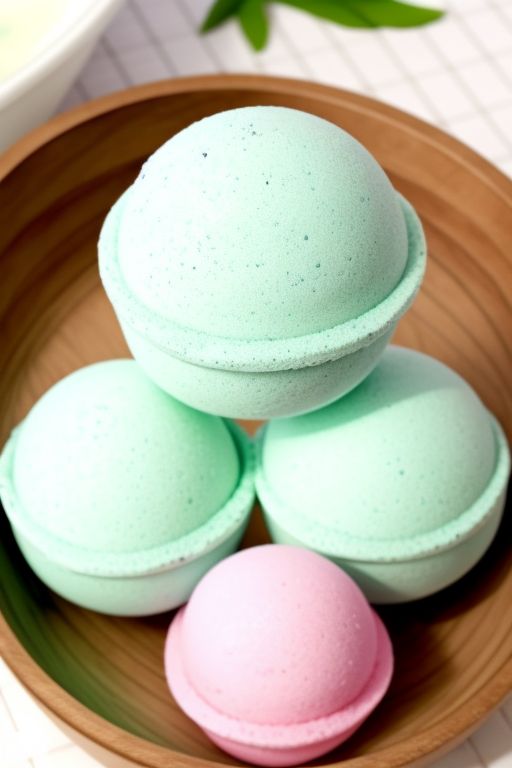
Materials:
- Baking soda
- Citric acid
- Epsom salt
- Cornstarch
- Essential oils (lavender, rose, etc.)
- Bath bomb molds (or muffin tin)
Instructions:
In a large bowl, combine baking soda, citric acid, Epsom salt, and cornstarch. Add a few drops of essential oils to the mixture to infuse your bath bombs with a calming, spring-inspired scent. Add water to the mixture a little at a time, stirring constantly until the consistency is like wet sand.
Pack the mixture into your bath bomb molds, pressing it down firmly. Let the bath bombs dry for 24 hours before removing them from the molds.
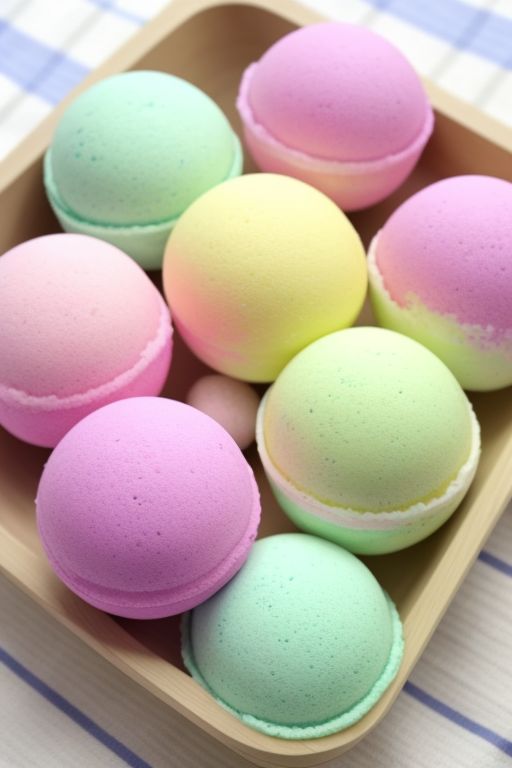
These bath bombs will make your spring relaxation routine even more enjoyable, leaving your skin soft and your senses refreshed.
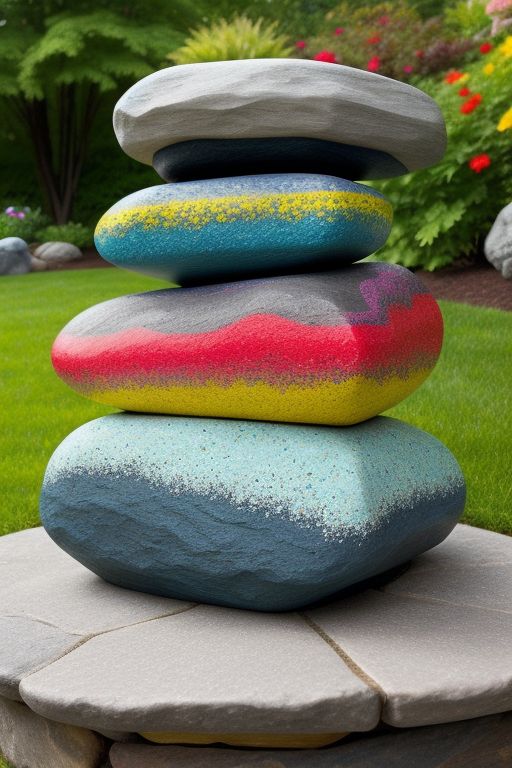
9. Painted Garden Stones

If you love spending time in the garden, adding painted stones can brighten your outdoor space in an instant. These colorful rocks are not only visually appealing but also make great additions to plant beds or as decorative accents along walkways.
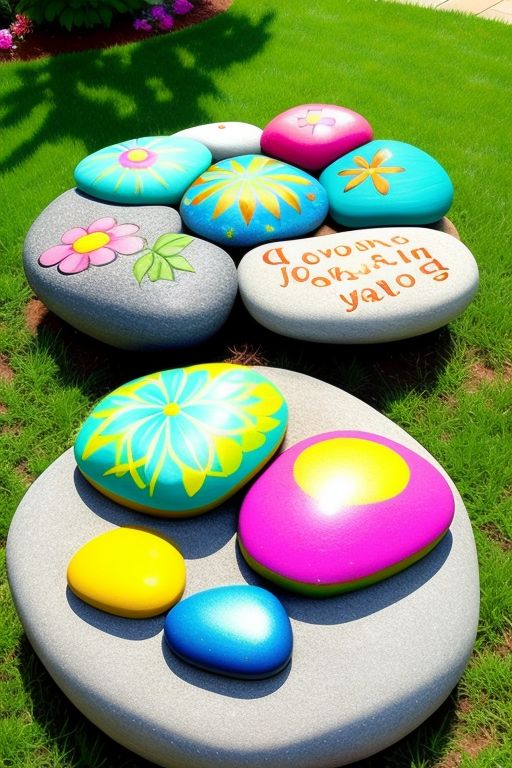
Materials:
- Smooth, flat stones
- Acrylic paints
- Paintbrushes
- Sealer (optional)
Instructions:
Start by collecting smooth, flat stones from your garden or local park. Wash them thoroughly and let them dry. Once dry, use acrylic paints to create vibrant designs. Popular designs include floral patterns, animals, or even inspirational words like “bloom” or “grow.”
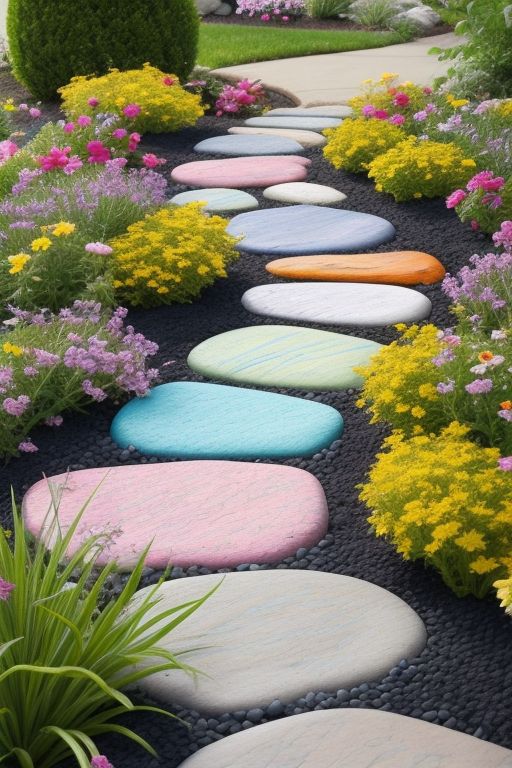
After the paint dries, seal the stones with a clear spray sealer to protect them from the elements if they will be placed outdoors. These painted stones can add a whimsical and personal touch to your spring garden.
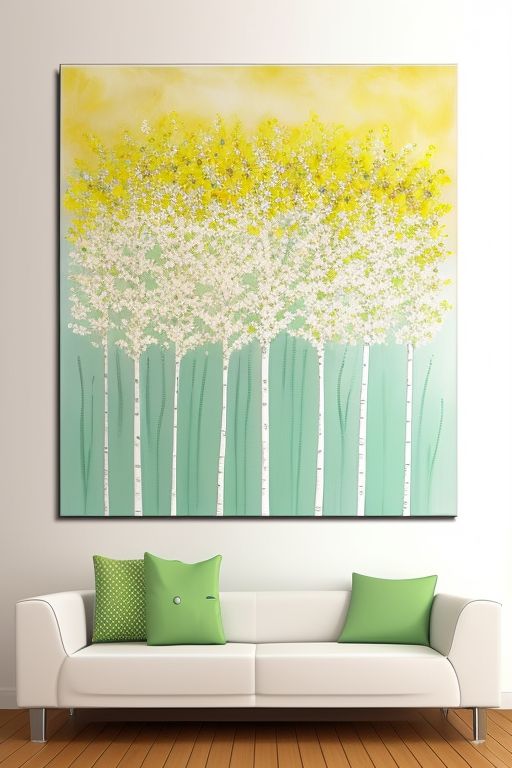
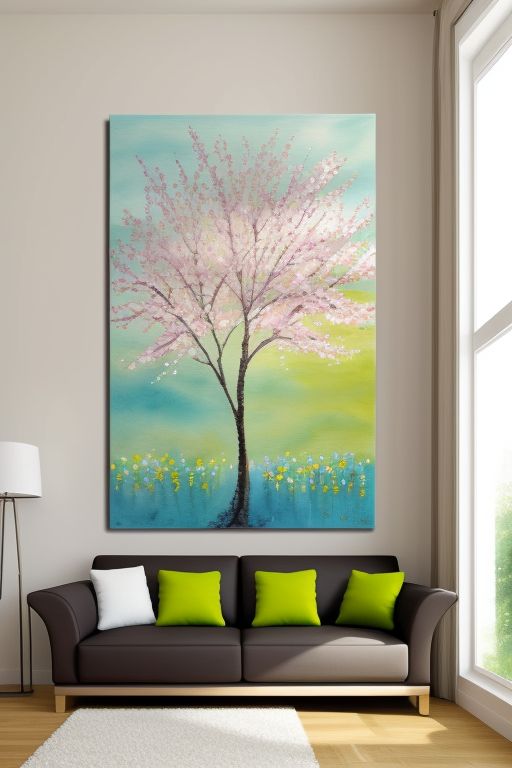
10. Spring-Inspired Wall Art
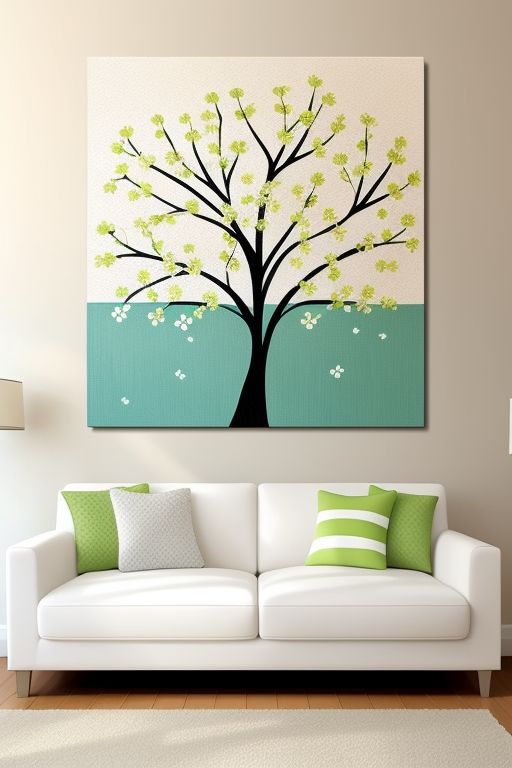
Bring the spirit of spring indoors with custom wall art. Whether you’re an artist or a beginner, this project allows you to create personalized pieces that brighten any room. From abstract florals to watercolor landscapes, wall art is a wonderful way to celebrate the season.
Materials:
- Canvas or wooden boards
- Acrylic paints or watercolor paints
- Brushes or sponges
- Palette
Instructions:
Start with a blank canvas or a wooden board. Use acrylic paints to create vibrant spring colors such as light blues, greens, and pinks. You can create abstract designs, paint blooming flowers, or even abstract representations of the season, like birds in flight or trees budding.
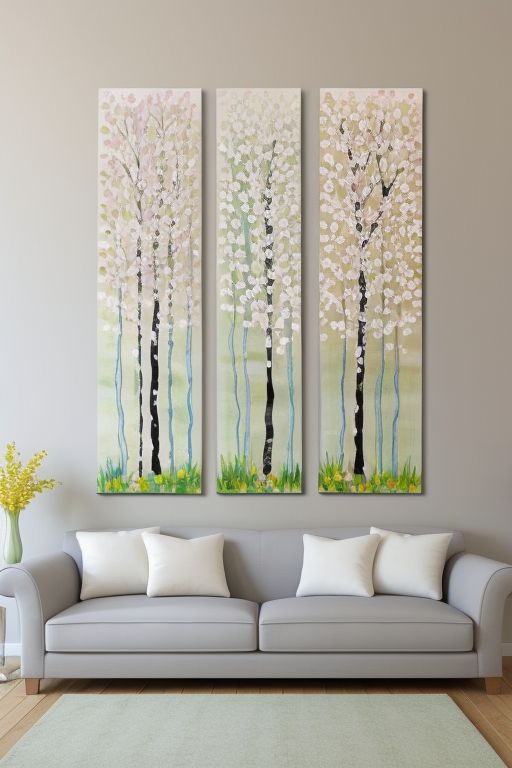
For a more delicate touch, use watercolor paints to create soft, ethereal designs. This approach works particularly well for nature-inspired themes. Once your artwork is complete, hang it up to infuse your home with the fresh, energizing vibes of spring.
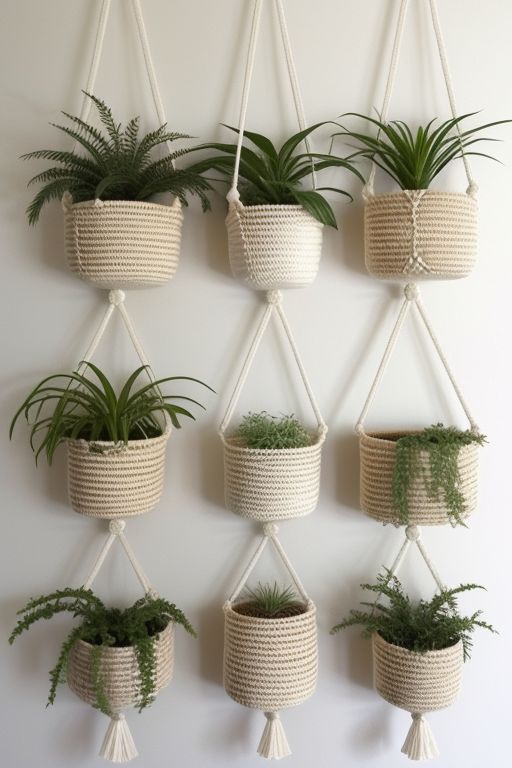
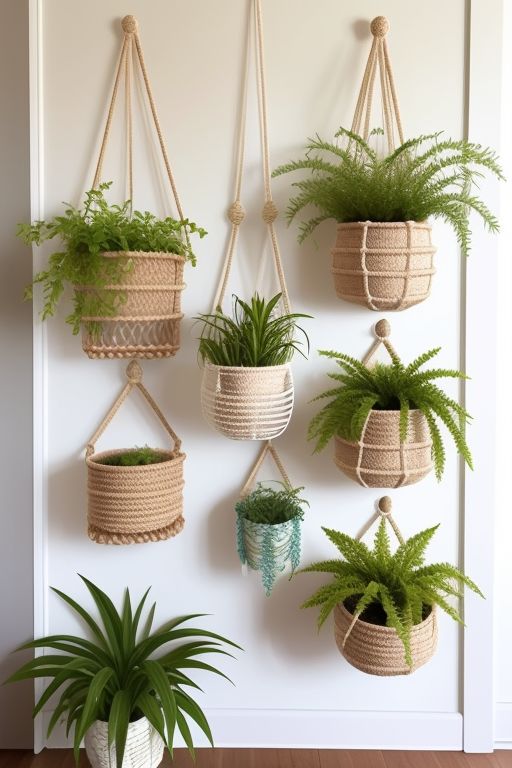
11. Macramé Plant Hangers
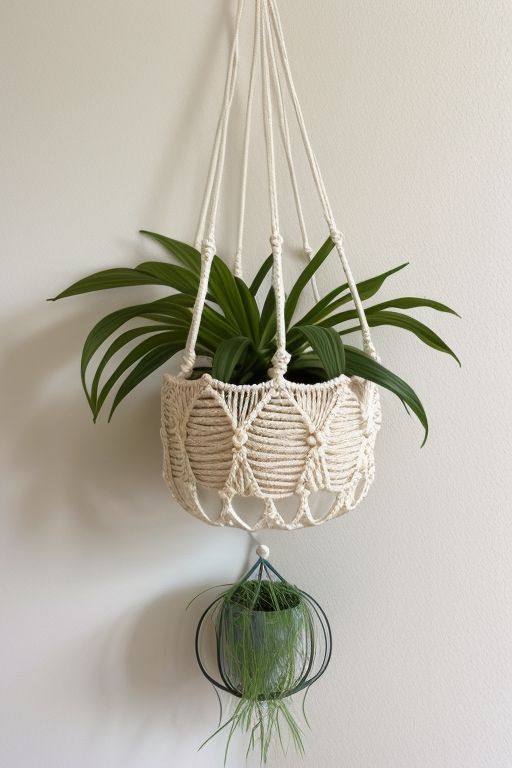
Macramé is a timeless craft that has made a strong comeback, especially for adding a boho-chic vibe to your home. Spring is the perfect time to create these stylish plant hangers that will showcase your favorite greenery in a unique and artistic way.
Materials:
- Macramé cord or rope
- Wooden dowel or ring
- Scissors
- Potted plant
Instructions:
Start by cutting several lengths of macramé cord, ensuring each piece is long enough to create a secure knot around your plant pot. Attach the cords to a wooden dowel or metal ring, tying them in a series of knots—square knots, lark’s head knots, or spiral knots are commonly used in macramé plant hangers.
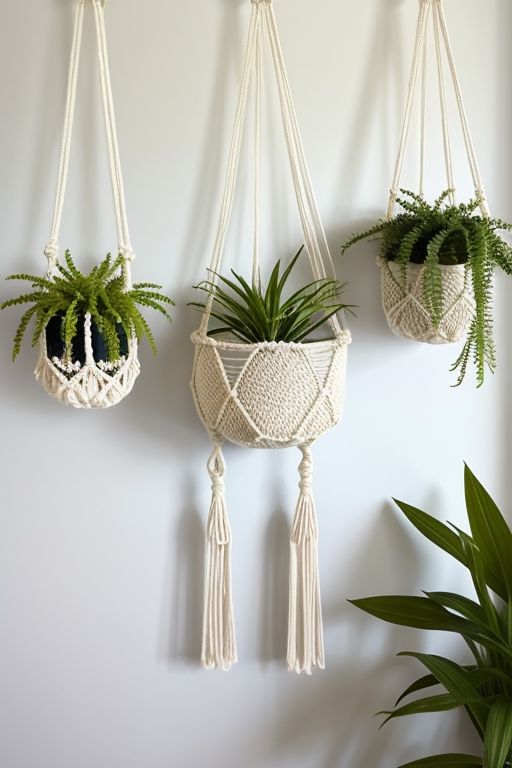
Once you’ve created your desired design, space the cords evenly and tie them at the base to form a secure holder for your plant pot. Slip your potted plant into the hanger and hang it from a ceiling hook or wall-mounted hook. These macramé hangers add an earthy, organic feel to any room and are an excellent way to bring the outdoors in.
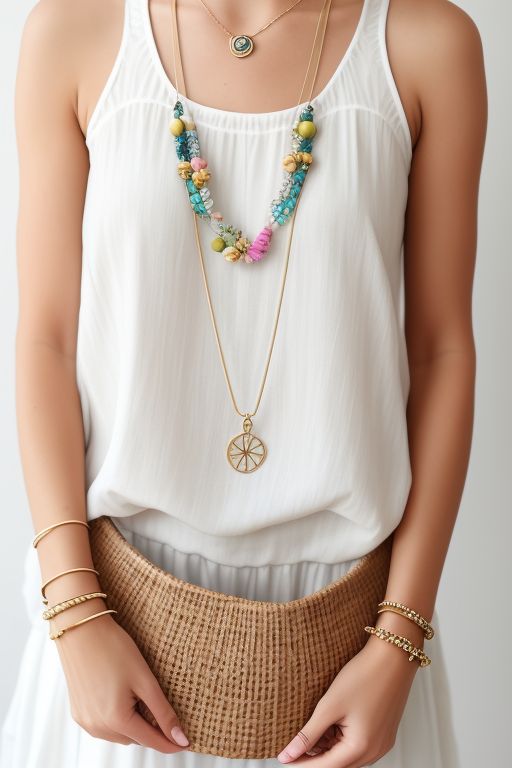
12. DIY Spring Jewelry

Spring jewelry is all about light, airy designs that complement the season’s colors and vibes. Whether you’re into boho, minimalist, or floral-inspired styles, creating your own jewelry is a fun way to accessorize and express yourself.

Materials:
- Beads (semi-precious, wood, or glass beads)
- Jewelry wire
- Pliers
- Clasps and findings
- Small charms or pendants (optional)
Instructions:
Start by selecting beads that represent the colors and energy of spring—think pastels, vibrant floral colors, or natural earth tones. Measure out the desired length of jewelry wire and start stringing the beads in a pattern or design of your choice. For added flair, you can include small charms or pendants that reflect spring themes, such as flowers, butterflies, or leaves.

Once your design is complete, use pliers to secure the ends of the wire and attach clasps or findings to make the piece wearable. You can create earrings, necklaces, or bracelets—personalizing each piece to match your style.
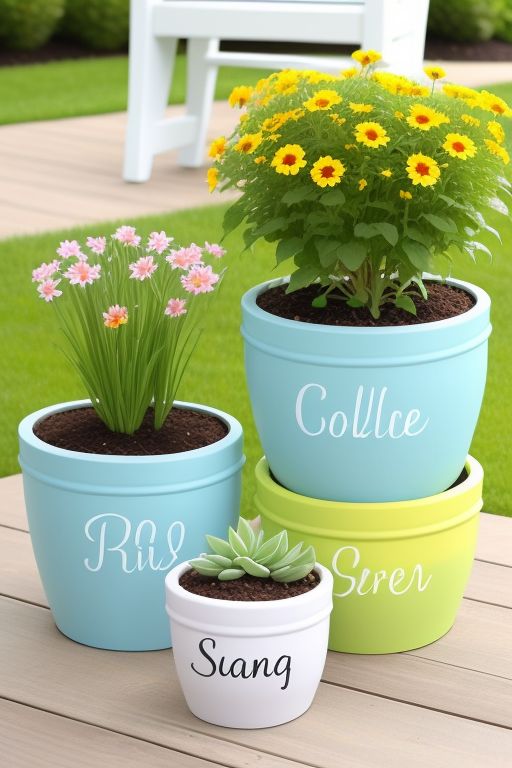
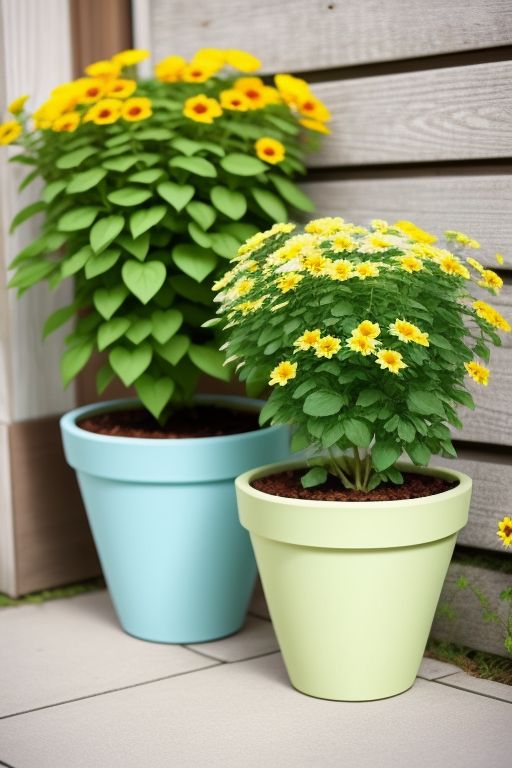
13. Painted Flower Pots
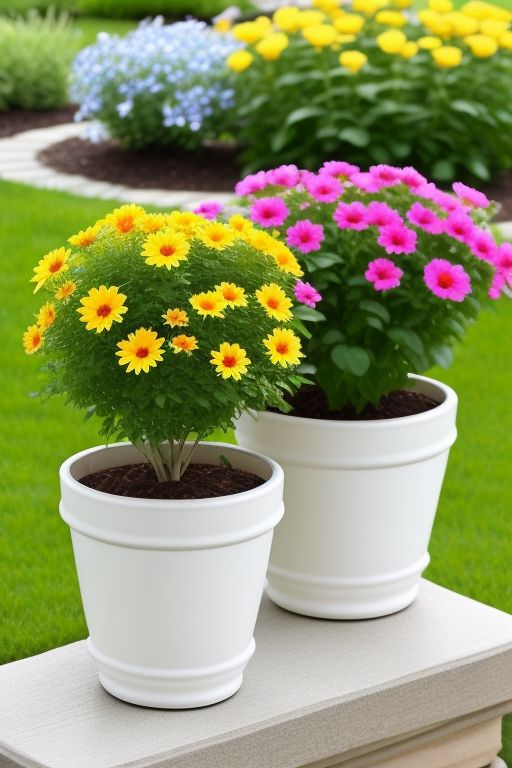
Flower pots are not only practical, but they can also be beautiful pieces of art for your garden or home. A quick coat of paint can turn an ordinary pot into a vibrant spring accessory, perfect for holding your favorite flowers or herbs.
Materials:
- Terra cotta flower pots
- Acrylic paint
- Paintbrushes
- Paint markers (optional)
- Clear sealer (optional)
Instructions:
Begin by cleaning the flower pots to remove any dirt or dust. Once dry, apply a base coat of acrylic paint in your chosen colors—light pastel shades like lavender, mint, or pale yellow work well for spring. After the base coat dries, add decorative details, such as stripes, polka dots, or flowers, using a finer brush or paint markers.

To protect your designs, apply a layer of clear sealer, especially if you plan to use the pots outdoors. These colorful pots will add a lively touch to your porch, patio, or garden.
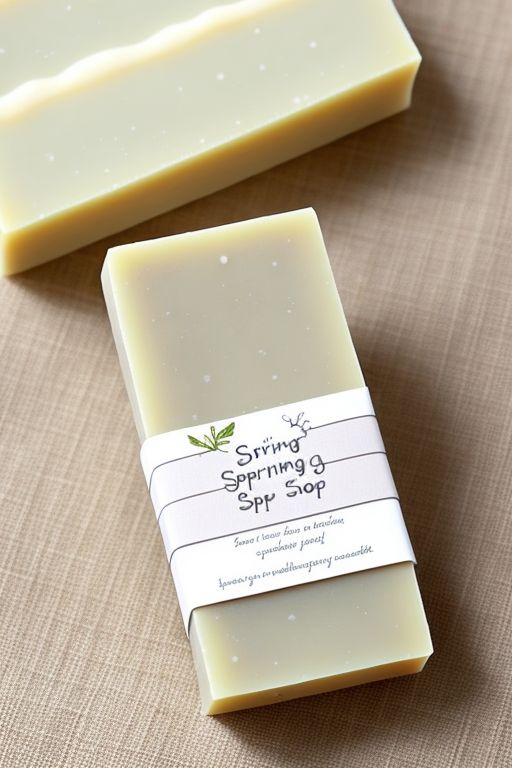
14. DIY Spring Soap Bars
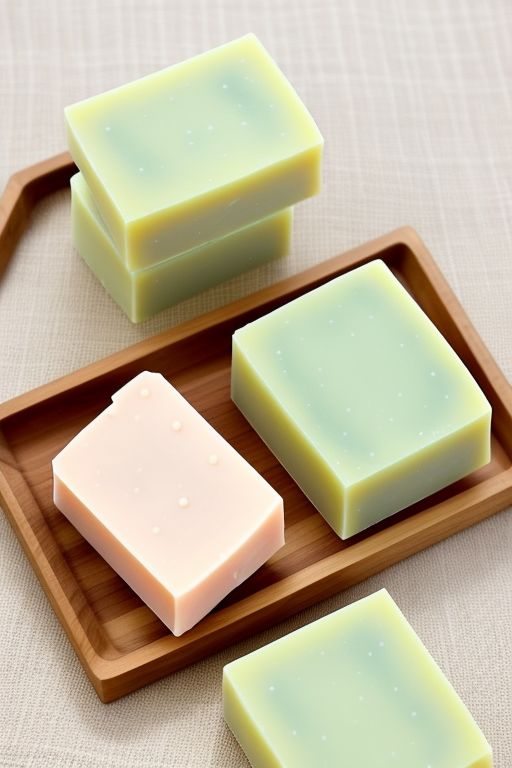
Spring is the time to refresh your senses, and what better way to do that than with your own handmade soap bars? Custom soaps allow you to create unique scents and textures, while also ensuring the ingredients are natural and skin-friendly.
Materials:
- Melt-and-pour soap base (glycerin, shea butter, or goat’s milk)
- Essential oils (lavender, rosemary, lemon, etc.)
- Dried flowers (lavender, chamomile, etc.)
- Soap molds
Instructions:
Start by melting the soap base according to the package instructions—usually in a double boiler or microwave. Once melted, add essential oils to give your soap its signature spring scent. You can also mix in dried flowers like lavender or rose petals for a fragrant touch and a visually appealing effect.
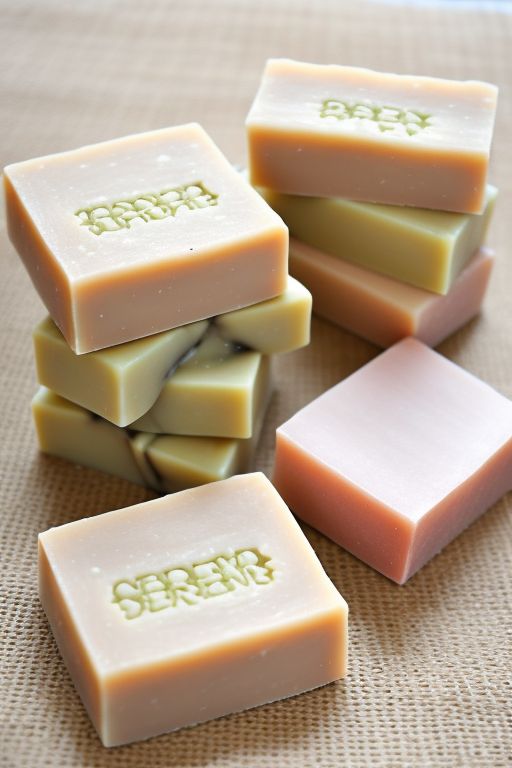
Pour the melted soap mixture into your soap molds and let them cool for several hours until solidified. Once ready, pop the soaps out of the molds, and they are ready to use. These DIY soap bars make wonderful gifts or can be added to your own bathroom for a fresh, spring-inspired aroma.
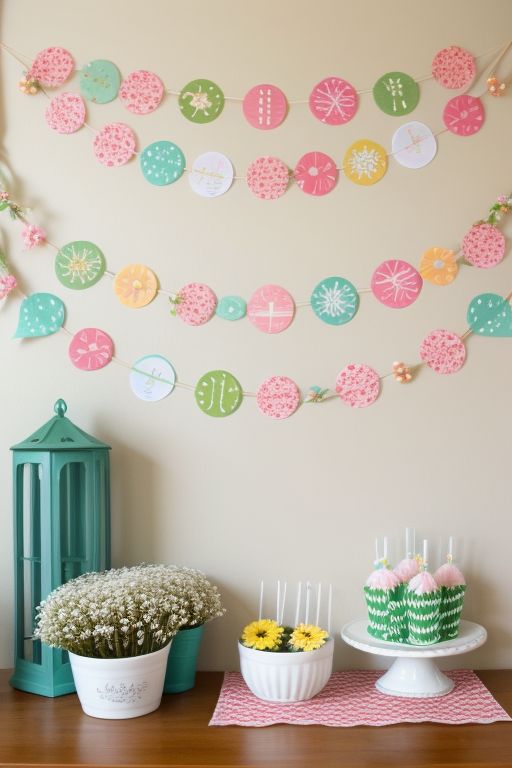
15. Spring-Themed Banner or Garland
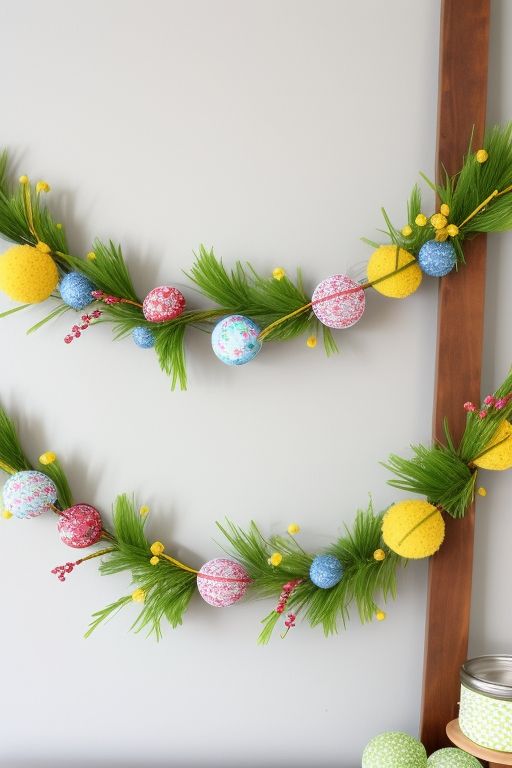
Add some festive flair to your spring décor with a handmade banner or garland. Whether you’re decorating for a spring party or simply brightening up your living room, this craft is an easy and enjoyable way to celebrate the season.
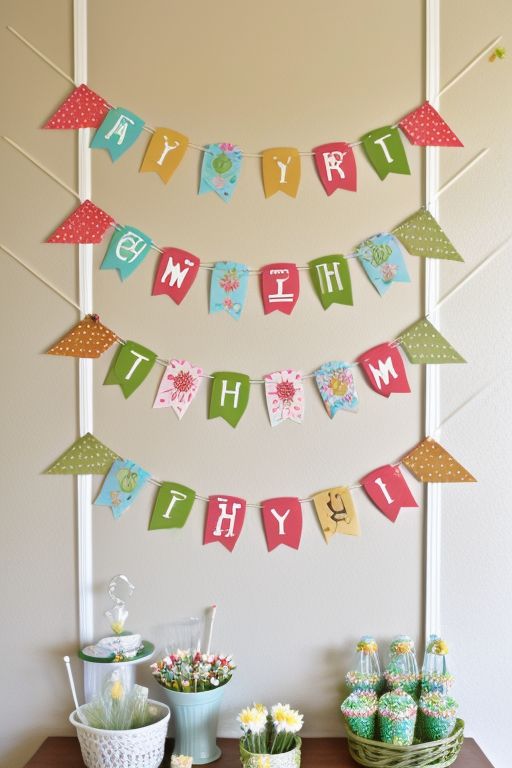
Materials:
- Colored paper or fabric (floral, pastel, or solid colors)
- String or twine
- Scissors
- Glue or sewing machine (optional)
- Hole punch
Instructions:
Start by cutting the paper or fabric into shapes—triangles, squares, or circles work well for banners. You can decorate each piece with stencils, stamps, or hand-painted designs to match the spring theme. Afterward, punch a hole at the top of each piece and thread them onto a length of string or twine.
Space the pieces evenly and tie knots to keep them in place. You can hang your banner or garland across a mantelpiece, from the ceiling, or along a wall to instantly add a touch of spring to your décor.
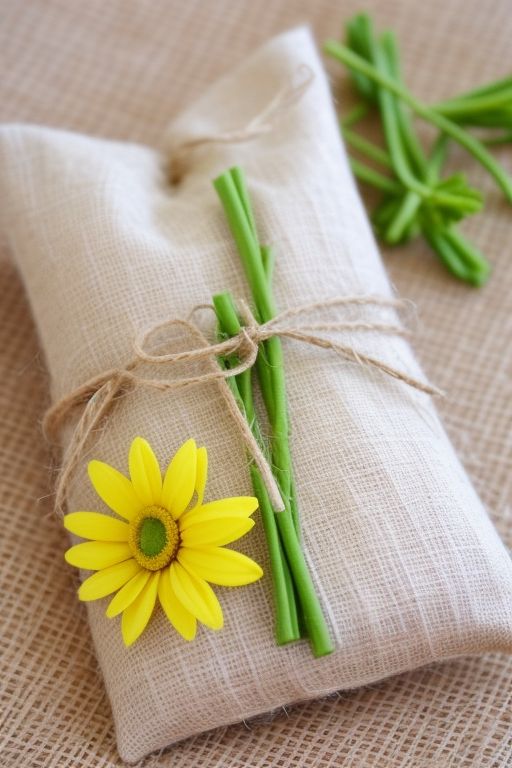
16. DIY Spring Scented Sachets
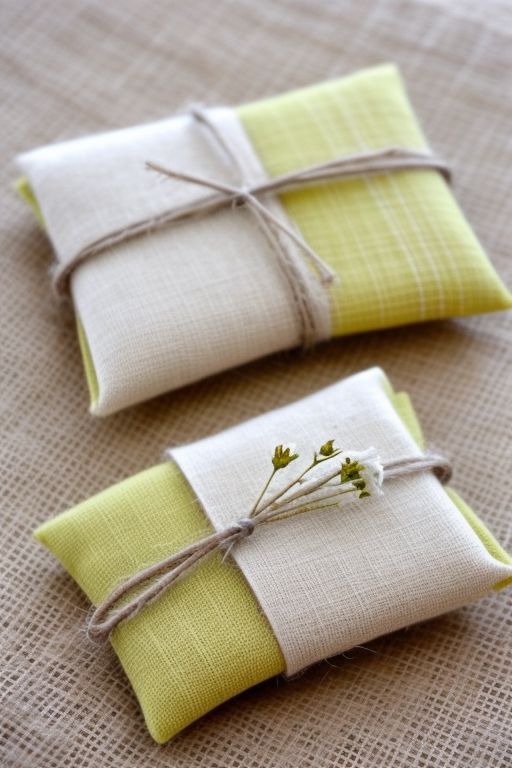
Sachets are a great way to introduce natural fragrances into your home without overpowering scents. Making your own spring-scented sachets is easy and inexpensive, and you can customize the scent to fit your preferences.

Materials:
- Dried flowers (lavender, rose petals, jasmine)
- Essential oils
- Small fabric bags or pouches
- Ribbon or twine
Instructions:
Fill your small fabric pouches with a mixture of dried flowers and add a few drops of essential oils to intensify the fragrance. Popular choices for spring are lavender, chamomile, and rose. Tie the pouches closed with ribbon or twine.
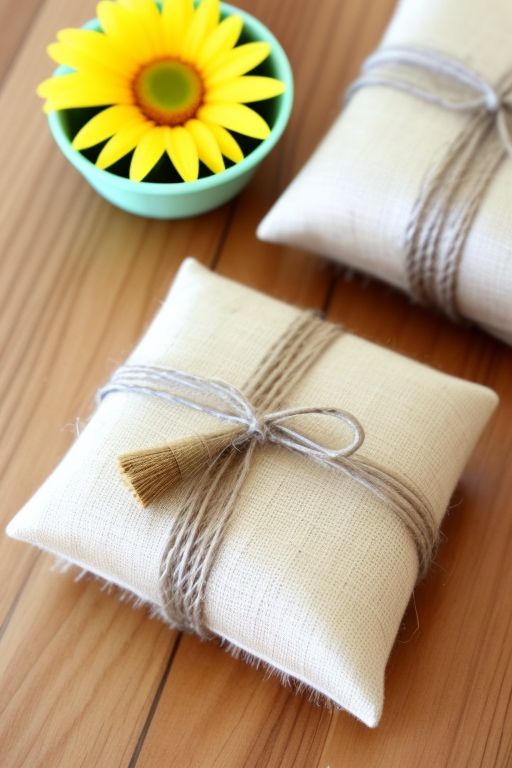
These sachets can be placed in drawers, closets, or even used as car fresheners. They make thoughtful gifts, too—add a personal touch by including a handwritten note with each sachet.
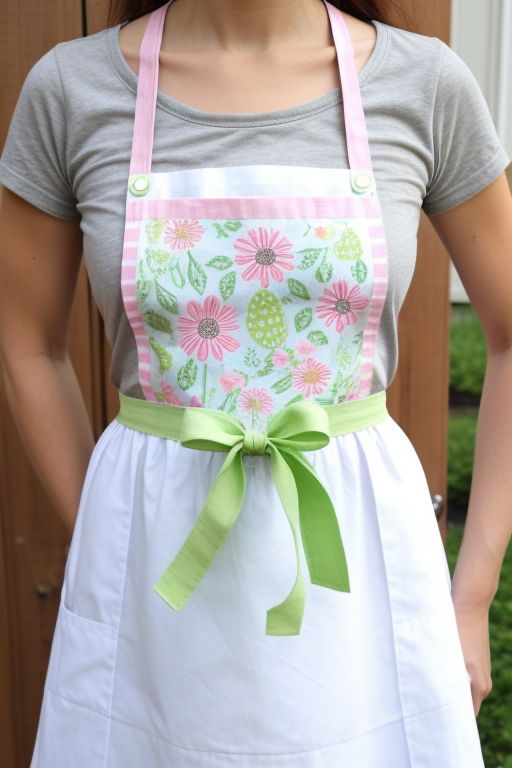
17. DIY Spring Apron
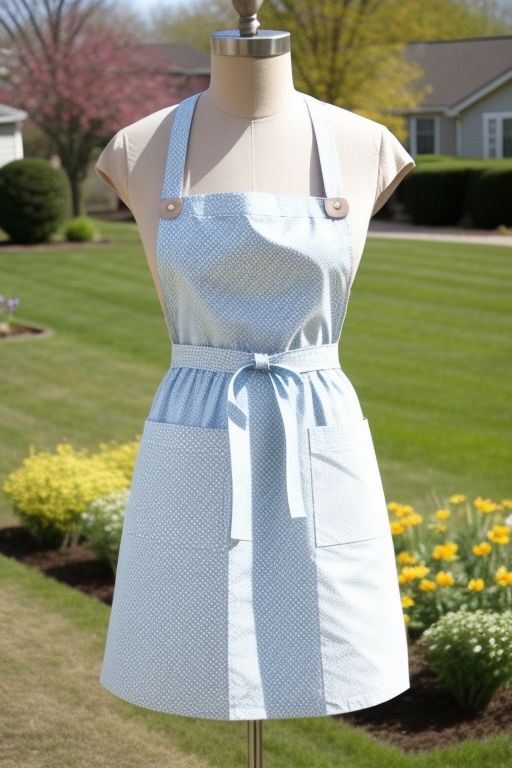
If you love spending time in the kitchen or gardening, a cute DIY spring apron is both practical and stylish. You can customize it with colors or patterns that scream spring, adding a personal touch to your workwear.
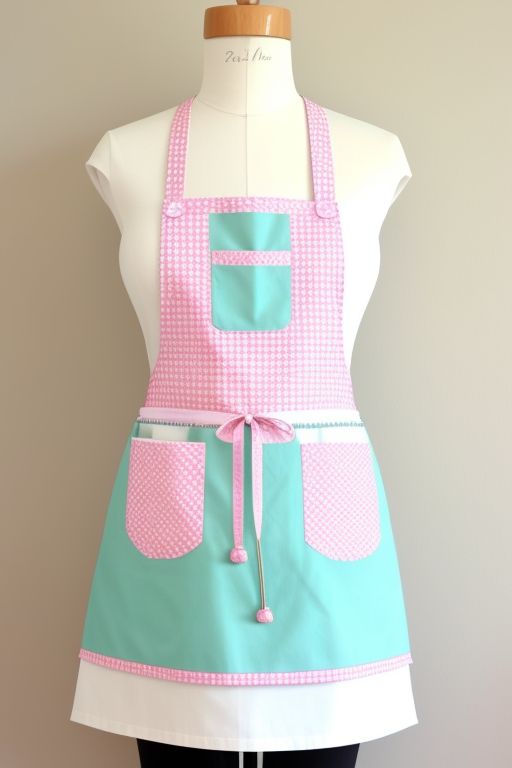
Materials:
- Fabric (floral prints, gingham, or solid spring colors)
- Sewing machine or needle and thread
- Ribbon or fabric for ties
- Scissors
Instructions:
Start by choosing your fabric—floral prints, gingham checks, or solid pastels are great options for spring. Cut the fabric into the desired apron shape, ensuring it’s large enough to cover your torso and tie around your waist. You can find simple apron patterns online if you need guidance.
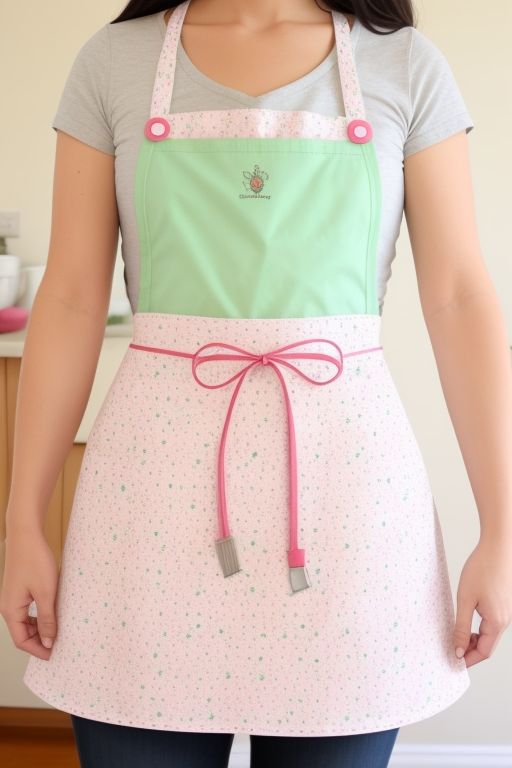
Sew the pieces together, attaching ribbons or fabric ties at the waist and neck. Add pockets for extra functionality, or decorate the apron with embroidery or fabric paint to make it truly one-of-a-kind.
18. Spring-Themed Cookie Cutters

If you’re a baker, spring-themed cookie cutters are a great way to bring the season’s beauty into your kitchen. Create cookies in fun shapes such as flowers, butterflies, birds, or bunnies, and decorate them with icing and sprinkles.

Materials:
- Spring-themed cookie cutters
- Sugar cookie dough
- Royal icing or colored frosting
- Sprinkles or edible glitter
Instructions:
Roll out your sugar cookie dough and use your spring-themed cookie cutters to cut shapes like daisies, butterflies, and tulips. Bake the cookies according to the recipe, then let them cool completely.

Once cooled, decorate with royal icing or colored frosting to bring the designs to life. Use sprinkles, edible glitter, or even edible flowers for extra springtime flair. These cookies are perfect for spring parties or as a sweet treat for your family.

19. DIY Spring Fleece Blankets

If you’re still experiencing chilly evenings during spring, a homemade fleece blanket will keep you cozy while adding a splash of color to your living room. This no-sew project is simple and enjoyable to create.

Materials:
- Fleece fabric (choose spring colors or patterns)
- Scissors
- Ruler
Instructions:
Start by cutting your fleece fabric into two equal pieces, each the size of the blanket you want to make. Place the two pieces together, with the printed sides facing outward. Use scissors to cut a fringe around the edges of both pieces.

Tie the fringes together using simple knots to join the two pieces. This process will give your blanket a cozy, textured edge. Once complete, you have a soft, stylish spring blanket to keep you warm on cool nights.

Conclusion
With these 19 DIY spring crafts for adults, you have everything you need to welcome the season with creativity and style. From home décor to personalized gifts, these projects are a great way to celebrate the beauty and renewal that spring brings. Whether you’re sprucing up your home, gardening, or enjoying a craft session with loved ones, these spring crafts are sure to add a fresh, fun twist to your season.
Happy crafting and enjoy the vibrant, blooming beauty of spring!