I Finally Figured Out How to Make a Large Living Room Feel Cozy
When we first moved in, I was obsessed with the size of our living room. The ceilings were vaulted. The windows were huge. Light poured in all day. It felt grand and impressive.
And yet… it didn’t feel good.
It echoed. Conversations sounded slightly hollow. At night it felt cold, even with lamps on. The furniture looked small and scattered, like it was politely staying out of each other’s way. I kept buying “one more thing” thinking that would fix it. A bigger coffee table. A new rug. Extra pillows. A console. Nothing solved the underlying problem.
What finally changed everything wasn’t buying better decor.
It was changing the order I made decisions in.
Instead of decorating first, I structured the room first. Walkways. Zones. Scale. Lighting. Then warmth.
Once I followed that sequence, my living room stopped feeling like a staged model home and started feeling like ours.
This is the exact process I used, from painter’s tape on the floor to the final cozy glow at night.
Supplies Quick Checklist
Before I touched the layout, I grabbed a few tools. Nothing glamorous, but absolutely necessary.
- Tape measure
- Painter’s tape
- My notes app for measurements
- Two to four lamps borrowed from other rooms
- Warm light bulbs (2700K–3000K is my comfort zone)
- Curtain clips to test height and length
- One oversized basket for random clutter
The painter’s tape alone changed the game. It let me test ideas without committing to anything permanent.
Zoning and Defining Separate Areas
The biggest mindset shift for me was realizing I didn’t have one giant room. I had multiple smaller areas pretending to be one.
Large spaces feel empty when they don’t have defined “jobs.” Once I gave different sections of the room a purpose, everything started making sense.
In our space, I defined:
- A main seating and TV zone
- A reading corner near the windows
- A subtle entry drop zone
- A small game table area that could flex when needed
The room didn’t need to be filled. It needed to be organized.
Step 1: Mark Walkways First
Before moving a single piece of furniture, I marked the main walkways with painter’s tape.
I measured and taped out:
- The path from the entry to the kitchen
- The route to the hallway
- The flow to the stairs
I aimed for at least 36 inches for main walkways. Once those lines were on the floor, I could clearly see where furniture could float without disrupting traffic.
This instantly stopped the “furniture guessing game” I’d been playing for months.
Step 2: Choose Zones by Function, Not Furniture
I stopped asking, “Where does the sofa go?” and started asking, “What needs to happen here?”
Each zone got three essentials:
- A boundary (usually a rug)
- A main anchor piece
- A light source
For the main seating area, I built everything around a 10×14 rug. Previously, I had a smaller rug that left furniture floating awkwardly around it. The bigger rug immediately created containment. The space felt intentional.
The reading corner got a chair, small rug, and a floor lamp. Suddenly it felt like a destination instead of an afterthought.
Step 3: Don’t Fear Floating Furniture
I used to push everything against walls because it felt safer. But in a large living room, that leaves a giant empty void in the center.
Once I pulled the sofa inward and placed it fully on the rug, the room felt grounded. I even added a console table behind it, which created a natural boundary between the seating zone and the walkway.
Floating furniture made the room feel designed instead of accidental.
Mini Layout Approaches That Worked for Me
Our room is a long open-concept rectangle, which meant I had to balance flow and function carefully.
Here’s what helped:
The “Room Within a Room” Setup
I positioned the main seating area closer to the focal wall rather than centered in the entire space. That allowed the rug and sectional to define their own contained area.
The console table behind the sofa softened the transition into the walkway and gave me a place for lamps and decorative objects.
Managing Multiple Focal Points
We have a fireplace and a TV, which created tension in layout planning.
Instead of fighting it, I treated the corner between them as the center of gravity. I angled seating slightly so it could serve both, without turning the room into a swivel-chair convention.
Balancing those two elements made the room feel cohesive instead of divided.
Oversized Lighting and Anchored Furniture
Lighting was the second major transformation.
For months, I relied on one overhead fixture. At night, the room felt flat and sterile. Large rooms amplify bad lighting.
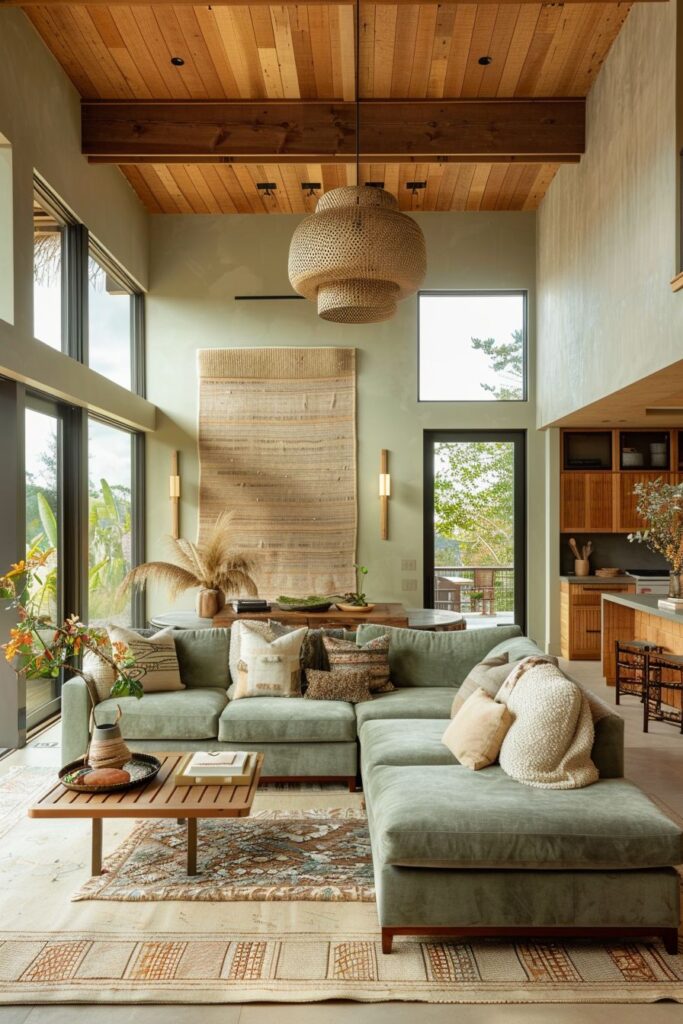
Step 1: Choose a Fixture That Matches the Scale
With vaulted ceilings, smaller fixtures looked lost.
I replaced ours with a larger pendant that visually connected to the seating group below. It felt proportionate. Big rooms need fixtures that hold their own.
Step 2: Layer the Lighting
In the main seating zone, I now use:
- Ambient lighting (overhead fixture)
- Task lighting (two table lamps)
- Accent lighting (a console lamp and candle glow)
I keep bulbs between 2700K and 3000K for warmth. Switching to warm bulbs alone made evenings feel dramatically cozier.
Adding dimmers allowed me to adjust mood throughout the day.
Step 3: Anchor Furniture Properly
I committed to a few rules:
- Front legs of sofas and chairs sit on the rug
- Coffee table stays 14–18 inches from the sofa
- Walkways stay clear without cutting through the seating group
Once I grouped furniture tightly enough to feel conversational, the room stopped looking like a showroom.
Balancing Scale with Textures and Layers
Large rooms exaggerate proportion mistakes.
Too many small pieces feel scattered. Oversized everything feels overwhelming.
The formula that worked for me was:
Big + Medium + Small.
- Big: Large sectional
- Medium: Pair of substantial chairs and a solid coffee table
- Small: Side tables and movable stools
Mixing sizes prevented the room from feeling monotonous.
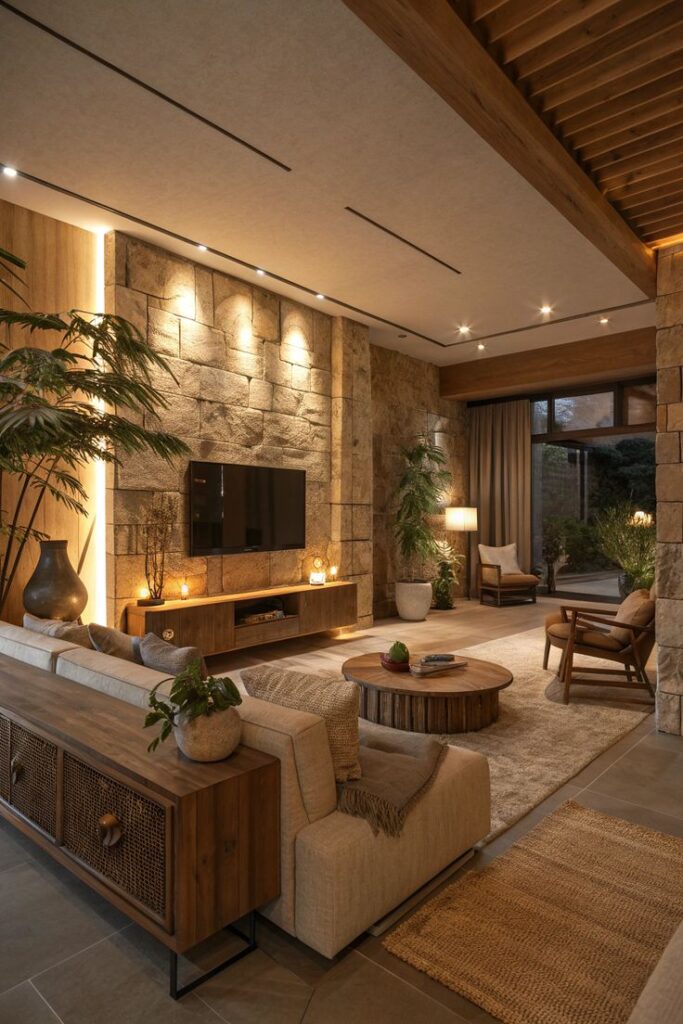
Then I focused on texture.
Instead of buying more decor, I layered materials:
- Linen upholstery
- Warm wood
- Chunky woven rug
- Knit throws
- Subtle metal accents
Repeating one material (wood tone) across zones tied everything together.
Texture added warmth without clutter.
Creating Warmth in Big Open Spaces
Brightness does not equal coziness.
Even with natural light, the room felt cold at night until I addressed softness.
Here’s what made the biggest difference:
Full-Length Curtains
I hung curtains high and wide, nearly ceiling height. They visually stretched the walls and softened the entire room.
Short curtains would have emphasized emptiness. Tall curtains created intimacy.
Proper Rug Size
Switching to a 10×14 rug eliminated the “postage stamp” effect.
The rug now fully contains the seating group, which grounds the entire zone.
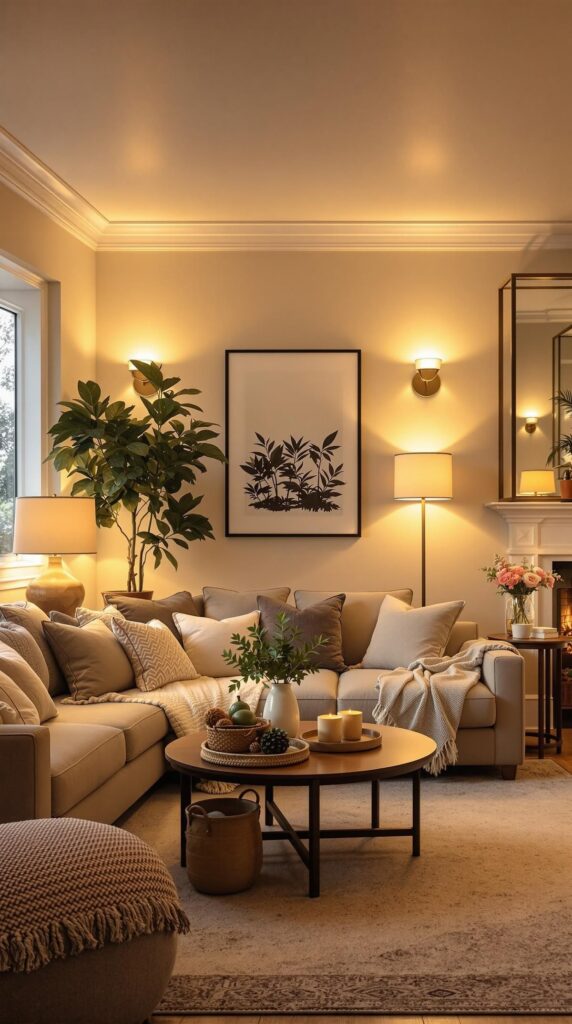
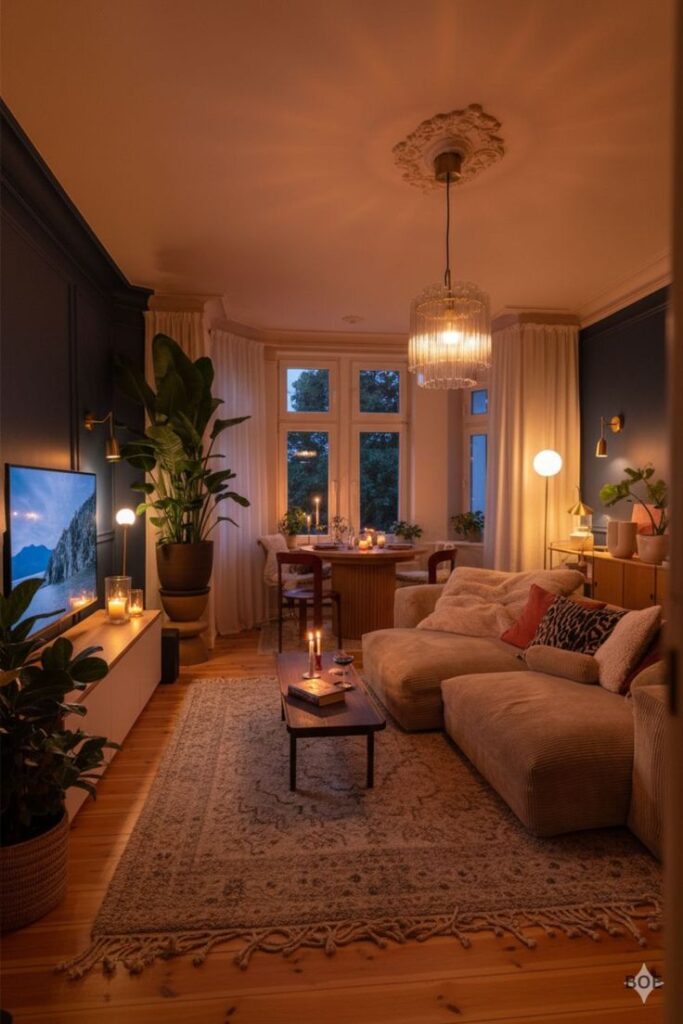
Layered Evening Lighting
Warm bulbs and multiple light sources transformed the nighttime mood.
The room no longer felt like a cavern after sunset.
Closed Storage
I added a media cabinet with doors and a large woven basket for throw blankets. Hiding visual clutter immediately made the room feel calmer.
Mistakes I Made (So You Don’t Have To)
- Using a rug that was too small
- Relying on one overhead light
- Pushing furniture against walls
- Choosing art that was too small for tall walls
- Adding too many small decorative items
Correcting just two of those mistakes made a noticeable difference.
Budget Priorities That Actually Matter
If I were starting over, I’d invest in this order:
- Correct rug size
- Layered lighting
- Appropriately scaled sofa
- Curtains
- Closed storage
Accessories come last.
Structure first, styling second.
What I’d Do Differently in Specific Situations
If You Have Vaulted Ceilings
Add one strong vertical element besides the ceiling. Tall curtains, oversized art, or a tall plant prevent the room from feeling bottom-heavy.
If Your Living Room Is Open to the Kitchen
Use the back of the sofa as a soft divider. A console table creates separation without blocking light or flow.
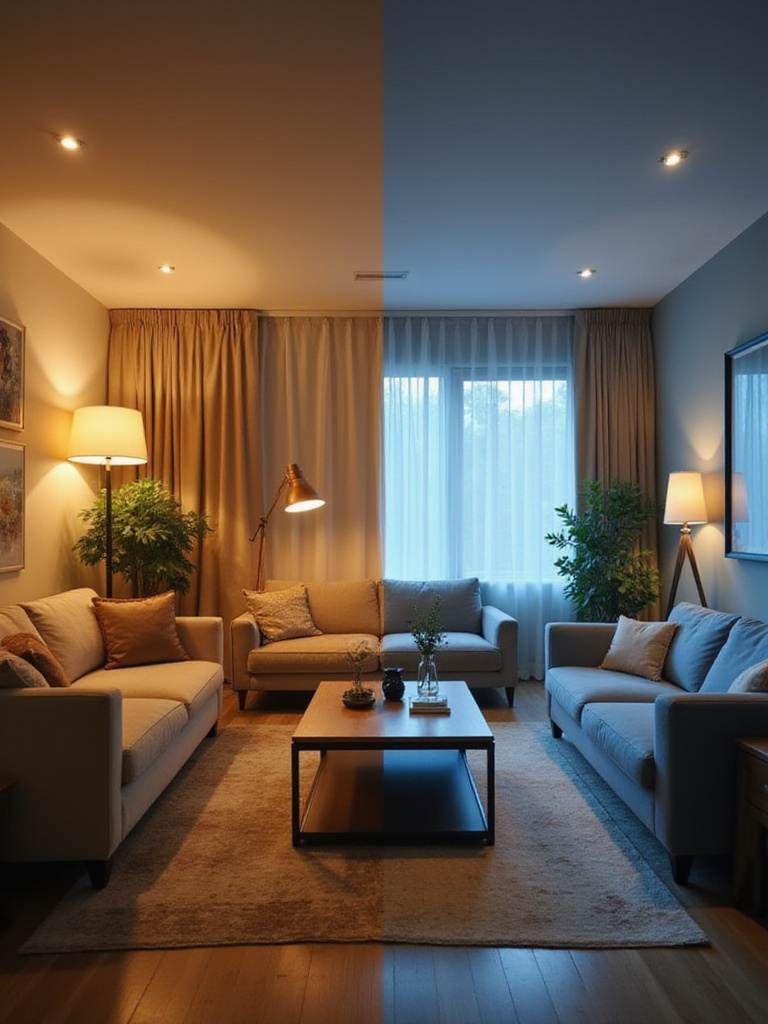
If You Have Large Windows
Balance natural light with nighttime layers. A room shouldn’t feel like two completely different spaces depending on the hour.
The Gentle Ending
Decorating a large living room isn’t about having better taste. It’s about making confident structural decisions.
Once I zoned the space, anchored it with the right rug, layered lighting properly, and introduced warmth through texture and scale, everything changed.
The room stopped feeling intimidating. It started feeling lived in.
If you take one thing from my experience, let it be this:
Change something structural before you buy another small accessory.
Commit to the layout. Anchor with scale. Layer your lighting. Then soften it.
That’s how a big, echo-y room becomes a cozy, intentional home.
FAQs
How Do I Decorate a Large Living Room Without It Feeling Empty?
Start by zoning the space into functional areas. Anchor each zone with a properly sized rug and at least one light source. Avoid pushing furniture against walls, and focus on layering lighting to prevent a cold atmosphere.
What Size Rug Should I Use in a Large Living Room?
Large seating groups often require 10×14 or 12×15 rugs. The rug should allow front legs of sofas and chairs to sit on it, creating a contained look.
How Many Lamps Should a Large Living Room Have?
At least two lamps in the main seating area plus one in a secondary zone. Large rooms need layered lighting to feel warm and balanced.
What Is the Fastest Way to Make a Big Living Room Feel Cozy?
Upgrade to warm bulbs (2700K–3000K) and add a correctly sized rug. Those two changes alone can dramatically shift the atmosphere.