How to Decorate a Balcony With Plants (My Mini Garden Blueprint for Small Spaces)
I didn’t start a balcony garden because I’m naturally organized or effortlessly “green thumb.” I started because I was tired of looking at an empty outdoor space that felt pointless. Like, why do I have a balcony if I never step outside?
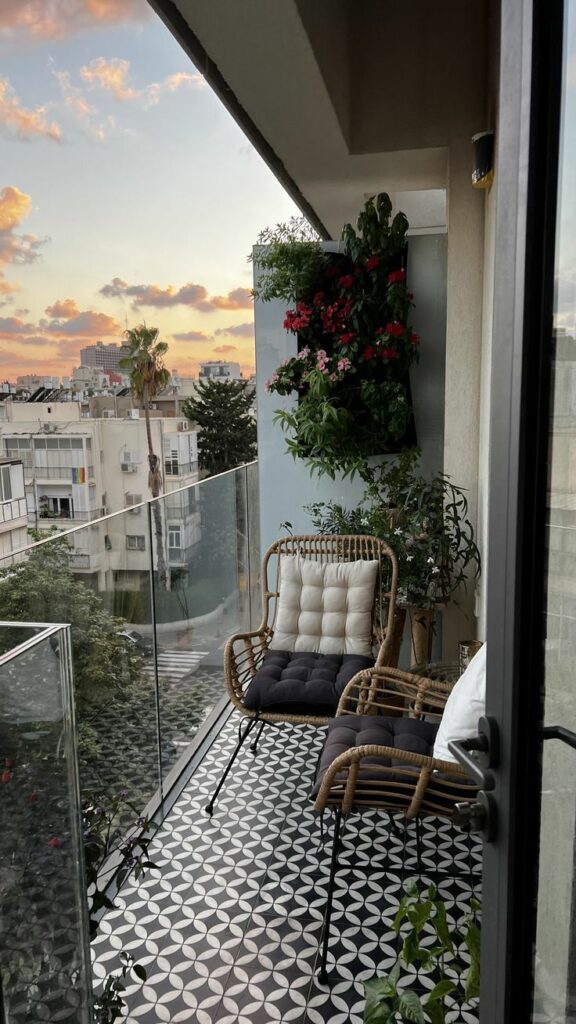
Once I added plants, everything changed. The air felt softer. The view felt nicer. I started opening the door more often. It wasn’t a huge transformation, but it made my home feel more lived in.
This is the exact system I used to decorate my balcony with plants so it looked styled, not crowded, and stayed easy to maintain. I’m keeping it realistic for small spaces, renters, wind, messy watering, and that one pot you always forget exists.
My Quick Blueprint (What I Actually Follow)
I use a simple formula that keeps me from buying random plants and turning my balcony into chaos.
4 Zones + 3 Layers + Thriller / Filler / Spiller
- 4 Zones: railing, wall, floor, overhead
- 3 Layers: tall, medium, trailing
- Thriller / Filler / Spiller: one star, one fullness plant, one draping plant
When I follow that, my balcony looks intentional even if the plants are basic.
Before Anything: My 60 Second Balcony Microclimate Check
I used to buy plants based on vibes. I would see something cute at the store and convince myself it could “handle my balcony.” Then it would crisp up in five days and I’d feel personally attacked.
Now I do this quick check first:
1) Light check
I look at my balcony in three moments:
- Morning
- Midday
- Late afternoon
Then I call it:
- Full sun: 6+ hours of direct sun
- Part shade: 3–6 hours, or filtered light
- Shade: bright but no real direct sun
2) Wind check
Wind is the silent bully. It snaps stems, dries soil fast, and turns hanging baskets into swinging weapons.
If it’s windy, I plan:
- heavier pots on the floor
- fewer tall, floppy plants
- more compact, sturdy shapes
3) Heat reflection check
Concrete, brick, and glass can cook plants. My balcony gets hotter than the weather forecast says, so I avoid small black plastic pots in direct sun. They heat up fast and stress roots.
4) Building safety check
I keep heavier pots near the wall, not on the rail edge. And if I use rail planters, I secure them properly and keep weight spread out.
That’s my whole “map.” It takes one minute and saves me money.
Step 1: I picked one main goal, so it looked intentional.
If I try to do privacy, herbs, flowers, and jungle vibes all at once, my balcony looks messy fast. So I pick one main goal first.
Here are the goals I’ve used and how they change the plant choices:
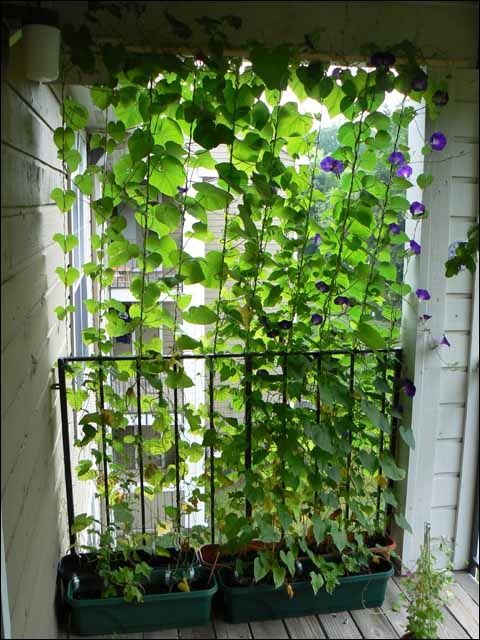
Privacy
When privacy is the priority, height and layering matter more than quantity. I focus on taller plants, climbing varieties, and staggered heights so the balcony feels tucked in rather than exposed. Trellises, rail planters with upright growers, and one or two-floor planters create a visual wall without blocking light. The goal is not to fill every inch, but to create enough vertical coverage that the space feels sheltered and intentional.
Edibles
For edible plants, I keep the setup simple and practical. I use a rail-mounted herb bar for everyday essentials like basil, mint, or parsley, and then add a larger container for a single, productive plant, such as tomatoes, peppers, or leafy greens. Limiting it to one main crop prevents crowding and makes maintenance manageable while still giving that satisfying grow your own feeling.
Flowers
With flowers, longevity and cohesion matter most. I choose plants that bloom for a long stretch instead of short bursts, and I repeat the same color palette across containers. Repeating colors makes the balcony feel designed rather than accidental, and it keeps the space calm instead of busy. Fewer varieties with stronger impact almost always look better than many different flowers competing for attention.
Low Fuss Greenery
When I want the easiest option, I go foliage heavy. Leafy plants give texture, depth, and color without constant deadheading or watering stress. Fewer blooms mean fewer maintenance tasks, and the balcony stays attractive even when life gets busy. This approach works especially well in hot or windy locations where flowering plants struggle.
If you only take one thing from this guide, let it be this: choose your goal first. Whether it is privacy, food, color, or low maintenance, having a clear purpose stops the random plant yard sale effect and turns your balcony into a space that feels planned and enjoyable to use.
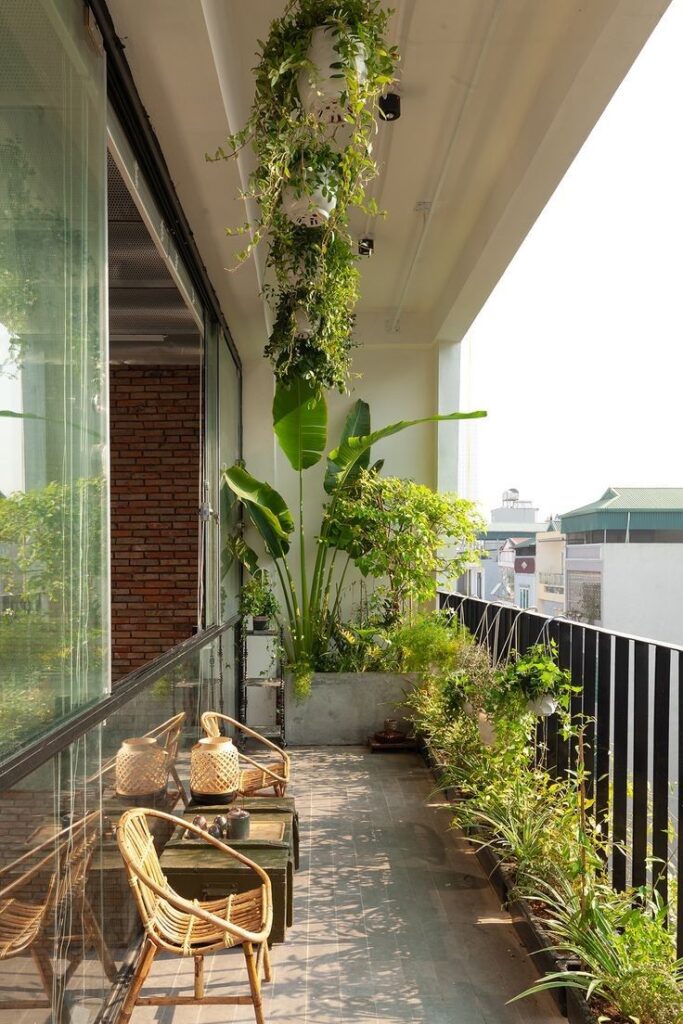
Step 2: I Set a Walkway Rule So the Balcony Stayed Usable
My balcony is small enough that if I put pots everywhere, I start doing that sideways crab walk. So I made one rule:
I leave a clear walkway strip. Always.
I literally used painter’s tape the first time to mark my “walking lane.” It helped me stop overfilling the space.
If your balcony is very narrow, you may only have room for plants on one side. That’s fine. It actually looks cleaner.
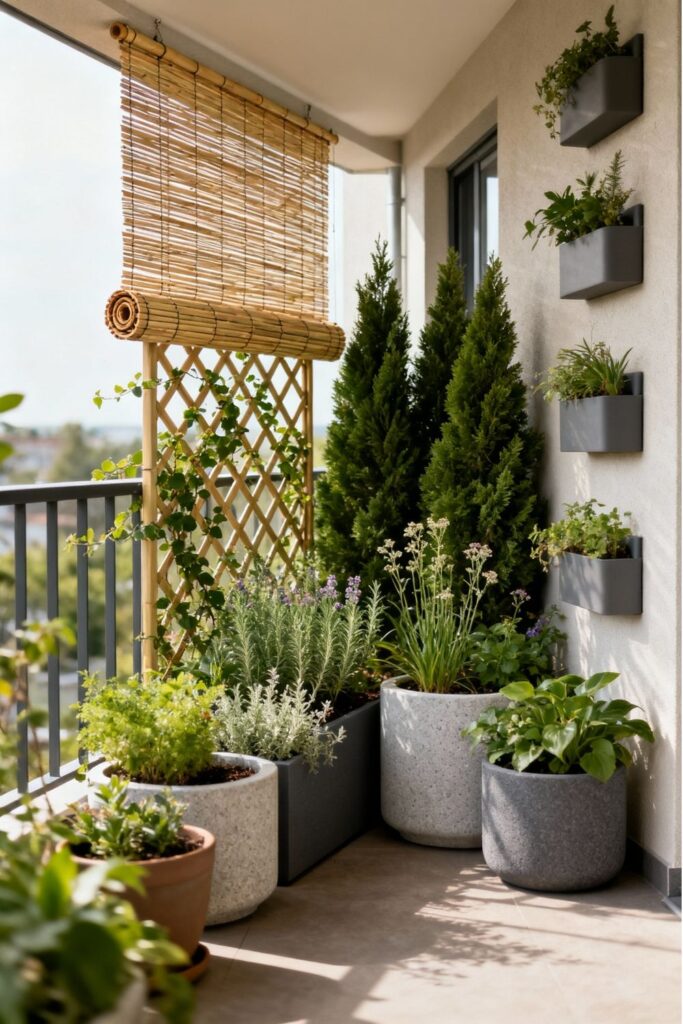
Step 3: I Built My Balcony Using the 4 Zones
This is what makes the balcony feel full without feeling crowded.
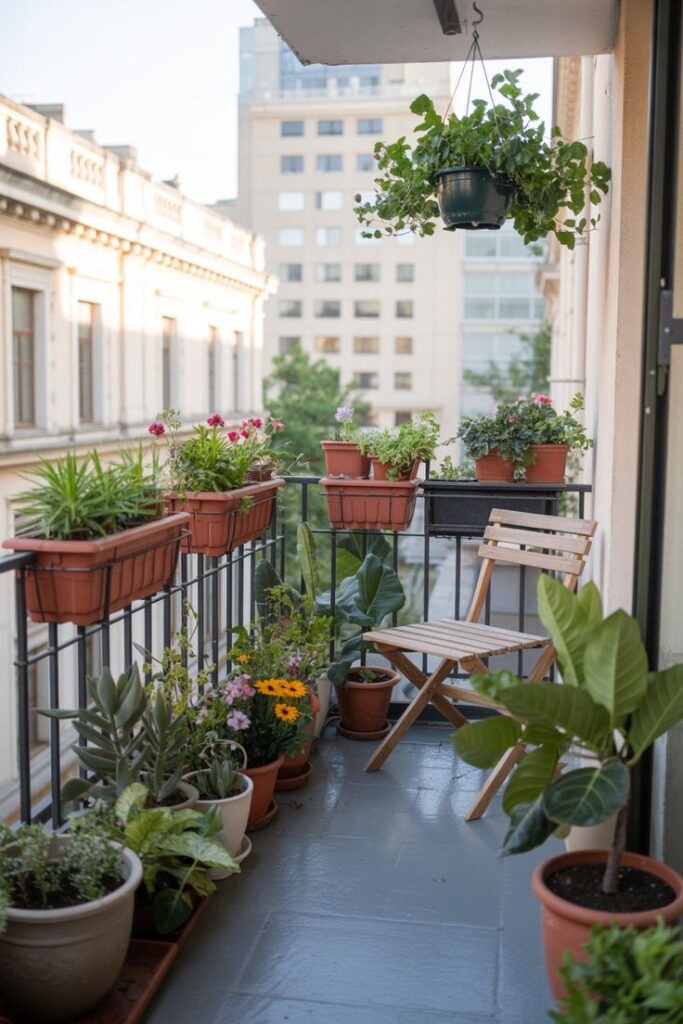
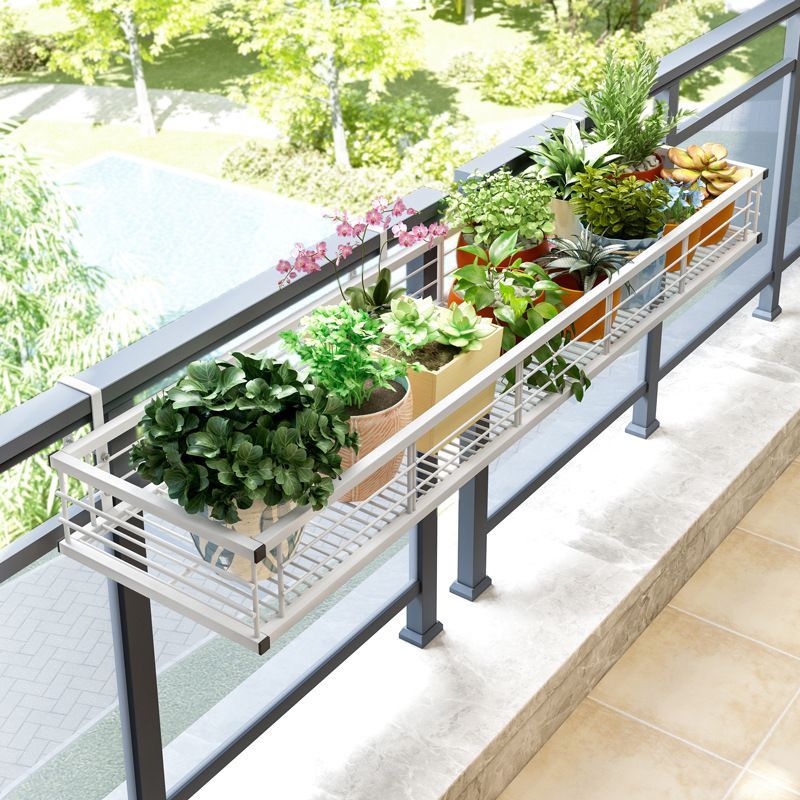
Zone 1: Railing zone (my favorite)
This is where I put things I use or see up close:
- herbs
- small bloomers
- trailing plants
Railing planters give me greenery without stealing floor space, which is gold on a small balcony.
Zone 2: Wall zone
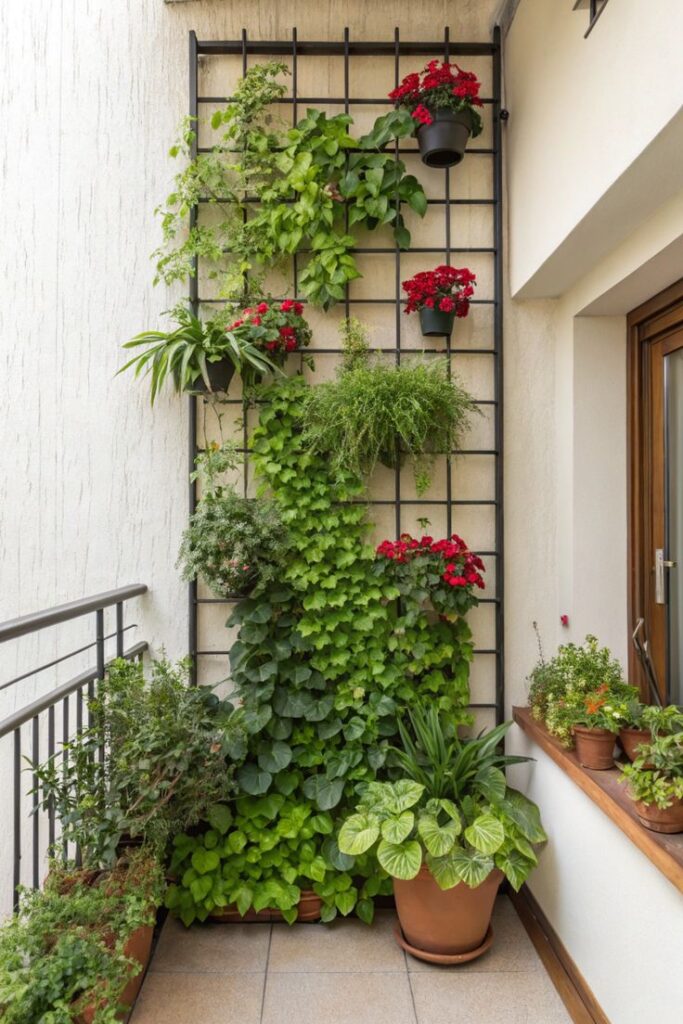
This is how I add height and style without clutter:
- trellis panel
- ladder shelf
- grid panel for climbers
Even renters can do this with freestanding pieces and clamp systems.
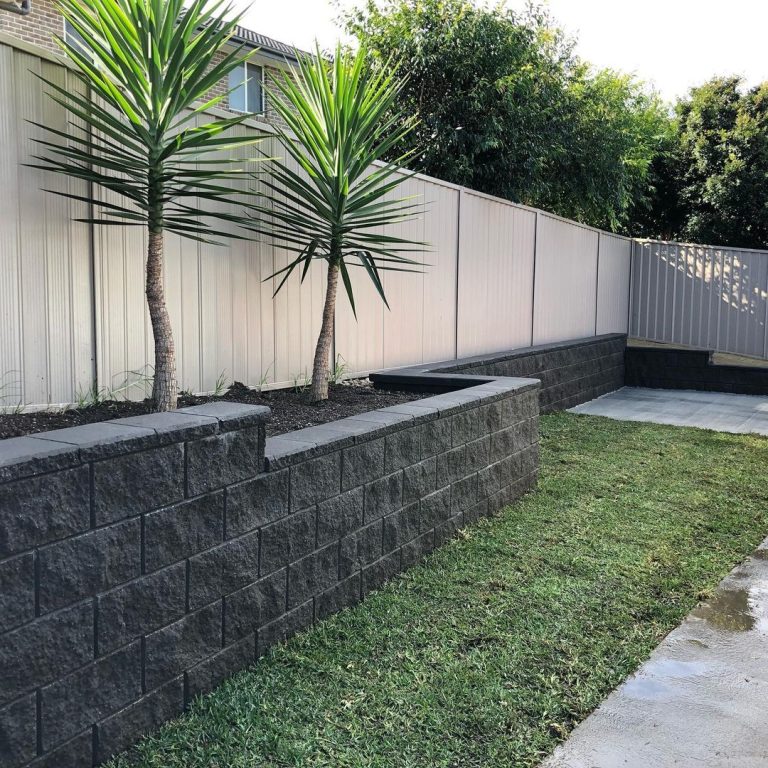
Zone 3: Floor zone
This is where I place the heavy, grounding stuff:
- one anchor pot
- a corner planter
- bigger containers for veggies
- anything that needs stability in wind
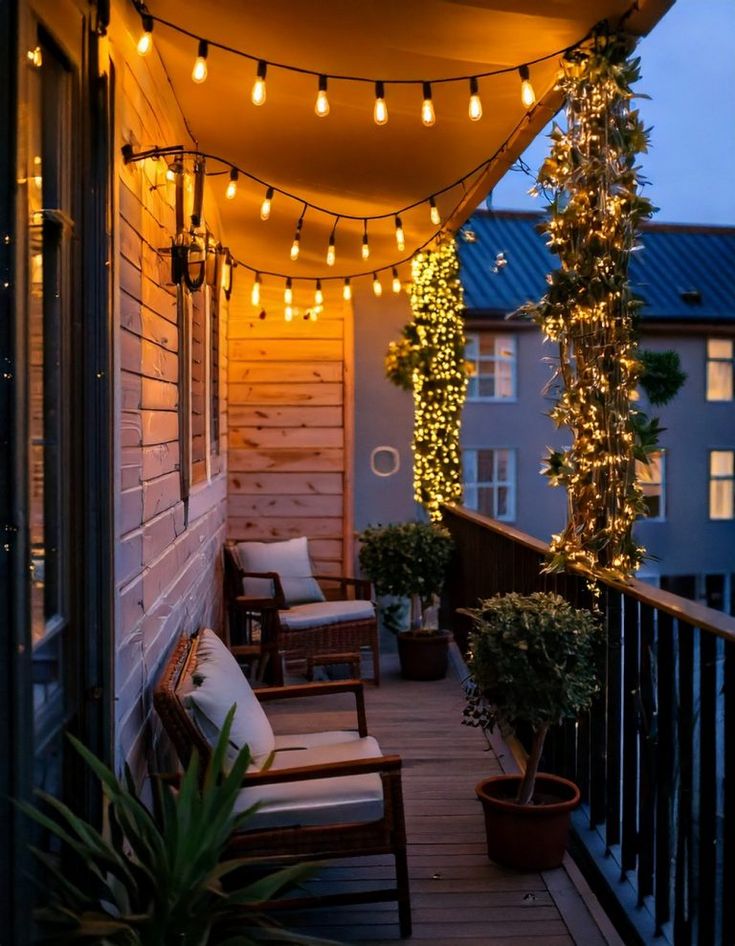
Zone 4: Overhead zone (optional and only if drip control is solid)
I only do overhead planters if:
- they’re light
- they don’t drip
- they are secured properly
If your balcony is windy, overhead planters can become annoying fast.
Step 4: I Used the 3 Layers So It Looked Styled
This is the part that makes it look “done.”
Back layer: Tall

This creates privacy and that mini room feeling.
Examples I’ve used:
- trellis climber
- taller grass
- upright rosemary
- compact shrub
Middle layer: Medium and full
This is the main body of the garden.
Examples:
- flowering annuals
- leafy greens
- bushy herbs
Front edge: Trailing
This softens hard lines and makes it look more expensive.
Examples:
- trailing nasturtium
- ivy or similar draping plants
- sweet potato vine
- trailing flowers
When I skip trailing plants, the balcony looks harsher. When I add one spiller, it instantly feels softer.
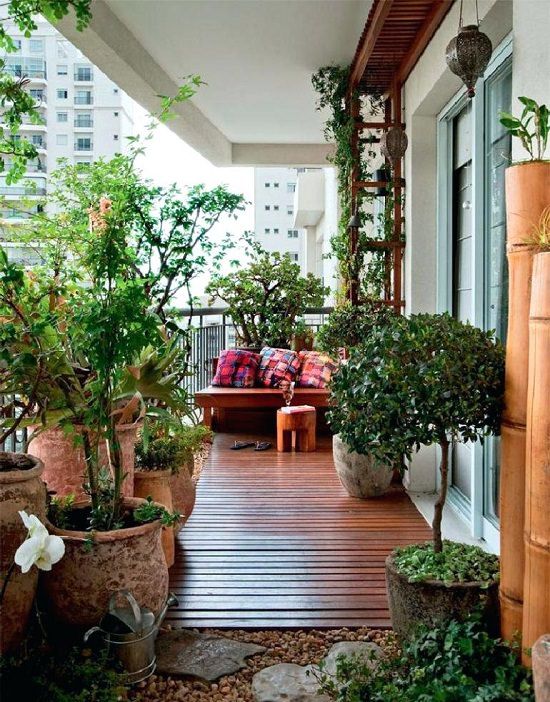
Step 5: The One Thing That Made My Balcony Look “Designed”
I added one big anchor pot.
Not a tiny pot. A real anchor.
I used to buy lots of small containers because they felt easier. But small pots dry out faster and look busier.
A bigger anchor pot:
- makes the balcony feel grounded
- holds moisture longer
- looks intentional even if the plant is simple
My anchor pot usually goes:
- in the far corner
- near the side I want privacy
- close to the wall for stability
That one move pulled everything together.
Step 6: Containers I Actually Like for Balcony Gardening
Containers aren’t just decor. They’re drainage, mess control, and plant health.
What I use most
- lightweight resin or fiberglass pots
- Fabric grow bags for edibles
- supported window boxes for rail herbs
- self-watering inserts for my thirstiest plants
What I avoid now
- no drainage holes
- tiny pots for thirsty plants
- containers that drip onto neighbors
- top-heavy planters on the rail edge
Every pot gets a drip tray. Even the “temporary” ones. I learned that the hard way.
My watering method that prevents mess
I water in two passes:
- water halfway, wait a minute
- water again until it drains
It soaks in better and reduces runoff.
Step 7: The Plant Picks That Worked Best on My Balcony
Instead of listing a million plants, here’s how I choose based on light.
If Your Balcony Gets Full Sun

When a balcony gets strong, direct sun for most of the day, plant choice matters a lot. I go for tougher plants that can handle heat without wilting or frying by midday. Mediterranean herbs like rosemary, thyme, and oregano thrive in these conditions and actually prefer sun and slightly drier soil. Heat tolerant flowers such as geraniums hold up well and keep blooming instead of giving up halfway through summer.
If I am feeling ambitious, I add one edible in a larger pot, something like tomatoes or peppers. I keep it to one main plant so it does not overwhelm the space. Full sun also means I always size pots up. Small containers dry out fast, and constant watering gets old quickly. Bigger pots hold moisture longer and keep plants healthier.
If Your Balcony Is Part Shade
Part shade is the easiest light level to work with. It gives you flexibility without the stress of extreme heat or deep shade. In this light, I can grow a wide mix without babysitting the plants.
Herbs do well, leafy greens stay tender, and colorful foliage plants hold their color without scorching. Many flowering plants bloom happily in part shade and last longer because they are not baking all day. This is the light level where you can mix function and beauty without much effort.
If Your Balcony Is Mostly Shade
For shaded balconies, I lean heavily into foliage and texture instead of chasing flowers. Lush green plants, layered leaves, and different shapes create a rich look without fighting the light.
I use fewer flowering plants and focus on fewer pots overall, but choose larger containers. Bigger containers look more intentional and keep the space from feeling cluttered. Shade balconies can actually look very polished and expensive when they are mostly green and thoughtfully layered.
If Your Balcony Is Windy
Wind changes everything, even on sunny balconies. When wind is a factor, I choose compact plants with sturdy stems that can handle movement without snapping or drying out.
Heavier base containers are essential so nothing tips over. I also keep taller plants closer to the wall or railing for protection. Let the structure of the building do some of the work, and the balcony stays calmer and easier to manage.
My Favorite Copy This Balcony Planting Recipes
These are the combinations I reach for when I want a balcony to look finished quickly, without overthinking plant choices or maintenance. Each recipe follows the same simple structure: one strong vertical plant, a supporting middle layer, and something that softens the edge by trailing over the pot.
You can copy these exactly or use them as templates and swap plants based on what is available locally.
Recipe 1: Full Sun Cheerful Pot
This one is bright, sturdy, and hard to mess up. It works best for balconies that get strong sun most of the day.
Thriller: Upright rosemary
Rosemary gives height, structure, and a slightly architectural feel. It also loves sun and heat, which makes it reliable.
Filler: Geraniums
Geraniums add color without being fragile. They bloom consistently and do not mind drying out a little between watering.
Spiller: Trailing nasturtium
Nasturtiums soften the edge of the pot and add a relaxed, cheerful look. They also handle sun well and give a slightly wild, cottage-style finish.
This combo feels happy and intentional without looking fussy, and it holds up well through hot weather.
Recipe 2: Shade Lush Pot
This is my go-to recipe when a balcony feels cool, shaded, or enclosed and needs softness.
Thriller: Taller fern
A fern gives instant lushness and height without needing flowers. It sets the tone for a calm, green look.
Filler: Heuchera
Heuchera adds color through foliage rather than blooms. The leaves bring contrast and interest even in low light.
Spiller: Trailing ivy style plant
An ivy or similar trailing plant drapes over the edge and makes the container feel full and layered.
This recipe makes a shade balcony feel intentional and high-end, especially when repeated in similar containers.
Recipe 3: Wind-Friendly Low-Fuss Pot
This one is all about durability. It works well on exposed balconies where wind is a constant factor.
Thriller: Compact shrub or hardy upright plant
Choose something sturdy with a strong stem that will not flop or snap easily. Compact is better than tall here.
Filler: Sedum
Sedum is tough, drought-tolerant, and does not mind wind. It fills space without demanding attention.
Spiller: Trailing stonecrop
Stonecrop trails gently without being fragile, adding softness without catching too much wind.
This combination stays neat, survives rough conditions, and rarely needs intervention.
Recipe 4: Herb Bar Rail Box
This is one of the fastest ways to make a balcony feel alive and useful.
Thriller: Rosemary or chives
These add height and structure while staying practical for cooking.
Filler: Parsley and basil
They fill the middle of the rail box and give you everyday herbs within reach.
Spiller: Trailing oregano
Oregano spills naturally over the edge and softens the box visually while still being edible.
One rail box planted like this already changes the entire feel of a balcony. It adds greenery, movement, and purpose without taking up floor space, and it works in both sun and part shade depending on placement.
If you repeat even one of these recipes across your balcony, the space starts to feel designed instead of random.
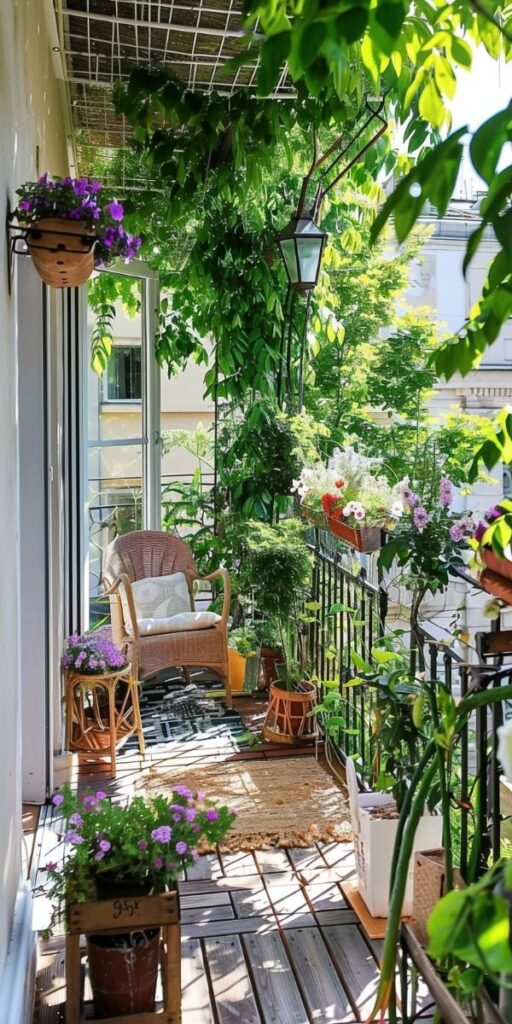
Step 8: How I Made Plant Privacy Feel Cozy, Not Like a Wall
I don’t try to block everything. I just soften the view.
My easiest privacy setup is:
- one taller floor pot near the open corner
- one trellis or upright plant near the railing
- trailing plants to soften edges
I like layered coverage because it still lets air move. Dense plant walls can look great, but they can also trap humidity and make things feel sticky in summer.
The 5 Minute Weekly Reset That Keeps My Balcony Garden Looking Good
This is how I keep it cute without turning it into a second job.
Once a week, I do:
- check soil moisture
- deadhead any sad blooms
- snip herbs
- rotate one pot for even growth
- wipe dusty leaves
- sweep spilled soil
That’s it. Five minutes.
The balcony stays tidy and I don’t get that overwhelmed feeling where everything is “fine” but somehow looks messy.
FAQ
How Do You Arrange Plants on a Balcony Without It Looking Cluttered?
I group plants by zones instead of scattering pots everywhere. I start with vertical space, then add one anchor pot on the floor, then layer in medium plants and one trailing plant. I always leave a clear walkway strip so it stays usable. The balcony looks fuller when plants are grouped into scenes, not spread out as singles.
What Is the Best Way to Create Balcony Privacy With Plants?
I use layered height instead of a solid wall. One tall plant or trellis in a floor pot creates the main screen, then I add medium plants around it, then a trailing plant to soften edges. It feels cozy but still breathable, which matters for airflow and plant health. If I need more coverage, I add a second tall element rather than more small pots.
How Do You Stop Water From Dripping Onto Neighbors Below?
Every pot gets a tray, and I water slowly in two passes so the soil absorbs more before it drains. I avoid overfilling saucers and I empty standing water after 20 to 30 minutes if needed. If I am watering rail planters, I use long trays designed for window boxes and I keep the watering light and controlled.
What Plants Are Easiest for a Balcony Mini Garden?
Herbs are the easiest starter because they are useful and forgiving when they match your light. In full sun, rosemary and thyme are sturdy. In part shade, basil and parsley do well. For a low fuss green look, foliage plants that match shade conditions are easier than chasing constant blooms. Bigger pots also make any plant easier to maintain.
How Many Plants Do You Actually Need for a Small Balcony?
Less than you think. I get the best look using fewer, larger pots instead of lots of tiny ones. One anchor pot, one or two rail boxes, and one trailing plant can already look styled. Once that base is working, I add one extra container at a time so I do not crowd the walkway or overload the balcony with weight.
Conclusion
When I wanted to decorate my balcony with plants, the biggest difference was stopping the random buying and using a simple blueprint. I mapped my light, picked one goal, left a walkway, then built the balcony with zones and layers. Once I added one anchor pot and one trailing plant, the whole space started looking intentional.
If you know someone with a tiny balcony who keeps saying “I should do something with this space,” share this with them. A mini balcony garden is one of the fastest upgrades that makes a home feel calmer and more alive.