If your windows feel a little flat or lifeless, adding something that interacts with natural light can make a noticeable difference. A well-made sun catcher has the ability to shift the atmosphere of a room without requiring a full redesign.
Sun catchers are often overlooked because many versions end up cloudy, dull, or purely decorative. Without the right materials or placement, they hang quietly in the background instead of actually working with sunlight. The key is understanding how transparency, shape, and positioning affect how light moves through your space.
A thoughtful DIY approach allows you to control both the look and the performance. Choosing glass, resin, crystal, or translucent elements can help you create pieces that cast subtle reflections or vibrant rainbows depending on your style. Even small adjustments like hanging height or window direction can dramatically change the result.
There are many ways to approach the design. Some styles lean minimal and modern, while others feel playful, colorful, or inspired by nature. Each method offers a different relationship with light throughout the day.
The Magic of DIY Sun Catchers
Windows are one of the most underused design features in a home. By adding a handmade sun catcher, you turn plain glass into something dynamic and ever-changing. As sunlight shifts, so does the mood of the room.
The real benefit of a DIY sun catcher is control. You can decide how bold or subtle you want the effect to be. Whether it is a crystal piece that casts rainbows across the walls or a pressed-flower design that glows softly in the afternoon light, these projects blend visual appeal with function.
Many of these ideas are beginner-friendly and require minimal tools. With a few affordable materials and a little creativity, you can create something that feels intentional rather than cluttered. Once you see how beautifully light transforms your space, you may start looking at every window as an opportunity.
Can Beginners Handle DIY Sun Catchers?
Absolutely. Most projects in this collection rely on simple techniques like layering translucent materials, working with basic craft tools, or assembling pre-cut glass or acrylic pieces.
Some of the easiest styles to start with include resin frames with dried flowers, bead-and-crystal strands, tissue paper mosaic designs, and geometric acrylic shapes. These allow you to experiment with light without complicated processes.
23 Inspiring DIY Sun Catcher Ideas
Check out this curated list of creative designs and light-catching setups for your next handmade project.
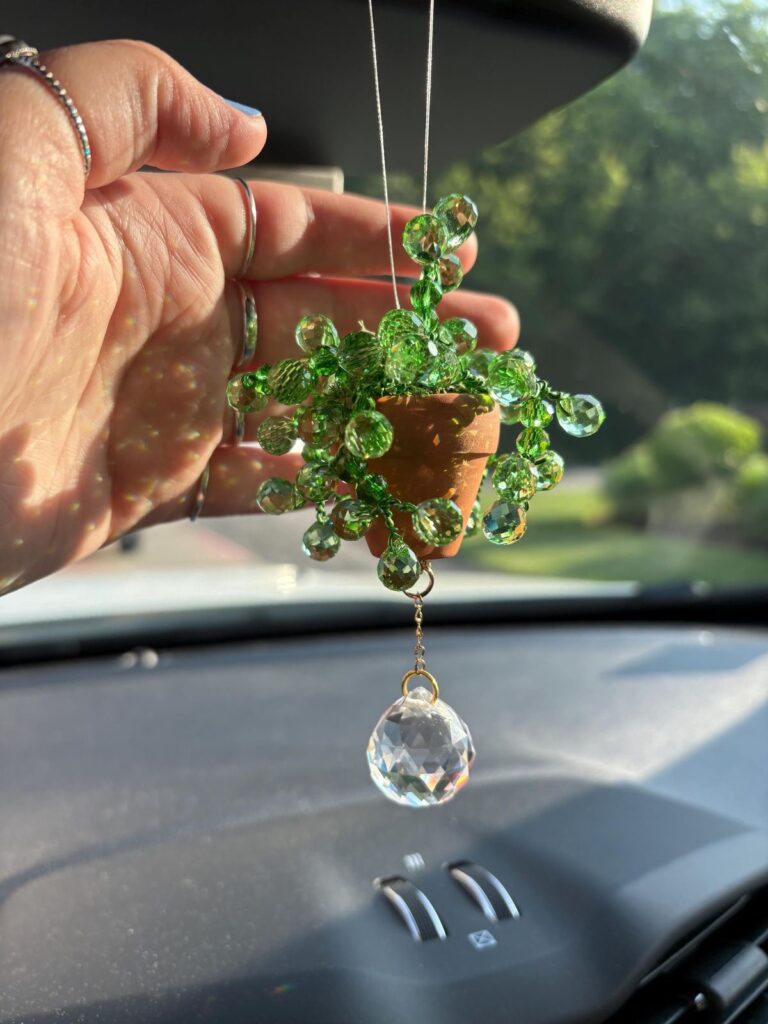
1. Crystal Sun Catcher with Beads
You know that rainbow sparkle you see on the wall sometimes and you instantly stare at it like a cat? That’s what a crystal-and-bead sun catcher does on purpose. It’s classic, it’s pretty, and it’s hard to mess up, which I love.
Quick Notes: Beginner-friendly: Yes | Time: 20 to 45 minutes | Cost: Low to medium
Materials Needed:
- Colorful beads (transparent beads look extra glowy)
- Fishing line, jewelry wire, or strong thread
- Metal ring or small hoop
- One crystal prism (optional but gives the best rainbow scatter)
- Scissors and a lighter or glue (to seal knots)
How to Make It:
Cut a few strands of fishing line and start threading beads in whatever pattern makes you happy. You can go organized (same colors repeating) or go chaos mode and mix everything. Tie each strand onto the metal ring, spacing them evenly so it looks balanced. If you’re adding a crystal prism, hang it from the center strand so it catches the most light. Make a small loop at the top for hanging, then test it in a sunny window and adjust the strand lengths if you want more movement.
2. Pressed Flower Sun Catcher
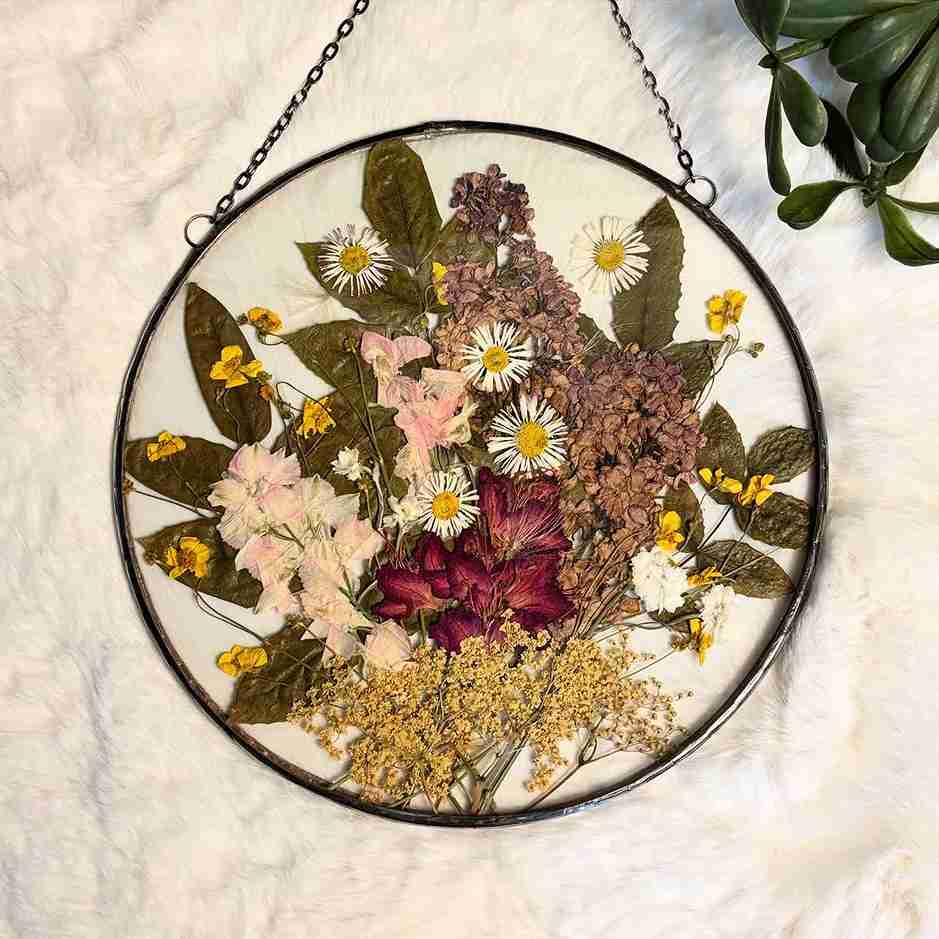
This one feels like bottling up a sweet little moment from a walk outside. If you’ve ever picked a tiny flower and didn’t want it to disappear in two days, this is the craft for that feeling.
Quick Notes: Beginner-friendly: Yes | Time: 15 minutes (plus flower pressing time) | Cost: Low
Materials Needed:
- Pressed flowers or leaves
- Clear contact paper or laminating sheets
- Scissors
- Hole punch
- String or ribbon
How to Make It:
Press flowers by placing them between parchment paper inside a heavy book for a few days. Once they’re flat and dry, peel one sheet of contact paper, place your flowers in a little “layout” (don’t over-pack it), then seal with another sheet. Trim into a circle, oval, or simple rectangle. Punch a hole at the top and add string. Hang it where it gets morning sun if you want that soft, dreamy glow.
3. Mosaic Glass Sun Catcher
If you want the “wow” factor without buying something expensive, mosaic is that girl. It takes a bit more patience, but the payoff is wild when the light hits those little pieces.
Quick Notes: Beginner-friendly: Intermediate | Time: 1 to 2 hours (plus drying time) | Cost: Medium
Materials Needed:
- Small glass tiles or pre-tumbled sea glass
- Strong adhesive (glass-safe)
- Grout
- Base surface (clear acrylic, a glass frame, or a small tray)
- Gloves and optional safety glasses
How to Make It:
Lay out your design first without glue. Once it looks right, glue each piece down and let it cure fully. Then press grout into the gaps and wipe the surface clean with a damp cloth. When it dries, polish it with a dry cloth so the glass shines. Add a hanging loop using strong wire or a frame hook. Hang it up and watch it throw tiny jewel-toned reflections around your room.
4. Hanging Shell Sun Catcher
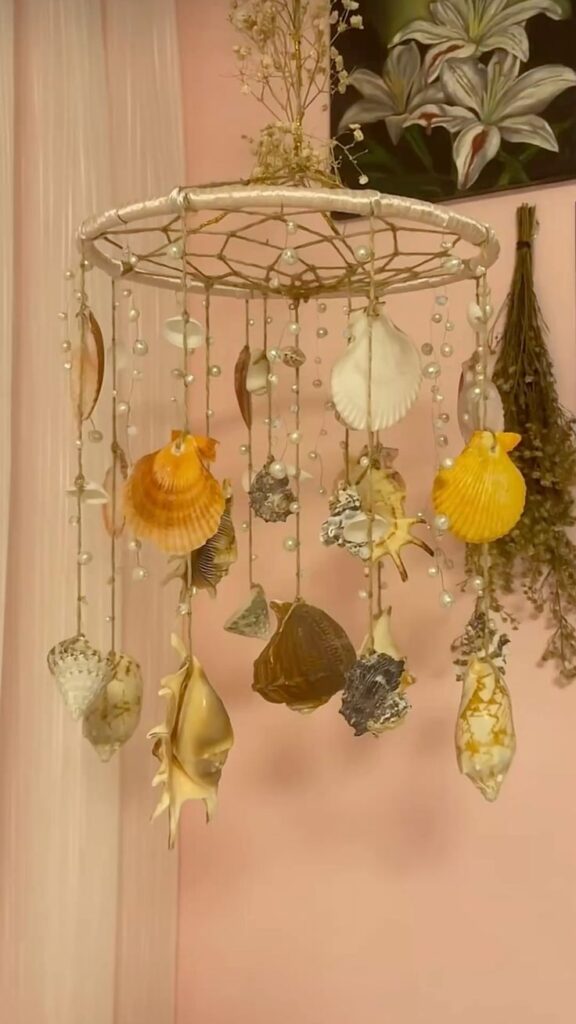
This one is for anyone who misses the ocean, or just wants that calm coastal vibe in a random Tuesday afternoon. Shells look soft and pretty in sunlight, and they make the cutest little clinky sound when they move.
Quick Notes: Beginner-friendly: Yes | Time: 30 to 60 minutes | Cost: Low
Materials Needed:
- Seashells (variety looks best)
- Twine, clear string, or fishing line
- Hot glue gun or small drill for holes
- Wooden ring or small dowel
How to Make It:
If your shells already have holes, thread them like beads and knot between each one so they don’t slide. If not, hot glue works for a quick version, just let it cool fully before hanging. Tie the strands to a wooden ring or dowel, then add one longer center strand for a focal shell. Hang it near a window or even on a covered porch where it can sway.
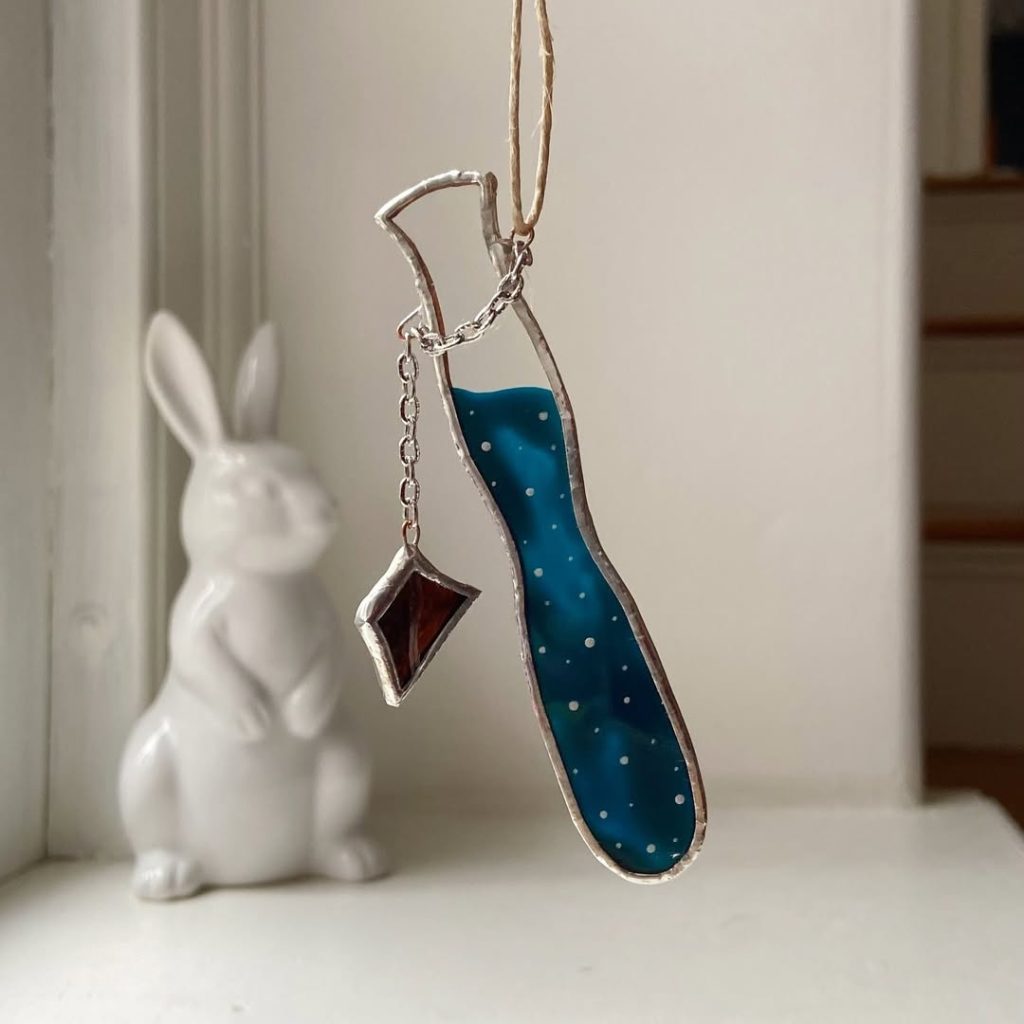
5. Stained Glass Sun Catcher
This one gives big “old library window” energy. It looks fancy, but with glass paint it’s totally doable at home, even if you’re not a pro crafter.
Quick Notes: Beginner-friendly: Yes | Time: 45 to 90 minutes (plus drying time) | Cost: Medium
Materials Needed:
- Clear glass or acrylic sheet
- Glass paint or faux stained-glass paint set
- Black outliner paint (optional, helps define sections)
- Paintbrush
- Small frame or edge tape
How to Make It:
Sketch your design on paper and place it underneath the clear glass/acrylic. Trace the lines with outliner if you have it, then fill in each section with glass paint. Keep layers thin so it dries evenly. Once fully dry, pop it into a frame or add a border for stability, then attach a hanging loop. Put it in a bright window and let it do its dramatic glow thing.
6. Beaded Hummingbird Sun Catcher
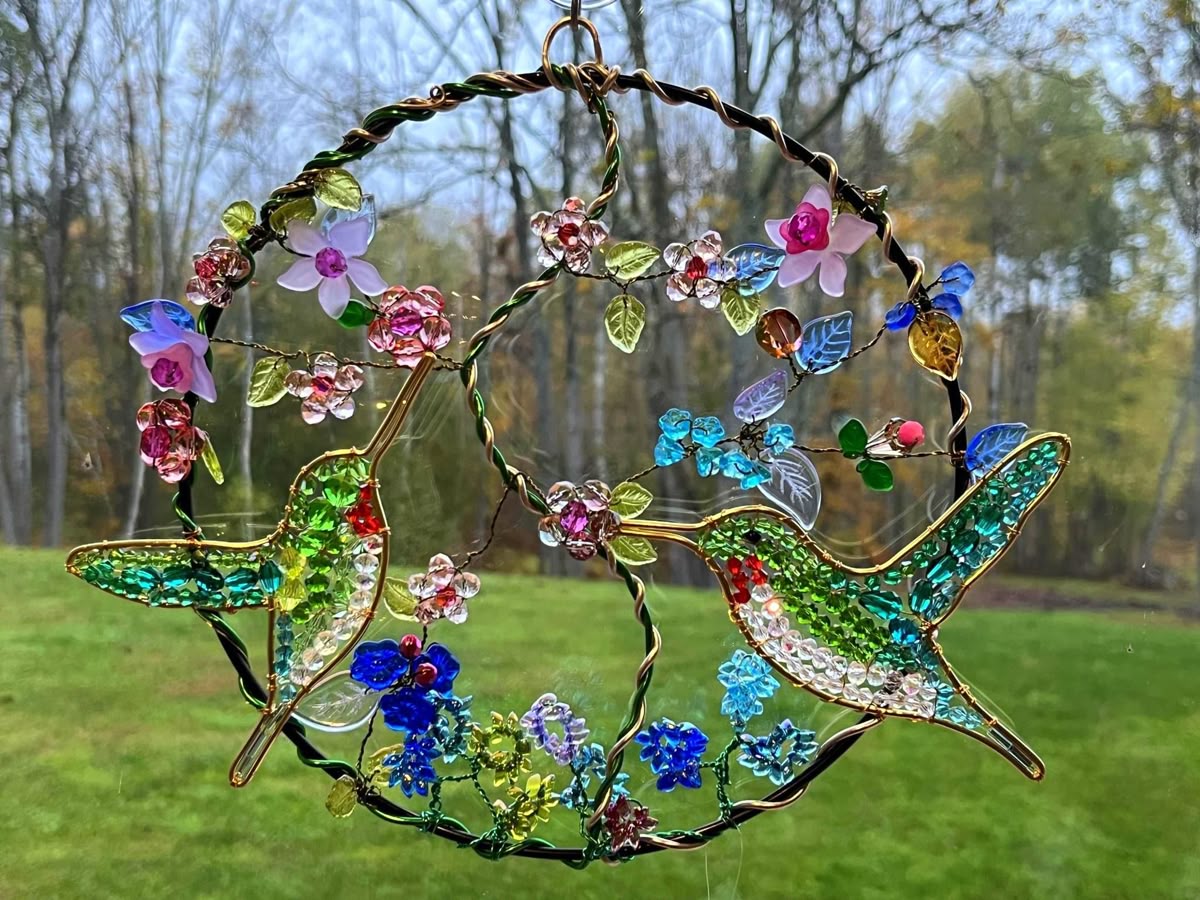
I didn’t expect this one to feel so joyful, but it does. A hummingbird shape in the window just looks like it belongs there, especially when the beads shimmer like tiny wings.
Quick Notes: Beginner-friendly: Intermediate | Time: 1 to 2 hours | Cost: Medium
Materials Needed:
- Craft wire
- Beads in multiple colors
- Pliers
- Optional crystal drop for the tail
How to Make It:
Bend wire into a simple hummingbird outline first, don’t worry about perfection. Then start threading beads along sections and twist the wire closed to “lock” them in. Use smaller beads around curved areas and bigger beads for the body. Add a hanging loop at the top, then test it in sunlight. If you want extra sparkle, hang a crystal at the tail tip.
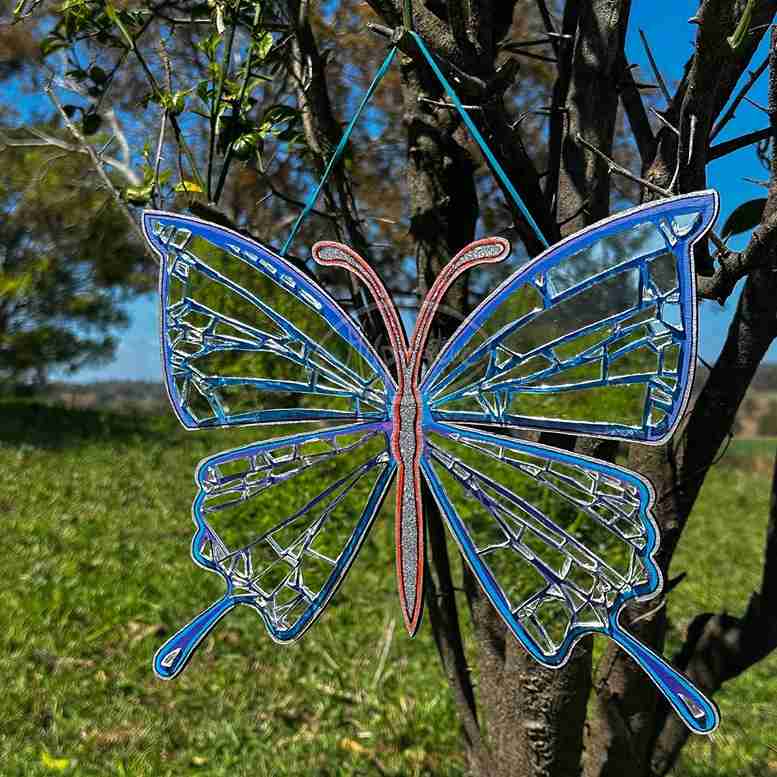
7. Butterfly Sun Catcher
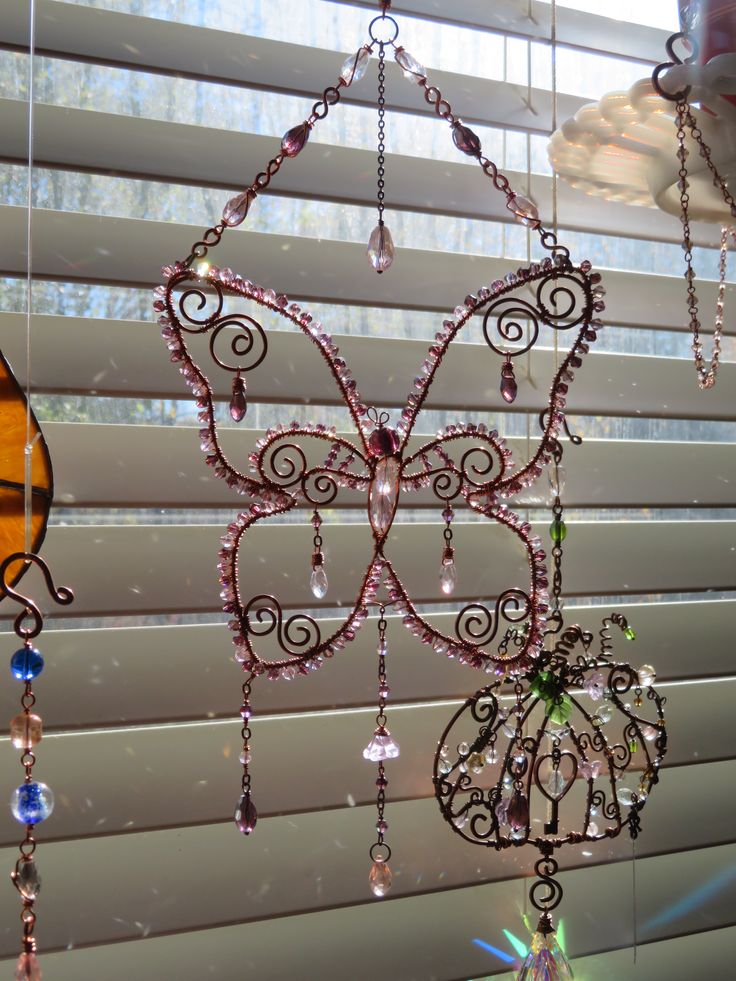
If you want something cute that instantly brightens a room, butterflies always work. They feel playful without looking childish, especially if you pick a color palette that matches your space.
Quick Notes: Beginner-friendly: Yes | Time: 20 to 40 minutes | Cost: Low
Materials Needed:
- Plastic butterfly shapes or clear shrink film
- Paint or glass markers
- String or thin ribbon
- Hole punch
How to Make It:
Paint or color your butterfly shapes, then let them dry completely so they don’t smudge. Punch a hole near the top wing and tie on string. Hang one butterfly or do a little cluster at different heights. Tip from experience: a few metallic marker details make it look extra finished.
8. Rainbow Sun Catcher with Yarn
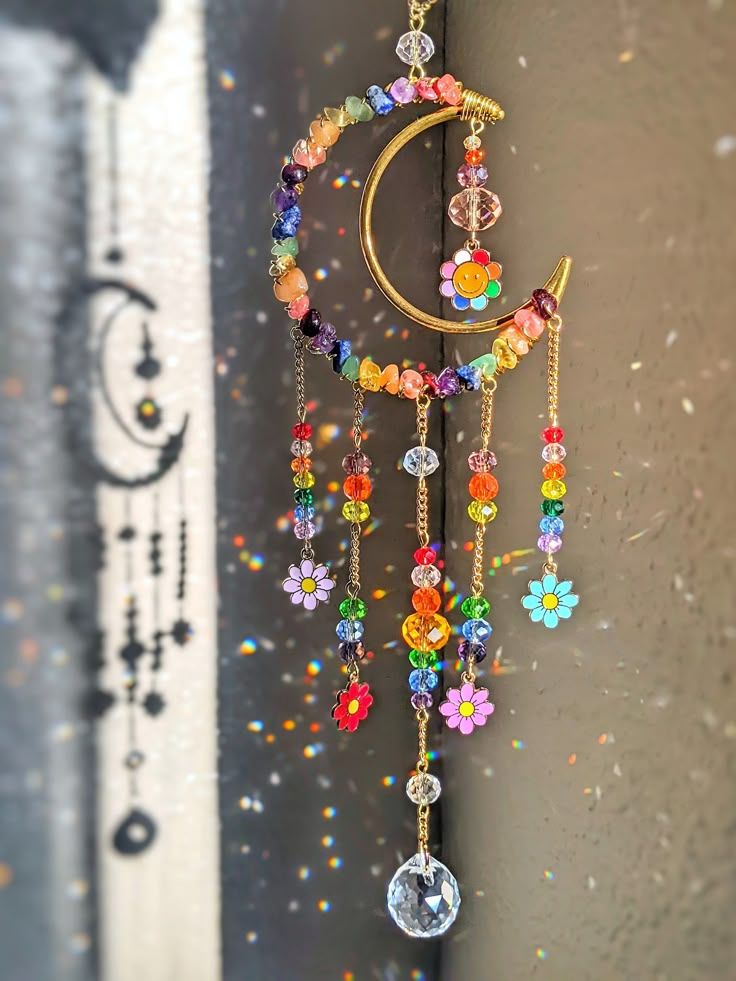
This is the “instant happy” sun catcher. Even on a cloudy day, it still looks cheerful, and it’s one of the easiest crafts on this whole list.
Quick Notes: Beginner-friendly: Yes | Time: 25 to 45 minutes | Cost: Low
Materials Needed:
- Yarn in rainbow colors
- Embroidery hoop or metal ring
- Scissors
- Optional pom poms or felt clouds
How to Make It:
Cut yarn strands to the same length. Tie them around the bottom half of the hoop in rainbow order, then trim the ends so it looks neat. If you want a cuter finish, glue felt clouds at the top sides or add pom poms at the ends. Hang it in a bright window and let it bring the vibe.
9. Nature-Inspired Leaf Sun Catcher
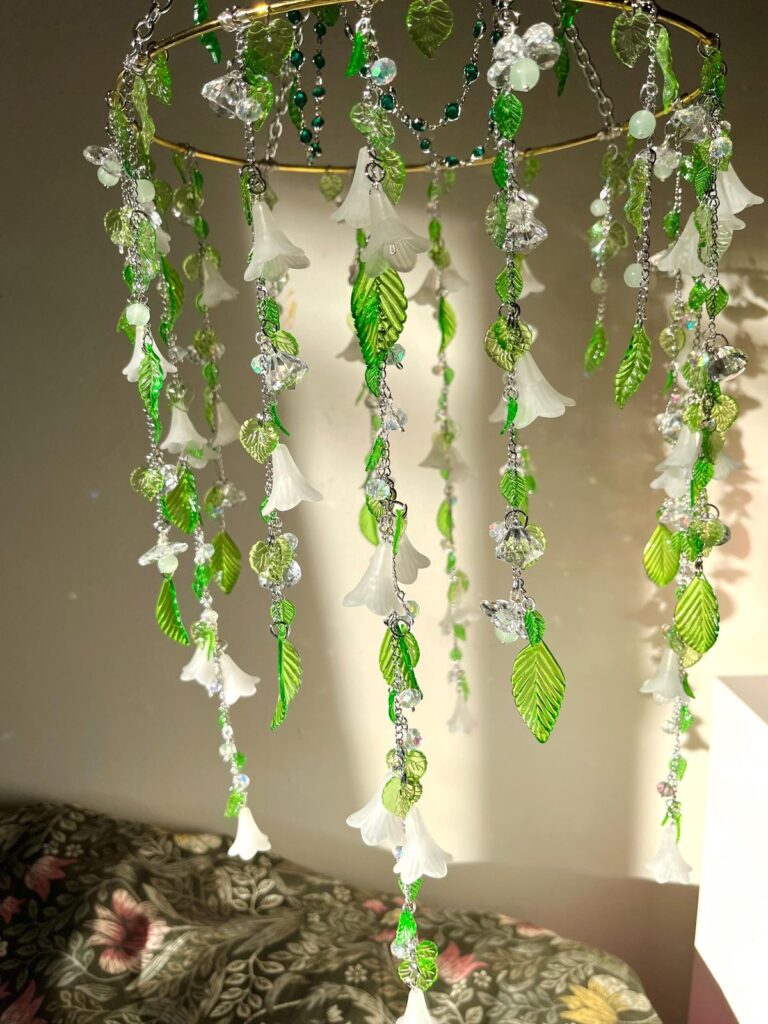
There’s something grounding about seeing a leaf preserved in light. This one feels calm and earthy, like bringing a little bit of fall into your home year-round.
Quick Notes: Beginner-friendly: Intermediate | Time: 30 minutes (plus curing time) | Cost: Medium
Materials Needed:
- Flat leaves (pressed works best)
- Clear resin and hardener
- Silicone mold or shallow tray
- Gloves and mixing cup
- String or small hook
How to Make It:
Press leaves so they’re dry and flat. Mix resin according to instructions, then pour a thin layer into your mold. Place the leaf gently, then add more resin to cover it fully. Pop any bubbles with a toothpick. After curing, add a small hole for string or attach a hook. Hang it where sunlight can shine through and highlight the leaf veins.
10. Geometric Beaded Sun Catcher

If your style leans modern and clean, this one hits. It’s like jewelry for your window, especially if you keep the bead colors minimal and let the shapes do the talking.
Quick Notes: Beginner-friendly: Intermediate | Time: 45 to 90 minutes | Cost: Low to medium
Materials Needed:
- Beads (mix sizes for texture)
- Wire
- Round ring or hoop
- Pliers
How to Make It:
Use wire to form triangles, diamonds, or squares, then thread beads along the edges and twist the corners closed. Arrange the shapes inside the hoop, attaching them with smaller wire loops. Add one small crystal drop at the bottom if you want extra light scatter. Hang it and watch the sun turn those little angles into sparkle.
11. Vintage Button Sun Catcher

This one feels like rummaging through your grandma’s sewing tin and finding tiny treasures. Buttons don’t “sparkle” the same way crystals do, but they glow softly, and it looks so cozy in a kitchen window.
Quick Notes: Beginner-friendly: Yes | Time: 30 to 60 minutes | Cost: Low
Materials Needed:
- Vintage buttons (mix colors and sizes)
- Fishing line or wire
- Hoop or small frame
- Optional beads in between buttons
How to Make It:
Thread buttons onto fishing line, tying a small knot after each one so they stay spaced out. Attach strands to a hoop, keeping the longest strand in the center for a nicer shape. If you want more shine, add a few clear beads in between the buttons. Hang it in a window where it can sway a little and catch the light.
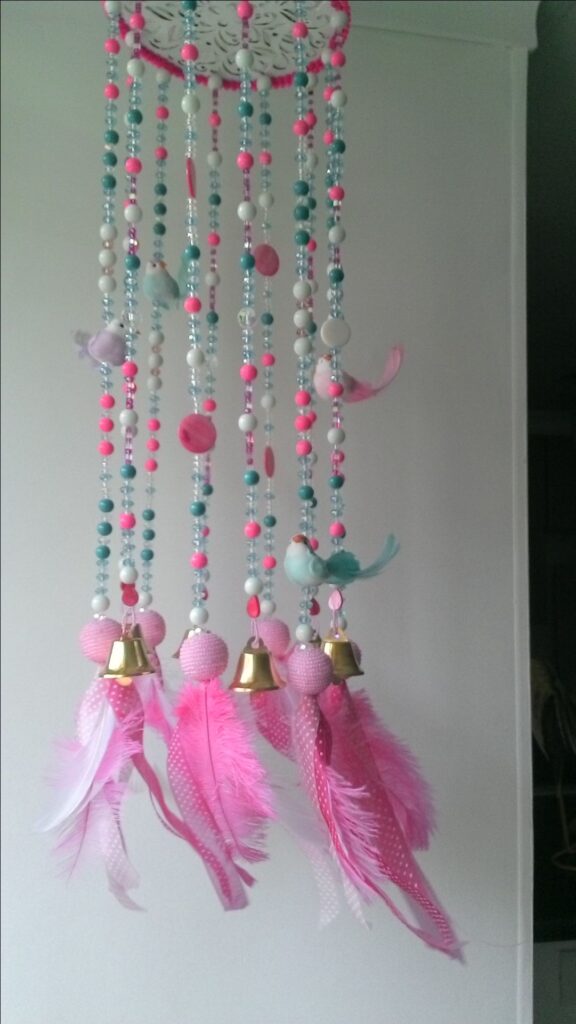
12. Dreamcatcher Sun Catcher

This is the kind of piece that makes a room feel softer. It’s part sun catcher, part wall art, and it looks especially good in a bedroom where you want calm energy.
Quick Notes: Beginner-friendly: Yes | Time: 45 to 90 minutes | Cost: Low to medium
Materials Needed:
- Dreamcatcher ring or embroidery hoop
- String or thin yarn
- Beads
- Feathers
- Optional crystal for the center
How to Make It:
Wrap the ring with string if you want a finished look. Then weave a simple web pattern across the center. Add beads into the web as you go, or hang them from the bottom with feathers. If you add a crystal in the center, it throws the prettiest little light flecks. Hang it near a window so it catches both light and a little breeze.
13. DIY Sun Catcher with Mirror Pieces
This one is for the sparkle lovers. Mirror pieces don’t just glow, they bounce light around your room like tiny disco reflections, especially in afternoon sun.
Quick Notes: Beginner-friendly: Intermediate | Time: 45 to 75 minutes | Cost: Medium
Materials Needed:
- Small mirror pieces or mirror mosaic tiles
- Strong glue
- Clear acrylic base or thick plastic
- Wire or string
How to Make It:
Arrange mirror pieces into a shape you like: sunburst, spiral, or simple cluster. Glue them onto the base and let dry fully. Attach a wire loop at the top for hanging. Tip: keep some space between pieces so light can pass through and the reflections feel more dynamic.
14. Watercolor Paper Sun Catcher

This one’s calm and artsy, like you’re making a little piece of soft color for your window. It’s also a great “I just want to paint something” project without pressure.
Quick Notes: Beginner-friendly: Yes | Time: 30 to 60 minutes | Cost: Low
Materials Needed:
- Watercolor paper
- Watercolors
- Scissors
- Hole punch
- String
- Optional laminating sheet for durability
How to Make It:
Paint an abstract wash, soft gradients, or little shapes. Let it dry fully, then cut it into a sun, heart, flower, or just a clean circle. If you want it to last longer, laminate it or cover it with clear contact paper. Punch a hole and hang it where sunlight can brighten the colors.
15. Hanging Feather Sun Catcher
This one moves the most, and that’s the whole point. It feels light and airy, and if you hang it near a window that gets a breeze, it’s like your room is gently breathing.
Quick Notes: Beginner-friendly: Yes | Time: 30 to 60 minutes | Cost: Low to medium
Materials Needed:
- Feathers
- Twine or string
- Hoop or small branch/dowel
- Beads (optional)
- Hot glue gun
How to Make It:
Cut strands of string at different lengths. Glue or tie feathers to the ends, and add beads above the feathers if you want more detail. Tie all strands to a hoop or branch. Keep the center strand longest for a nice shape. Hang it up and let it sway.
16. Upcycled CD Sun Catcher
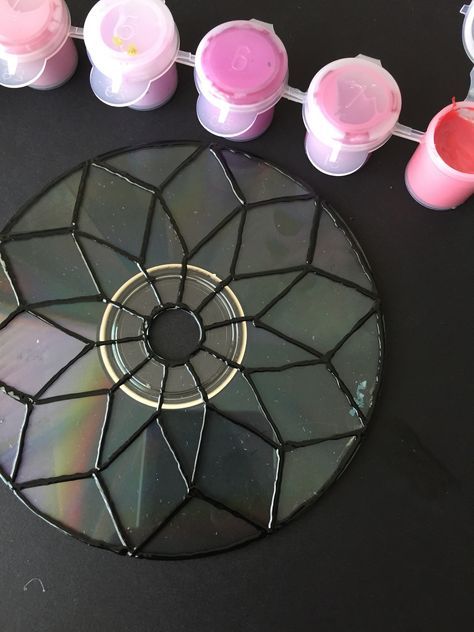
I’m telling you, old CDs are basically free rainbow machines. This is one of those crafts that looks way cooler in real life than you’d expect.
Quick Notes: Beginner-friendly: Yes | Time: 15 to 30 minutes | Cost: Very low
Materials Needed:
- Old CDs or DVDs
- String or fishing line
- Optional paint, stickers, or markers
- Scissors (optional if cutting into shapes)
How to Make It:
Clean the CD, then decorate if you want: paint one side, add stickers, or doodle with markers. Thread string through the center hole and tie a knot. If you want a hanging chain, connect multiple CDs vertically. Hang it where sun hits directly and enjoy the instant rainbow reflections.
17. Fused Glass Sun Catcher

This is the “I’m serious about crafts” option. If you’ve got access to a kiln through a studio or class, fused glass is absolutely worth trying at least once. It looks like real art because it is.
Quick Notes: Beginner-friendly: Advanced (or guided class) | Time: 1 to 2 hours plus kiln schedule | Cost: Medium to high
Materials Needed:
- Glass sheets or glass frit
- Kiln access (studio or class)
- Glass cutter (optional)
- Kiln paper and safety gear
How to Make It:
Arrange glass pieces into a design on kiln paper. Keep edges smooth and avoid stacking too thick unless you want a bolder shape. Fire according to the studio’s schedule, then let it cool completely. Add a hanging loop using wire wrap or a drilled hole (studio can often help). Hang it where the sun can light up the colors like candy.
18. Wooden Bead Sun Catcher

This one doesn’t scream sparkle, it whispers cozy. Wooden beads look so good in neutral homes, boho rooms, or anywhere you want texture without loud color.
Quick Notes: Beginner-friendly: Yes | Time: 20 to 45 minutes | Cost: Low
Materials Needed:
- Wooden beads
- String, twine, or thin rope
- Hoop or wooden ring
- Optional: one clear crystal bead for light scatter
How to Make It:
Thread beads onto string, switching bead sizes for a more interesting look. Tie strands onto a ring, then add a hanging loop. If you want it to catch more light, add a clear crystal or glass bead at the bottom of the center strand. Hang it in a sunny window for a warm, simple glow.
19. Pinecone Sun Catcher
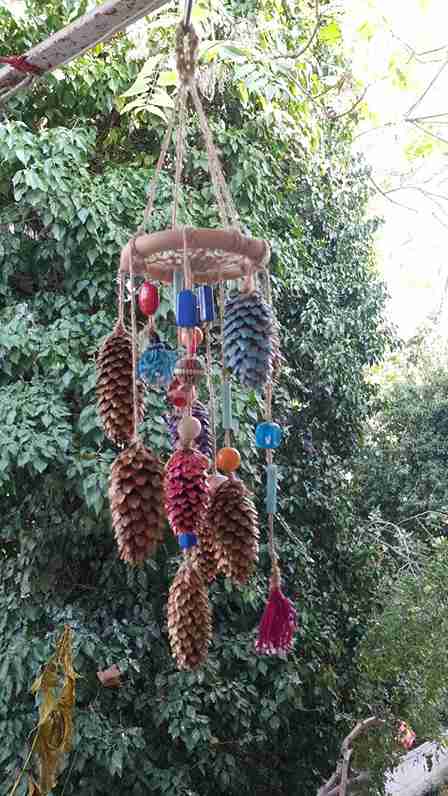
This one feels like autumn in a nutshell. Pinecones don’t refract light, but they look gorgeous when sunlight warms them up, especially with a little glitter or metallic paint on the tips.
Quick Notes: Beginner-friendly: Yes | Time: 15 to 30 minutes | Cost: Very low
Materials Needed:
- Pinecones
- Ribbon or string
- Hot glue gun
- Optional glitter or metallic paint
How to Make It:
Clean the pinecone and let it dry. Add glitter or paint to the edges if you want extra shine. Hot glue the ribbon to the top, hold it for a few seconds, and let it cool fully. Hang one pinecone or make a small cluster at different heights for a cozy window moment.
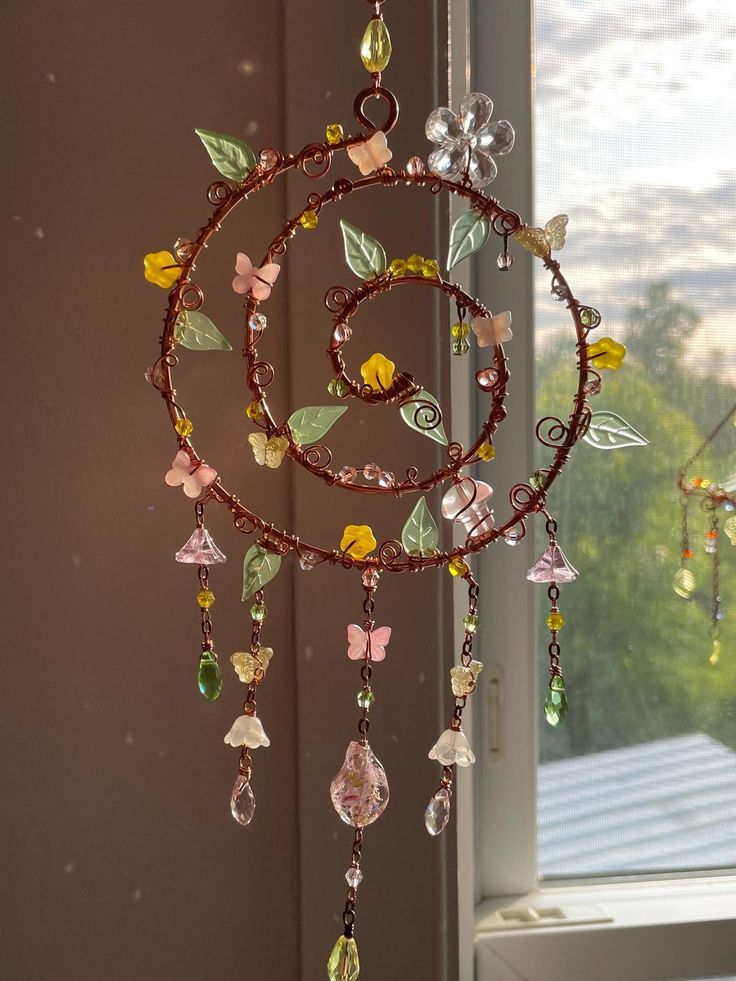
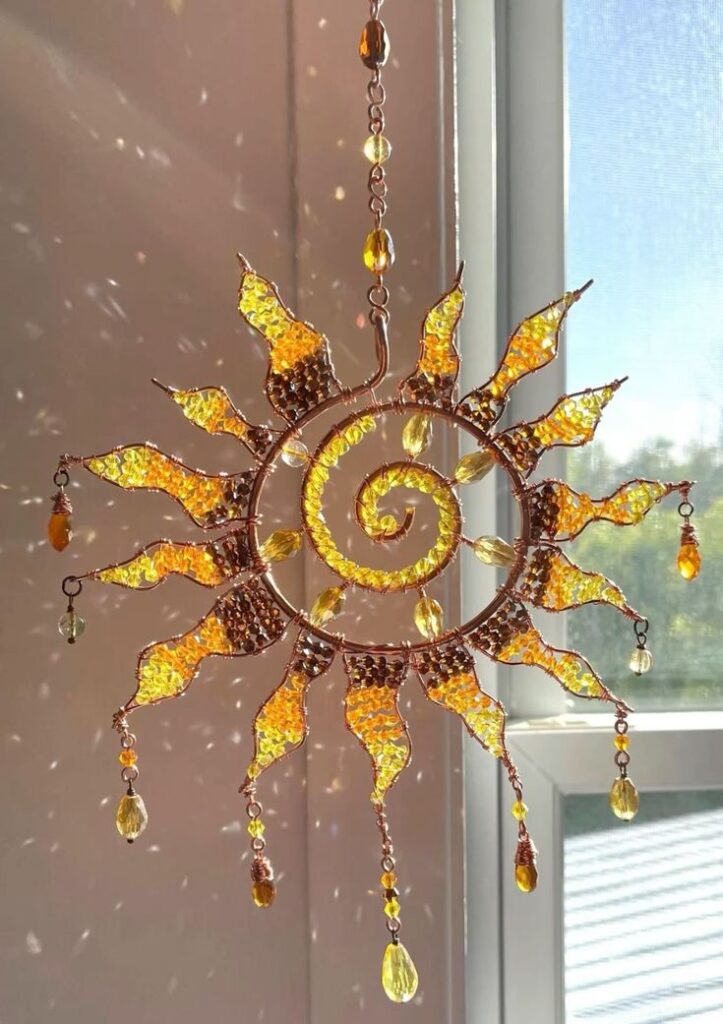
20. Copper Wire Sun Catcher
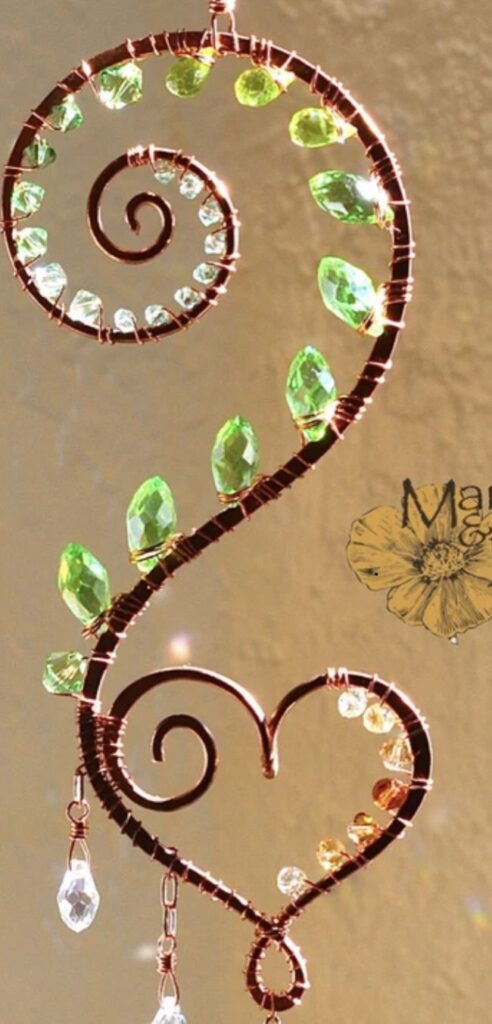
Copper wire in sunlight has its own kind of glow. It’s warm, a little earthy, and looks really polished even when you keep the design simple.
Quick Notes: Beginner-friendly: Yes | Time: 30 to 60 minutes | Cost: Low to medium
Materials Needed:
- Copper wire
- Pliers
- Optional beads or crystal drop
How to Make It:
Bend copper wire into spirals, loops, or a simple sunburst shape. Add beads on sections of the wire if you want color. Twist ends securely with pliers and create a hanging loop at the top. Hang it where it gets direct light, because copper looks best when it’s glowing.
21. Mini Terrarium Sun Catcher
This is basically a tiny hanging garden that also catches light. It looks adorable in a kitchen window, and it gives that “I have my life together” vibe even if you don’t.
Quick Notes: Beginner-friendly: Yes | Time: 30 to 45 minutes | Cost: Low to medium
Materials Needed:
- Small glass container or hanging ornament
- Tiny plants or air plants
- Decorative stones, sand, or moss
- String or wire for hanging
How to Make It:
Layer stones or sand at the bottom, then add moss and your tiny plant. Keep it light so it doesn’t get heavy for hanging. Tie string around the top (or use the ornament hook), then hang it in bright light. Tip: air plants are easiest because they don’t need soil, and they’re happy near windows.
22. Plastic Bottle Sun Catcher
If you want a budget craft that still looks fun in the sun, this one is it. It’s also a great project for kids or for those days when you want to make something without buying supplies.
Quick Notes: Beginner-friendly: Yes | Time: 20 to 40 minutes | Cost: Very low
Materials Needed:
- Plastic bottle
- Scissors
- Paint or permanent markers (optional)
- String
- Hole punch or heated skewer (adult help)
How to Make It:
Cut the bottle into flat-ish sections, then trim into flower petals, spirals, or geometric shapes. Color them with markers or paint, then let dry. Punch holes and string pieces together into a hanging chain. Hang it in a window and watch it glow. Tip: leaving some parts clear makes the light look extra bright.
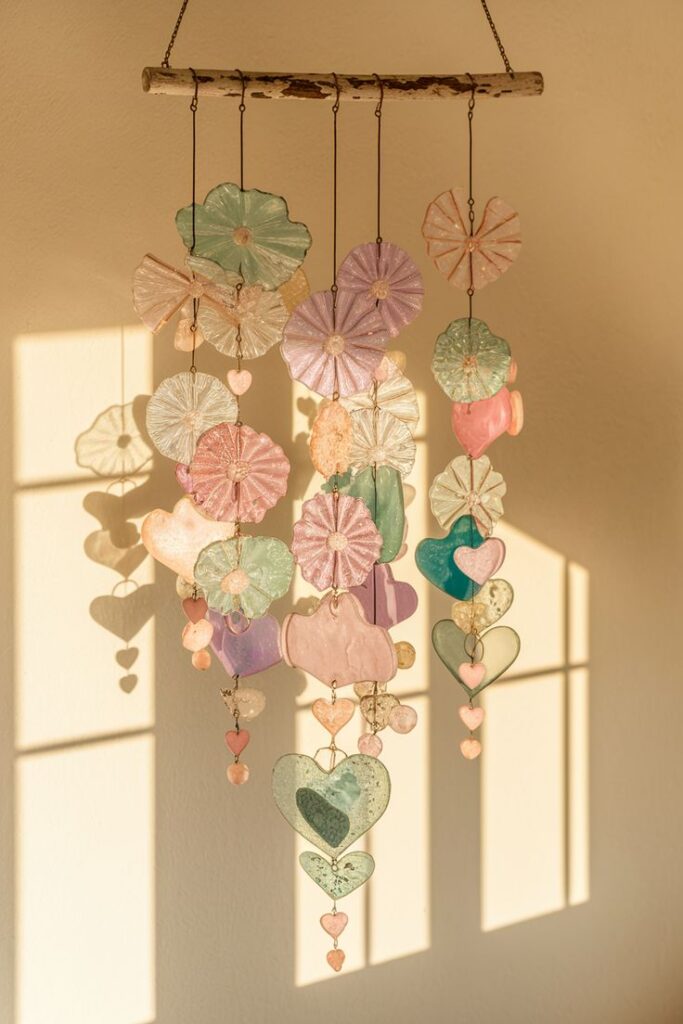
23. Beaded Heart Sun Catcher
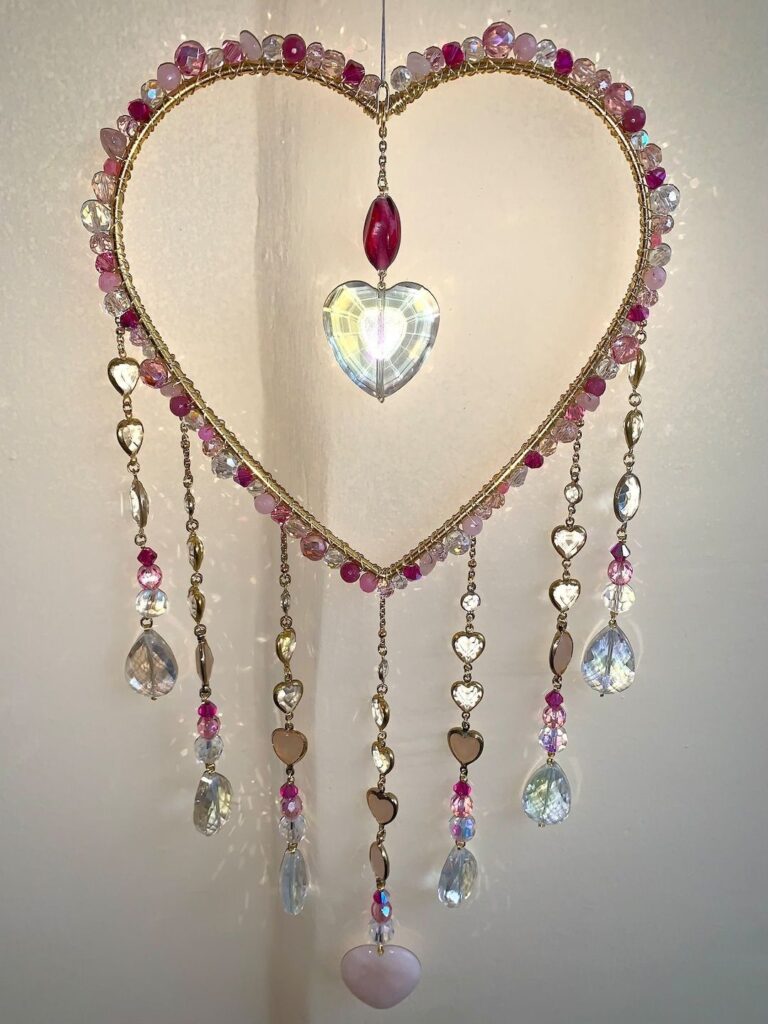
This one is sweet without being cheesy. A heart shape in beads looks especially pretty in soft colors, and it makes a cute handmade gift too.
Quick Notes: Beginner-friendly: Yes | Time: 30 to 60 minutes | Cost: Low
Materials Needed:
- Heart-shaped wire frame (or craft wire to form one)
- Beads
- Pliers
- String or wire for hanging
How to Make It:
If you’re forming your own heart, bend wire into a heart shape and twist the ends closed. Thread beads onto wire and wrap them around the frame, or fill the inside with beaded strands like a web. Add a loop at the top and hang it in a sunny window. Tip: mixing clear beads with colored beads gives it extra sparkle without looking too loud.
Conclusion
Sun catchers are the kind of craft that gives you an instant mood boost because the final result literally changes your light. Even a simple one can make a room feel warmer, softer, and more lived-in, like the house is quietly glowing instead of just sitting there.
If you’re brand new to DIY, start with the yarn rainbow, pressed flowers, CD sun catcher, or the beaded heart. They’re low-stress and still look adorable in a window. If you want something that feels more “art piece,” go for stained glass paint, mirror pieces, or a mosaic design. Those are the ones that get compliments fast.
One last tip that actually matters: hang your sun catcher where it gets direct sunlight for at least an hour a day. Morning light gives a softer glow, afternoon sun gives stronger reflections. If you want maximum rainbow scatter, add one clear crystal prism somewhere in your design. It’s like turning the brightness up.
Now pick one idea, grab what you already have, and make your window do something pretty. And if you end up making more than one, welcome to the club. It happens.

Ethan Walker is the founder and editor of HandyCraftsHub. He oversees the editorial direction of the site and contributes in-depth home decor and DIY guides focused on practical, real-world application.
With experience in hands-on home projects and everyday design decisions, Ethan emphasizes livable spaces over short-term trends. His work prioritizes clarity, functionality, and long-term value, helping readers make informed choices with confidence.
As editor, Ethan reviews published content to ensure it meets HandyCraftsHub’s standards for accuracy, usefulness, and practicality.