19 Brick Garden Edging Ideas That Instantly Make Gardens Look Polished

This post contains affiliate links, and we will be compensated if you buy after clicking on our links. Read our disclaimer.
Read our editorial process
Keeping garden edges neat can be harder than it looks. Grass spreads, mulch shifts, and planting beds often lose their shape over time without a clear border in place.
Brick edging remains one of the most practical ways to create separation between lawns, pathways, and garden beds. It offers a durable solution that helps contain materials while adding structure to the overall landscape.
A well-planned brick border can improve both appearance and function. It creates cleaner lines, simplifies maintenance, and gives planting areas a more finished look throughout the year.
From simple ground-level installations to decorative patterns and raised borders, there are many ways to use brick edging to suit different garden styles and layouts.
These brick garden edging ideas show how a small design detail can make a noticeable difference across an entire outdoor space.
1. Classic Straight Brick Edging

Have you ever just wanted your garden to look like it has its life together? That’s what this classic straight line does for me. I remember helping my uncle lay these down one summer, and the way it instantly made the yard look “finished” was wild. It’s perfect for those of us who like things neat but not fussy. If you’ve got a modern house or just a simple rectangular flower bed, this is your best friend.
Pro tip: lay them flat if you want to run your mower right over the edge without needing a weed whacker later!
Best for: modern homes, rectangular beds, clean layouts
Pro tip: lay bricks flush with soil so your mower can glide over
Watch out: poor leveling leads to uneven lines over time
Discover More Landscaping Projects
• Backyard Layout Ideas
• Driveway Entrance Landscaping Ideas
• Whimsical Garden Ideas
• Pea Gravel Patio Ideas
2. Curved Brick Edging
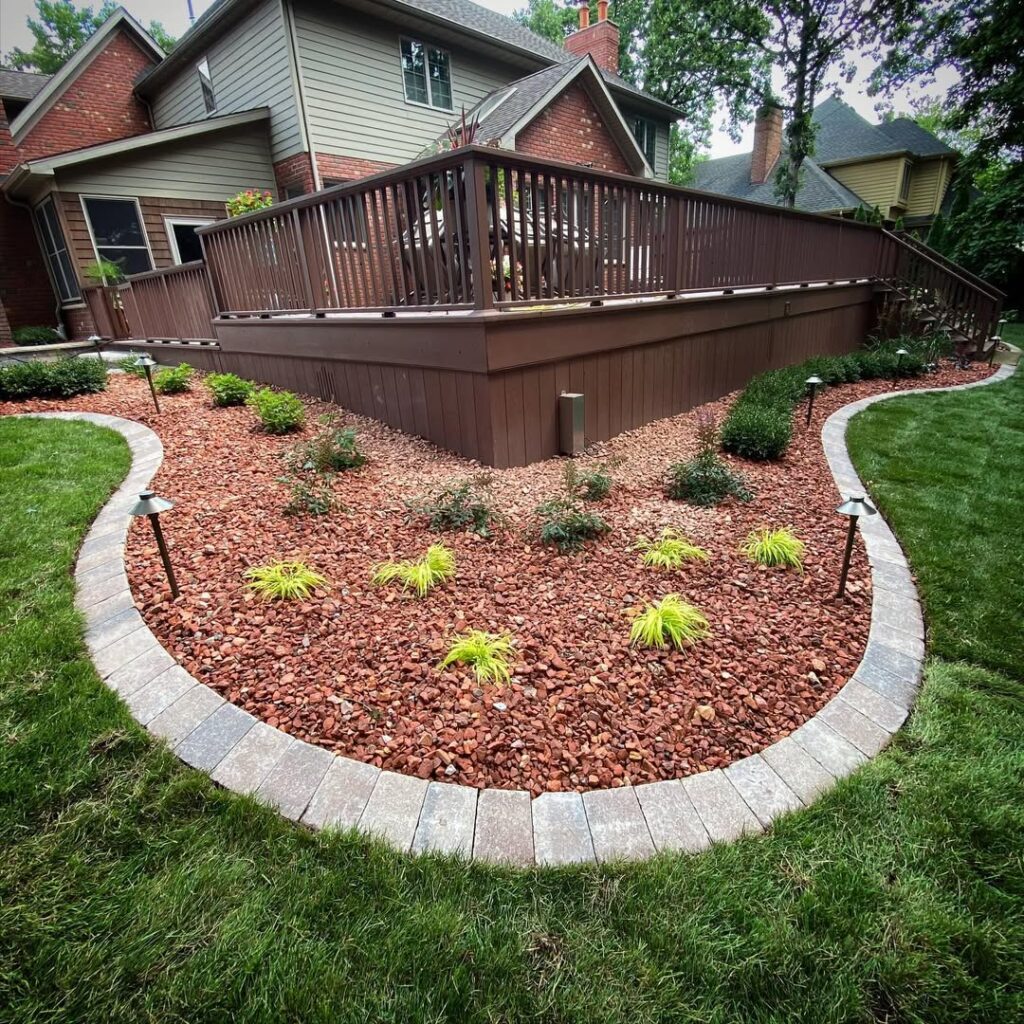
Doesn’t this just feel like a deep breath? I’m lowkey obsessed with how a curve can make a backyard feel like a hidden path in the woods. If your garden has a personality that’s a bit more “go with the flow,” you have to try this. It mimics the way water moves or how a trail winds through the brush.
I’d pair this with some tall, flowing grasses letting them lean over the brick a little makes the whole vibe feel soft and dreamy.
Best for: cottage gardens, organic layouts
Pro tip: use a hose to map curves before installing
Watch out: tight curves require more precise cutting and spacing
3. Raised Brick Edging
Okay, let’s talk about drama! If you want your prize-winning peonies to actually get the attention they deserve, you need to lift them up. I love this for preventing that annoying “mulch slide” after a big storm. It’s like a little fortress for your plants.
If you’re like me and your back isn’t what it used to be, having that extra bit of height also makes weeding just a tiny bit easier. Try stacking them two or three high for a look that feels really solid and intentional.
Best for: sloped yards, heavy rain areas
Pro tip: stack 2–3 layers for stability and visibility
Watch out: needs a solid base or it will shift over time
4. Brick and Gravel Combination
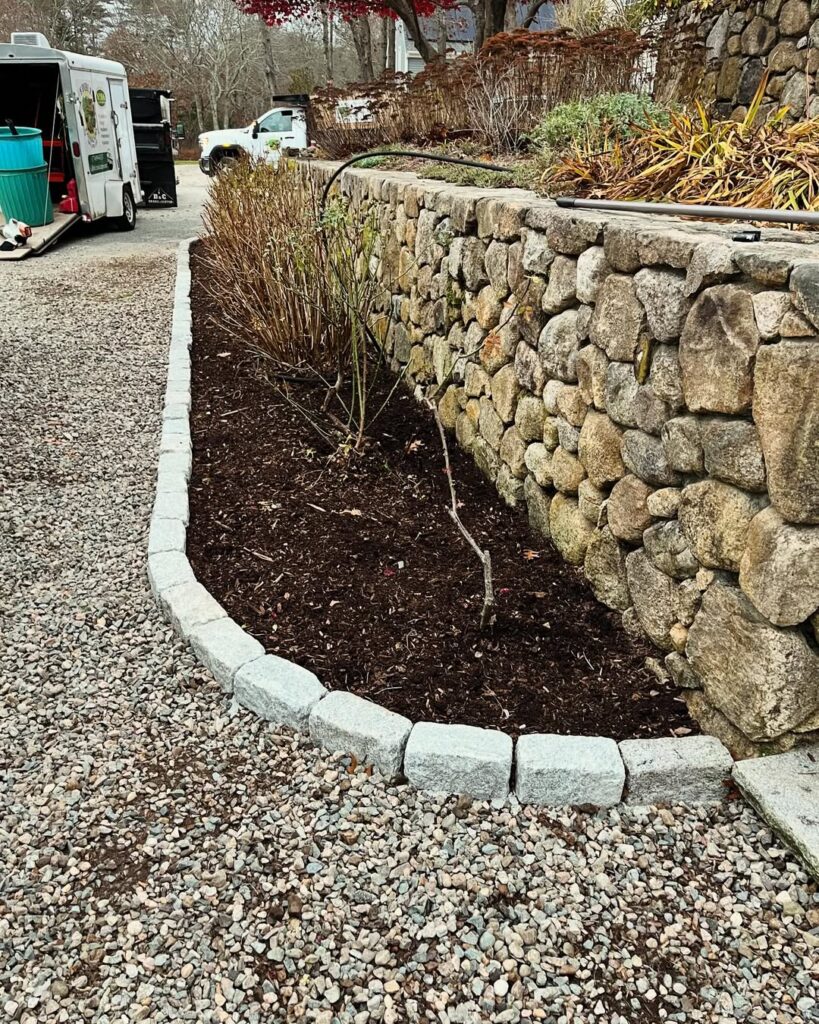
This gives me major “modern desert” vibes, and I am here for it. Why settle for one texture when you can have two? I’d use this in a spot that stays a bit damp, because that gravel helps so much with drainage.
It’s a very “cool neighbor” look super clean but still feels grounded. I’d throw some succulents in there or maybe some lavender. The way the red of the brick pops against the grey river stones?
Best for: damp areas, modern landscaping
Pro tip: Use landscape fabric under gravel
Watch out: loose gravel can scatter without proper edging
5. Basketweave Brick Edging
Can we just appreciate the craftsmanship here? My grandmother had a patio like this, and I used to trace the patterns with my toes. It feels a bit vintage, like a cozy cottage garden that’s been there for a hundred years.
It takes a second longer to lay out, but the texture is so satisfying. If you’ve got an older home or you just love that “shabby chic” energy, this is the one. It’s a conversation starter for sure.
Best for: vintage or cottage-style homes
Pro tip: Use contrasting brick tones for more texture
Watch out: takes longer to install than simple layouts
6. Angled Brick Edging
This is for the bold souls out there. Setting bricks on their side at an angle, some people call it “sawtooth,” gives your garden a literal edge. It’s cheeky and high-energy. I think it looks amazing when the sun hits it and creates all those little triangular shadows.
Just a heads-up: it’s a bit trickier to mow around, so maybe save this for a spot where you’re okay with a little hand-trimming on a lazy Sunday afternoon.
Best for: decorative borders, statement edges
Pro tip: keep spacing consistent for a clean pattern
Watch out: harder to mow and maintain clean edges
7. Stacked Brick Pillars
If you’re looking for a way to make your entrance feel a bit more “grand,” these pillars are the move. It’s such a boss way to mark the end of a garden bed or the start of a path. You don’t have to build them huge even just a foot tall makes a massive difference.
I love the idea of putting a little solar lantern or a potted trailing vine right on top. It adds that architectural “oomph” without needing a whole construction crew.
Best for: pathways, garden entry points
Pro tip: top with planters or lights for extra impact
Watch out: needs a stable foundation to avoid leaning
8. Zigzag Brick Edging
This is just pure fun. It breaks up the boring straight lines and makes the yard feel like it has some rhythm. If you have a small space, the diagonal lines actually trick your eyes into thinking the garden is bigger than it is.
I’m a fan of using slightly different shades of brick here to really make that “zig” and “zag” stand out. It’s playful, and honestly, gardening should be fun, right?
Best for: compact gardens, creative layouts
Pro tip: mix brick tones for visual contrast
Watch out: requires careful alignment to avoid looking messy
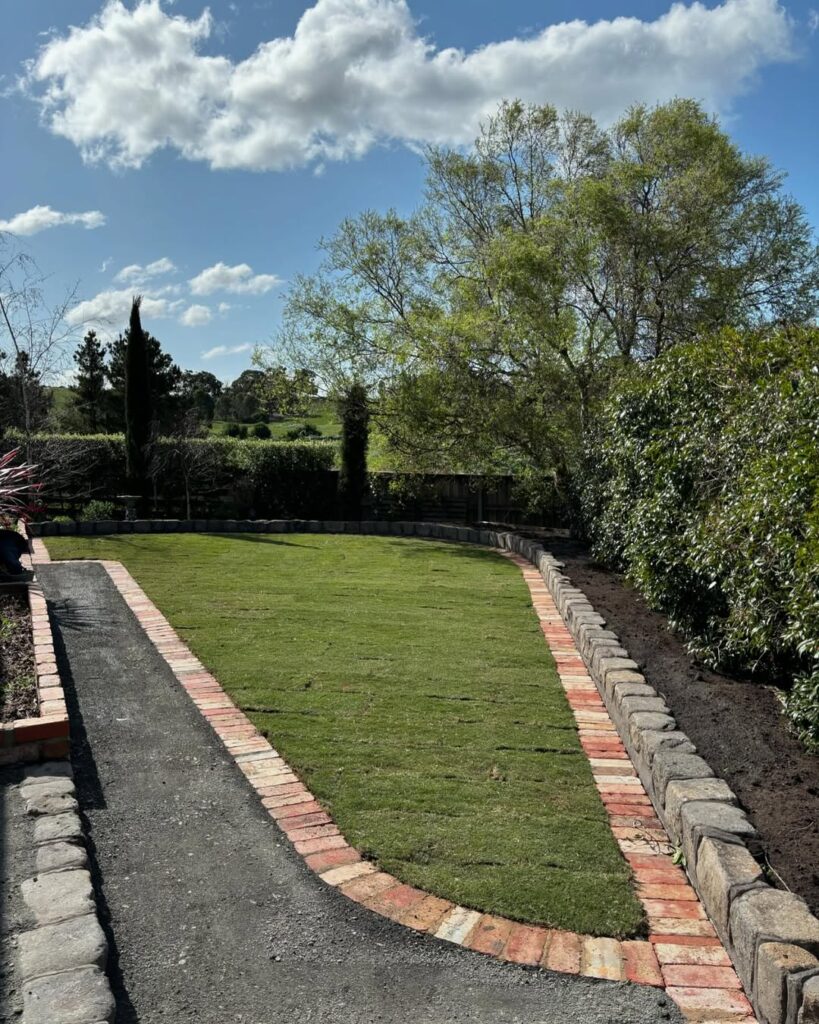
9. Brick Garden Edging with Turf
For my “keep it simple” crew, this is the winner. By setting the bricks flush with the grass, you get this super sleek, high-end look that’s also incredibly practical. It’s like a frame for a picture.
I love how the green of a healthy lawn looks right up against the deep red or orange of the brick. It’s low-profile but high-impact, and your mower will thank you.
Best for: low-maintenance yards
Pro tip: install a flush for seamless mowing
Watch out: turf must be level or edges will look uneven
10. Semi-Circular Brick Edging
Ever have a tree that looks a bit lonely in the middle of the yard? Wrap a semi-circle of bricks around it! It creates this beautiful little island of calm.
I’ve seen people do this around birdbaths or fire pits, too, and it just makes the whole area feel “meant to be.” It’s soft, it’s inviting, and it’s a great way to use up those extra bricks you might have lying around from another project.
Best for: feature areas, centerpiece landscaping
Pro tip: combine with mulch or gravel for contrast
Watch out: spacing must stay consistent to keep symmetry
11. Vertical Brick Edging
This feels very “big city loft” but in a garden. Standing the bricks up on their ends creates these tall, slim lines that feel really sophisticated. It’s a great way to gain some height without the bulk of a full wall.
I’d use this to border a path where you’ve got some “spillers” you know, those plants that like to flop over the edge. The vertical bricks hold them back just enough.
Best for: modern gardens, narrow borders
Pro tip: bury at least one-third of the brick for stability
Watch out: it can tilt over time without compacted soil
12. Brick Edging with Stone Inlays
I’m all about that “found in nature” look. Mixing bricks with raw stones feels very grounded and earthy. It reminds me of the riverbeds back home where the smooth rocks meet the red earth.
It’s not about being perfect; it’s about the contrast. This is a “no-stress” design if a stone is a little crooked, it just adds to the charm.
Best for: rustic or nature-inspired gardens
Pro tip: Use irregular stones for a more organic feel
Watch out: uneven stones can create tripping hazards
13. Brick Edging with Cement Grouting
If you’re the type who likes everything “just so,” you’ll love the finished look of grouted bricks. It’s permanent, it’s sturdy, and it looks like a professional did it.
No weeds are popping through those cracks! It gives a very clean, “estate” vibe to the garden. I’d do this around a front walkway to really boost that curb appeal it tells the neighbors you really care about the details.
Best for: permanent front yard edging
Pro tip: Use proper outdoor mortar mix
Watch out: difficult to adjust later if the layout changes
14. Brick Edging with Wood Accents
This is such a warm, cozy combo. The “sturdiness” of the brick meets the “softness” of the wood. It feels very Pacific Northwest or mountain cabin.
I’d use some cedar or reclaimed wood to keep it eco-friendly. It’s the kind of look that makes you want to grab a coffee and sit on the porch just to stare at your yard for a while.
Best for: cozy, cabin-style gardens
Pro tip: Use treated or rot-resistant wood like cedar
Watch out: wood requires maintenance over time
15. DIY Brick Garden Path Edging
Is there anything better than a clear path? Using bricks to line a walkway makes your garden feel like a destination. It guides your feet and keeps the dirt where it belongs.
I did this for a little herb garden path once, and it made the whole space feel like a professional botanical garden. Plus, it’s a great weekend project you can totally knock out with a friend and a couple of cold drinks.
Best for: walkways and garden paths
Pro tip: compact the base before placing bricks
Watch out: shifting soil can misalign edges
16. Recycled Brick Edging
I love a good story, don’t you? Using old, chipped, or “distressed” bricks from a demolition site or a backyard bin is so soulful. Each brick has a history.
It gives your garden that “lived-in” feel immediately no waiting ten years for it to look established. It’s eco-conscious, it’s affordable, and it looks incredibly cool.
Best for: eco-friendly projects, vintage aesthetics
Pro tip: Clean and sort bricks before use
Watch out: inconsistent sizes can affect alignment
17. Stepping Stone Brick Edging
This is for the explorers. Integrating bigger flat stones into your brick line means you can hop right into the bed to prune a rose or check on a tomato without squishing your soil.
It’s functional art. I’m lowkey obsessed with how it breaks up the visual weight of a long brick line. It feels very intentional and thoughtful.
Best for: active gardens where you need access
Pro tip: space stones based on natural walking steps
Watch out: unstable stones can become safety issues
18. Decorative Mosaic Designs
Alright, let’s get creative! If you’ve got some broken pottery or colorful pebbles, you can turn your brick edging into a literal masterpiece.
It’s a way to put your own heartbeat into the landscape. It doesn’t have to be a whole mural, even just a little pattern every few feet is enough to make people stop and say, “Wow, did you do that?”
Best for: artistic spaces, DIY lovers
Pro tip: keep patterns simple to avoid clutter
Watch out: too many colors can feel overwhelming
19. Brick Edging with Gravel Trenches
This is the ultimate “clean girl” aesthetic for gardens. A row of bricks, a little channel of gravel, and then another row of bricks. It’s so architectural and sharp.
It’s also a secret weapon for drainage. If you live somewhere where it rains a ton, this trench helps move water away from your plant roots. Form and function at its best!
Best for: drainage-heavy areas, modern layouts
Pro tip: slope the trench slightly for water flow
Watch out: needs occasional gravel topping
Add More Outdoor Features
• Front Porch Step Ideas
• Spring Porch Ideas
• Front Porch Railing Ideas
• Scrap Wood Ideas
FAQ
How Do I Choose The Right Brick For My Climate?
When you’re picking out your bricks, you really have to think about where you live. If you’re in a spot where the ground freezes and thaws a lot, you’ll want “severe weather” grade bricks. Regular interior bricks might look cute, but they’ll crumble like a dry cracker after one hard winter. Look for something labeled for outdoor use or “paver” grade. These are fired at higher temperatures and can handle the moisture and the cold without falling apart on you.
Should I Use Mortar Or Just Dry-Lay The Bricks?
This really depends on how much of a commitment you’re ready for! Dry-laying (just setting them in a trench of sand or dirt) is awesome because it’s easy to change later if you decide to expand your garden. Plus, it’s a lot cheaper. But, if you want that “set it and forget it” stability where the bricks don’t budge even when you step on them, go for mortar or a specialized landscape adhesive. Just remember, once you mortar, those bricks are staying put!
How Do I Keep My Brick Edging From Sinking?
The secret isn’t actually the bricks it’s what’s underneath them. If you just toss bricks on top of the grass, they’re going to disappear into the mud within a season. You’ve gotta dig a shallow trench and fill it with a couple of inches of leveled-out crushed stone or coarse sand. Think of it like a foundation for a house, just smaller. This keeps the water draining away so the soil stays firm, and your beautiful edge stays nice and level for years.
Conclusion
Brick edging is honestly such a timeless way to give your outdoor space some soul and structure. Whether you go for those sharp, modern lines or something a bit more weathered and “lived-in,” it’s one of those projects that pays off every single time you look out the window. It defines your hard work and keeps your garden looking like a sanctuary instead of a chore.
If any of these ideas sparked a “hey, I could do that!” moment, I’d love for you to share this with your friends and family!
Maybe you’ll even find a buddy to help you haul some bricks this weekend.
Happy gardening!