Transform your space with these 33 DIY room decor ideas that are easy and fun to create. Whether you’re looking to spruce up a cozy corner or give your entire room a new vibe, these creative projects will help you express your personal style without breaking the bank. Let’s dive into some simple yet effective ways to make your space feel truly yours!
Customized Throw Pillows
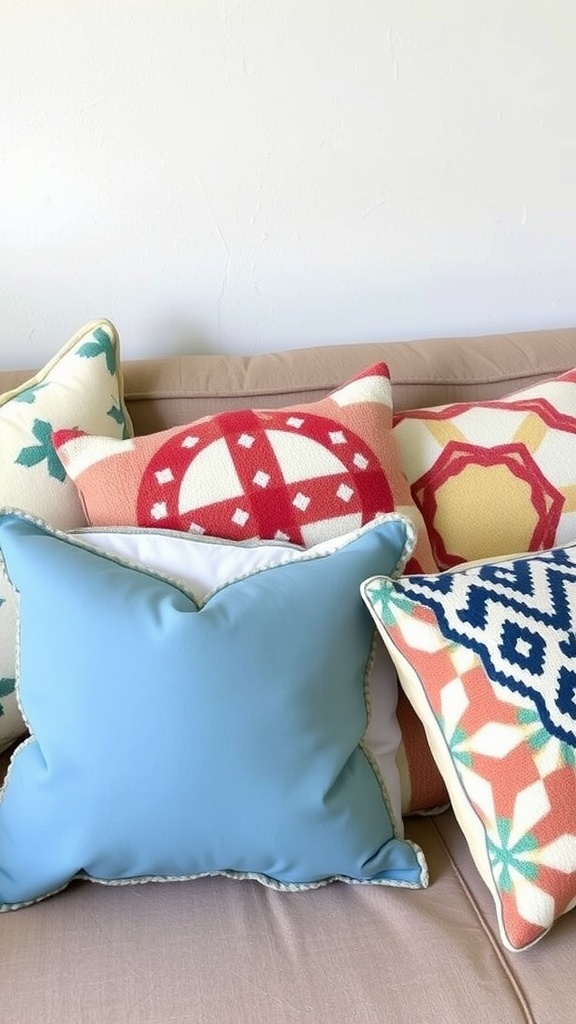
Throw pillows are a simple way to add personality to any room. They can transform your space into something uniquely yours. The image shows a mix of custom-designed pillows that bring color and comfort to a sofa. Each pillow has its own pattern and color scheme, making the overall look more vibrant.
Choosing the right fabric and design is key. For a cohesive look, select colors that complement your existing decor. The blue pillow in the image stands out while harmonizing with the other shades. Consider using different shapes and sizes to create visual interest.
DIY enthusiasts can easily customize their own pillows. Start with plain pillow covers and use fabric paint or iron-on transfers. You can also sew patches for a more personal touch. This not only allows for creativity but also makes it a fun project.
Mixing patterns can seem daunting, but it works beautifully when done right. The playful styles shown in the image demonstrate how geometrics and florals can coexist. Just remember to balance bold designs with more subdued ones for a well-rounded look.
Painted Mason Jar Vases
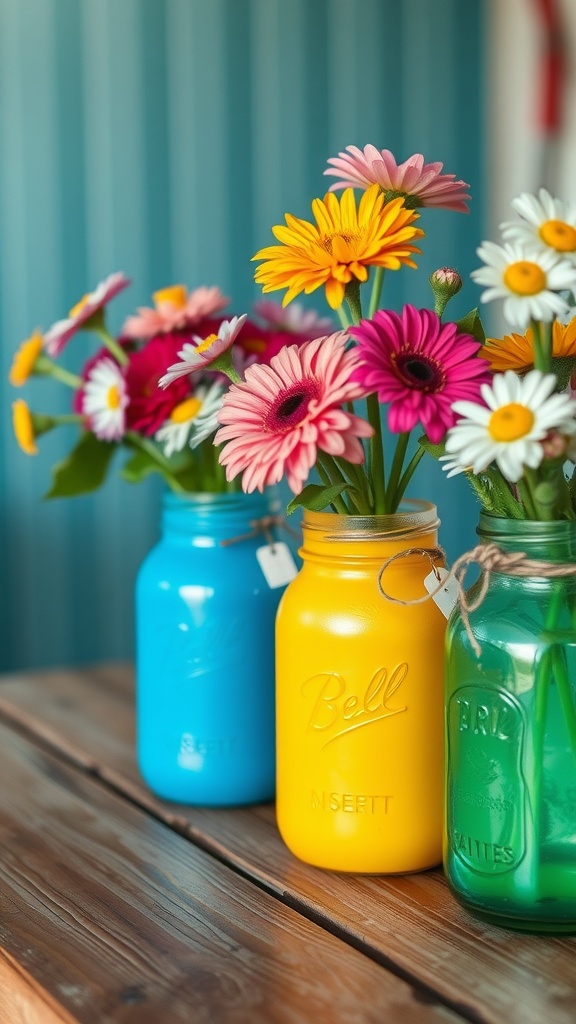
Adding a pop of color to your space is easy with painted mason jar vases. These cheerful jars not only serve as flower holders but also as decorative pieces that brighten up any room.
The jars in the image showcase vibrant shades of blue, yellow, and green, each filled with colorful faux flowers. The combination of the bright colors and the lively blooms creates an inviting atmosphere. Whether you place them on a table or shelf, they instantly draw the eye.
Creating your own painted mason jar vases is simple! Gather some mason jars, acrylic paint, and flowers. Start by painting the jars in your favorite colors. Once dry, fill them with fresh or faux flowers. You can even add tags for a personal touch. This DIY project is not just about decoration; it also brings a sense of creativity into your home.
These vases are perfect for seasonal decor too. Change the flowers and colors to match holidays or seasons, keeping your decor fresh and fun. With these painted mason jar vases, you can easily express your style while adding a splash of joy to your space.
Woven Wall Baskets
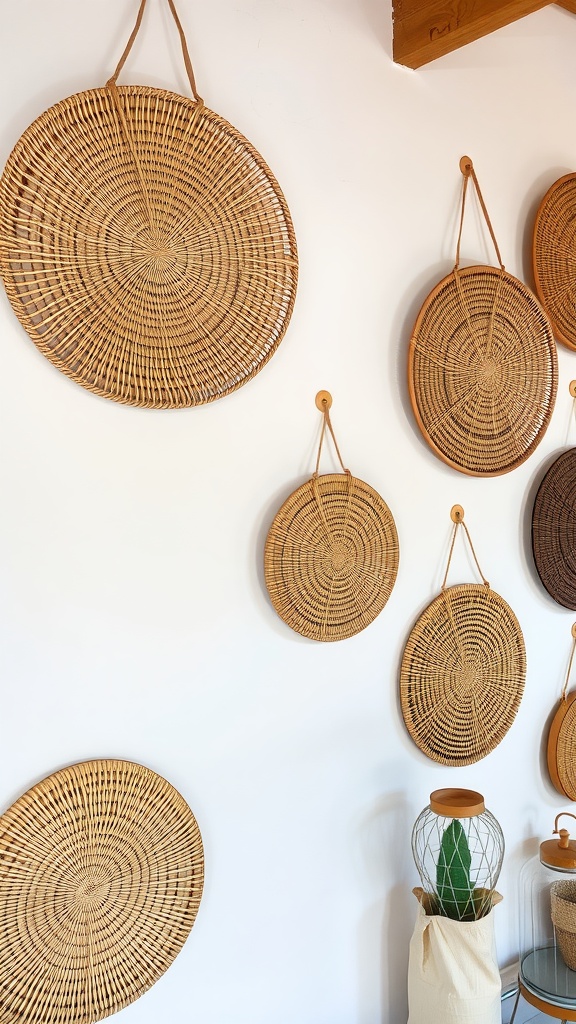
Woven wall baskets are a stylish way to add texture and warmth to your home. These baskets come in various sizes and shapes, making it easy to create an eye-catching display. In the image, you can see a lovely arrangement of round woven baskets hanging on a wall. Their natural tones bring a cozy vibe to the space.
Using wall baskets as decor can be both functional and beautiful. They can serve as storage for small items or just as decorative pieces to enhance your wall. The intricacies of the weave add depth to any room, making it feel more inviting.
To create your own woven wall basket display, start by selecting a few baskets in different sizes. Arrange them on the wall to find a layout you like. Hanging them at varying heights can add visual interest. This DIY project is not only enjoyable but also allows you to showcase your personal style.
Fabric-Covered Bulletin Board
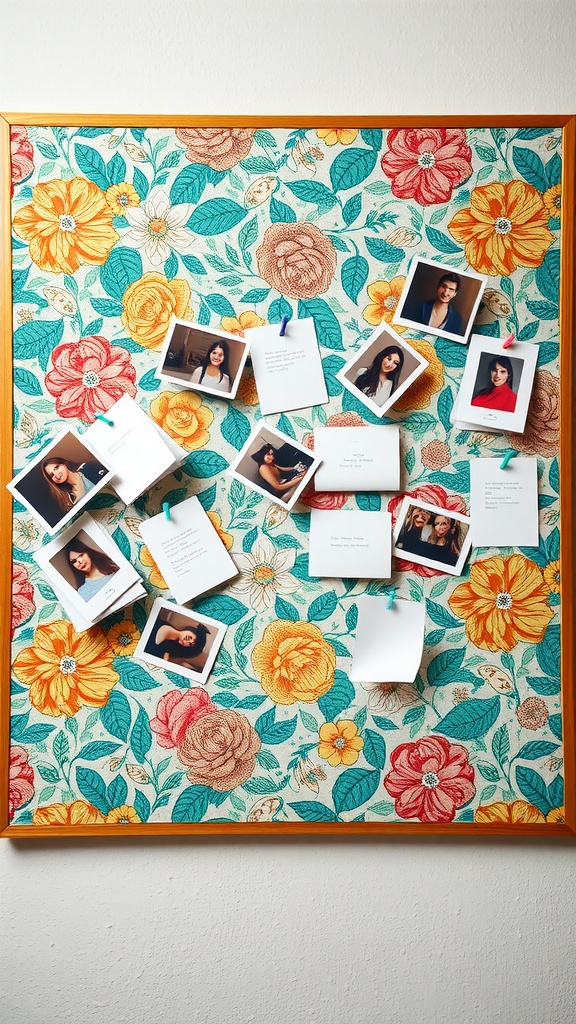
A fabric-covered bulletin board is a simple yet stylish addition to any room. It offers a fun way to display photos, notes, or reminders while adding a splash of color to your walls.
The image shows a vibrant bulletin board adorned with a floral fabric. The bright patterns complement the pinned photos and notes, creating a lively atmosphere. Each element on the board is easy to see, making it functional as well as decorative.
You can personalize your bulletin board by choosing fabric that matches your decor. Whether you prefer bold patterns or subtle designs, the options are endless. Using small clips or push pins, you can swap out photos and notes whenever you like, keeping the display fresh and engaging.
This DIY project is not only enjoyable to make, but it also allows for creative expression. Gather your favorite fabric, a cork board, and some clips, then get started. You’ll end up with a beautiful piece that brightens up your space and helps you stay organized.
Wooden Pallet Coffee Table
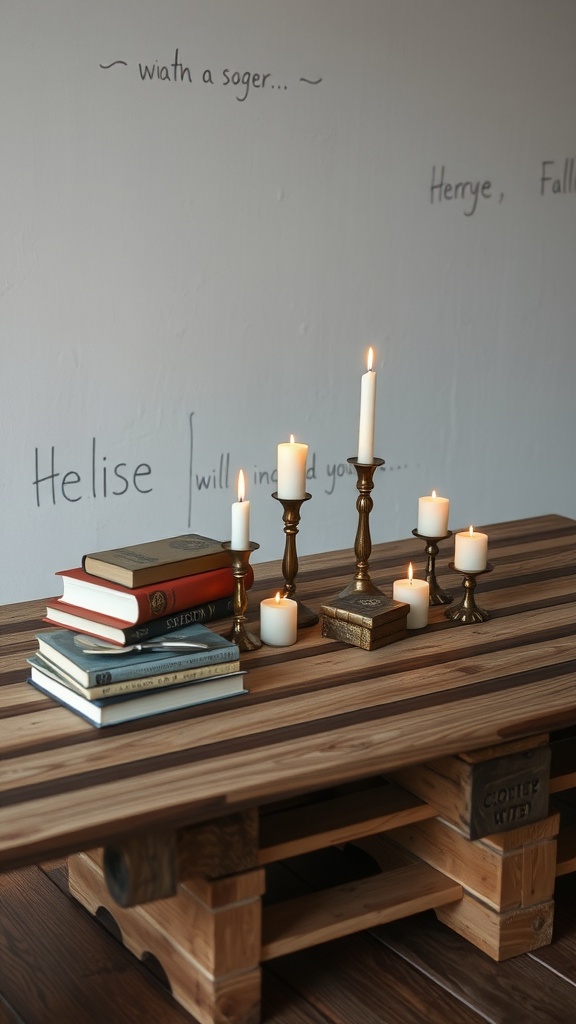
If you’re looking to add a touch of charm to your living space, a wooden pallet coffee table is a fantastic option. This DIY project is not only budget-friendly but also allows you to customize the look to fit your style.
The image shows a beautifully arranged wooden pallet coffee table topped with a few stacked books and elegant candles. The warm tones of the wood provide a cozy feel, making it an inviting spot for gathering with friends or enjoying a quiet evening.
To create your own wooden pallet coffee table, start by sourcing a sturdy pallet. Sand it down to ensure a smooth surface, then consider staining or painting it to match your décor. For a personal touch, you can add decorative elements like a table runner or seasonal decorations.
The candles and books on the table add character and create a focal point in the room. Feel free to experiment with different heights and arrangements. This not only enhances the table’s aesthetic but also makes it functional for displaying your favorite reads or seasonal accents.
DIY Photo Gallery Wall
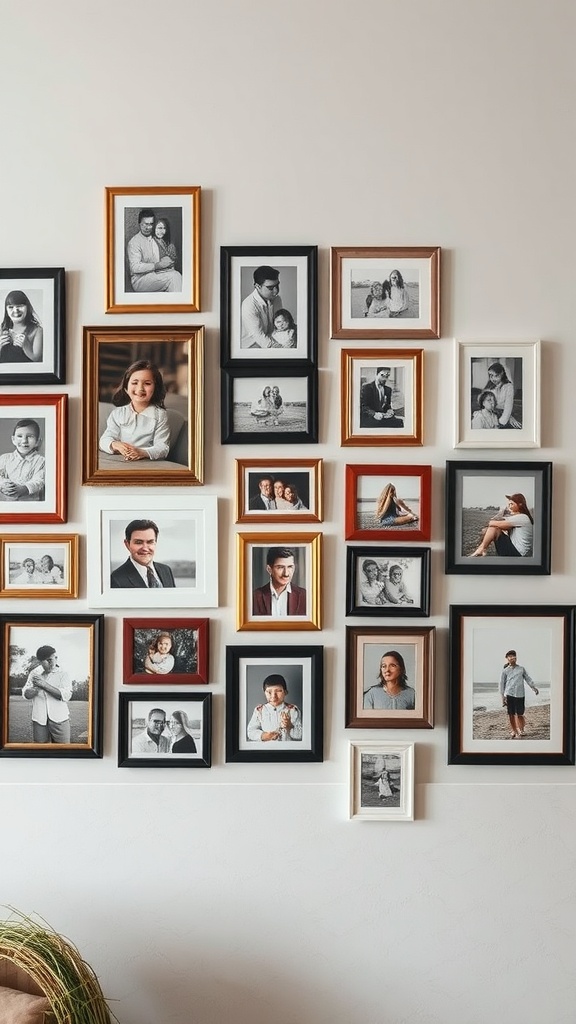
Creating a photo gallery wall is a fun way to add personality to your space. This particular image shows a beautiful arrangement of framed photos, showcasing precious memories. The mix of black, white, and metallic frames adds depth and interest, making the display vibrant and inviting.
Start by gathering your favorite photos. You can choose a theme, like family or travel, to give the wall a cohesive look. Arrange your frames on the floor first to find the perfect layout before hanging them. This can save you time and help you visualize how it will appear on the wall.
Don’t be afraid to experiment with different frame sizes and colors. Using a combination of frames can create a dynamic feel. Once you’ve got your layout, use nails or adhesive strips to hang the frames. Make sure to step back and check your work as you go to ensure everything is aligned and looks good together.
Lastly, remember to enjoy the process! A gallery wall is a testament to your favorite moments and adds a personal touch to your home. It can be a conversation starter and a warm reminder of the people and places that matter most to you.
Macrame Wall Hanging
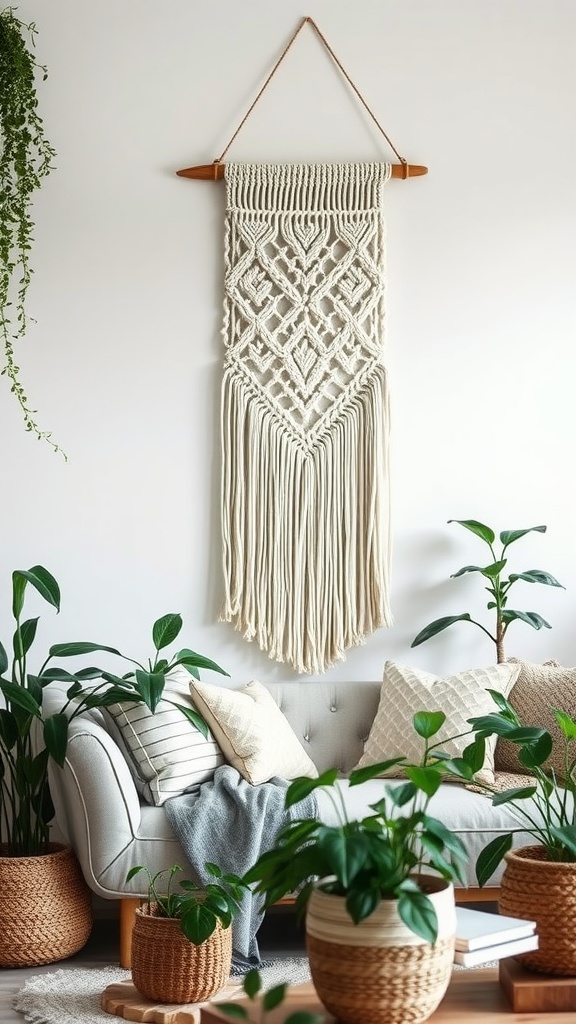
If you’re looking for a way to add some texture to your space, a macrame wall hanging might just be the answer. This image showcases a beautifully crafted piece that serves as a focal point in a cozy living room. The intricate knotting of the macrame creates a stunning design that draws the eye.
The soft, neutral tones of the hanging complement the light color of the wall, creating a harmonious blend. The wooden dowel adds a natural touch, making it easy to hang and display. Surrounding this art piece are various houseplants, which help bring life and a sense of nature indoors.
Incorporating a macrame wall hanging into your decor not only enhances the aesthetic but also adds a handmade feel. DIY enthusiasts can find plenty of tutorials online to create their own unique designs. It’s a fun project that allows for personal expression while beautifying your space.
Consider positioning your macrame piece over a sofa or on a bare wall to make a statement. By pairing it with textured cushions and greenery, you can create a cozy, inviting atmosphere.
Upcycled Wooden Crate Shelves
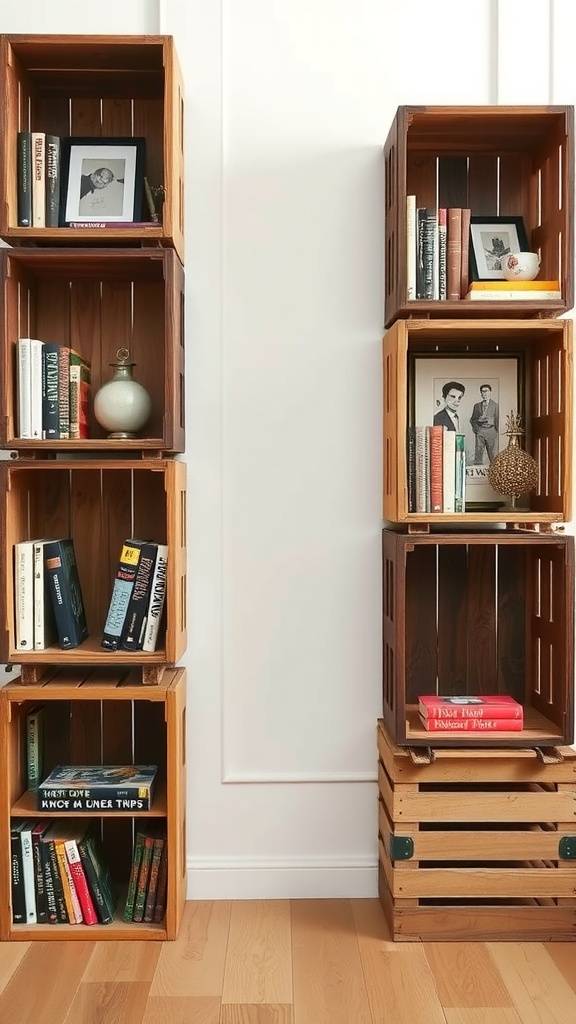
Upcycled wooden crate shelves are a stylish and functional way to display your favorite items. These shelves not only add character to your space but also help organize your books and decor.
The image shows a clever arrangement of wooden crates stacked both vertically and horizontally. Each crate is filled with a mix of books, decorative objects, and personal photos. This creates a warm and inviting atmosphere.
One of the best parts about using wooden crates is their versatility. You can easily customize them to fit your home style. A simple stain or paint can give these crates a fresh look, matching them to your existing decor.
To make your own wooden crate shelves, start by gathering some crates. Thrift stores or online marketplaces often have affordable options. Once you’ve chosen your crates, decide on a layout that works for your space. Secure them together if needed to create a stable structure. Then, style the shelves with your favorite books and decor to make them truly yours!
DIY Candle Holders from Wine Bottles
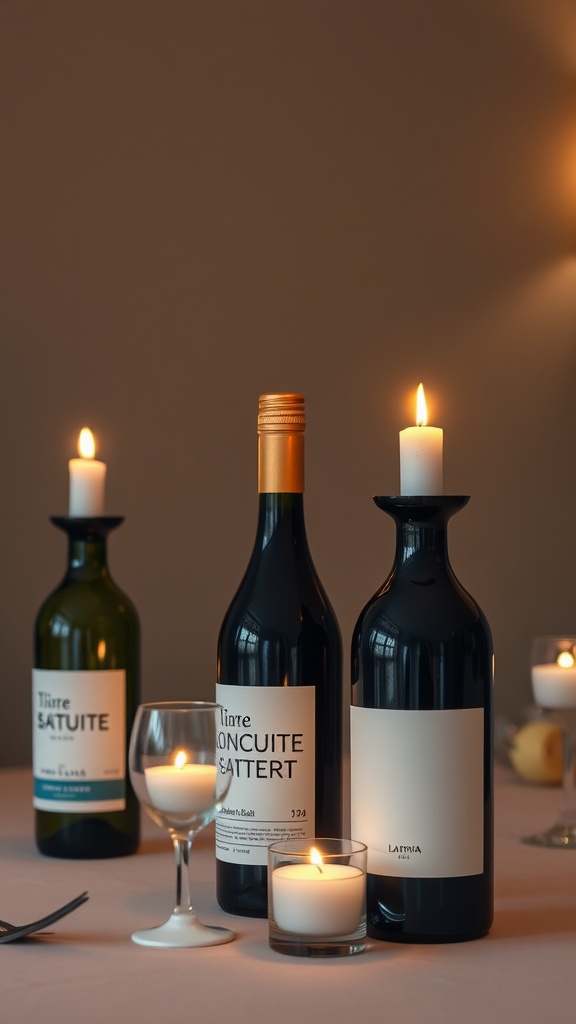
Transforming wine bottles into candle holders is a fun and eco-friendly project. The image shows beautifully repurposed bottles, each serving as a unique base for candles. This is not only an easy DIY project but also adds a warm ambiance to any room.
Start by cleaning your bottles thoroughly and removing any labels. You can choose to leave the bottles as they are for a rustic look or paint them for a pop of color. Once you have your bottles ready, you can place a taper candle in the neck of the bottle or use small votive candles inside the bottles.
To make it even more personal, consider adding decorative elements like twine, lace, or paint. This customization makes each piece special and aligned with your home decor style. It’s a simple yet charming way to brighten up your space while utilizing items that might otherwise go to waste.
Framed Fabric Swatches
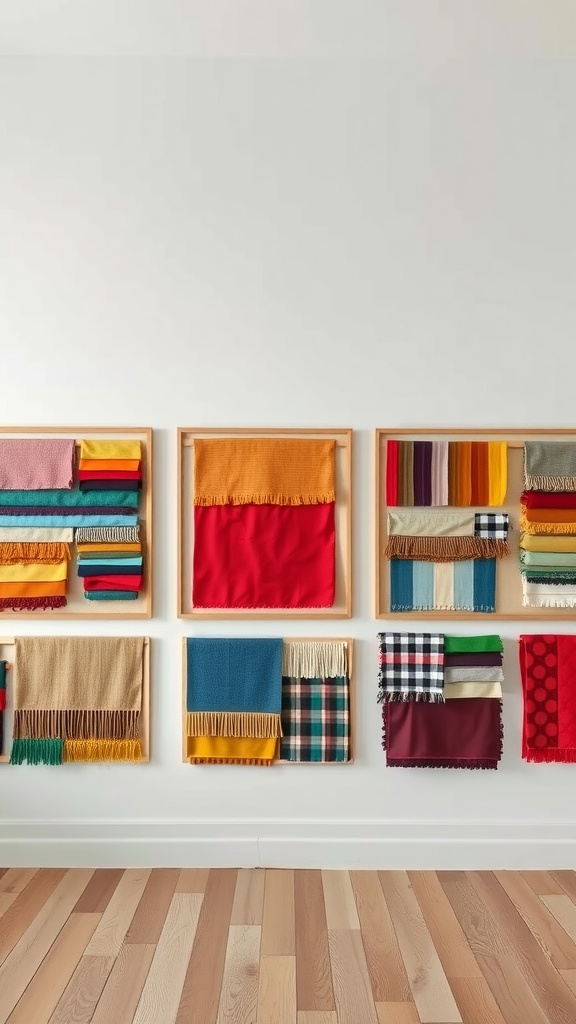
Framed fabric swatches add a splash of color and texture to any room. This creative decor idea showcases various fabrics in an organized yet playful way. Each frame acts as a mini canvas, highlighting the beauty of patterns, colors, and materials.
To create your own framed fabric swatches, start by gathering a variety of fabric pieces. Look for different textures and colors that speak to your style. Cotton, linen, or even wool can all add unique vibes to your decor.
Once you have your fabrics, cut them to fit inside your frames. Experiment with arrangements before securing them in. Mixing and matching patterns can create a lively conversation piece. Hang the completed frames on a wall with plenty of natural light to show off their charm.
This DIY project is not only fun but also practical. You can easily swap out fabrics whenever you want a change, keeping your decor fresh and inviting.
DIY String Light Canopy

Creating a DIY string light canopy can transform any room into a cozy retreat. Picture a collection of delicate string lights cascading down from the ceiling, draped with soft fabric. It’s a simple way to add charm and warmth to your space.
In the image, you can see how the lights hang beautifully, creating an inviting atmosphere. The lights twinkle softly, making the room feel magical. Choosing the right fabric can enhance the overall look, whether it’s sheer for a light feel or a heavier material for a more dramatic effect.
To get started, you’ll need string lights, some fabric, and a few hooks or adhesive strips to secure everything in place. Drape the fabric in a way that allows the lights to hang down freely, creating a waterfall effect. This setup not only looks pretty but also adds a soft glow, perfect for relaxing evenings or gatherings with friends.
Don’t forget to experiment with different layouts. You can make your canopy as big or small as you like. It’s all about what feels right for your space. Add a few personal touches, like photos or garlands, to make it truly yours. With just a few basic materials, you can easily create a dreamy ambiance that’s hard to resist.
Geometric Wall Art
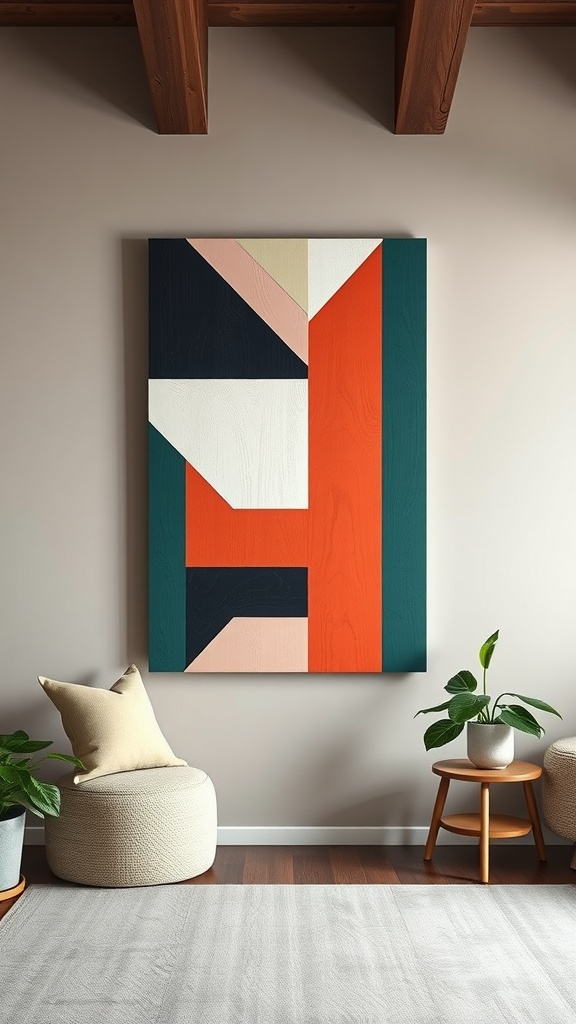
Geometric wall art is a fun and trendy way to add character to your space. This piece showcases a blend of shapes and colors that can make any room feel more inviting. The bold use of orange, navy, and teal creates a vibrant focal point, while softer tones like pink and cream balance it nicely.
When thinking about creating your own geometric art, consider the colors that resonate with your style. It doesn’t have to be complicated—start with a few simple shapes. You can use wood panels or canvas as your base. Experiment with different arrangements until you find a design that feels right for your home.
Incorporating plants around your art adds a touch of nature. The greenery complements geometric patterns beautifully and brings life to the room. Consider placing a small plant on a side table to enhance the overall aesthetic.
Faux Fur Area Rug
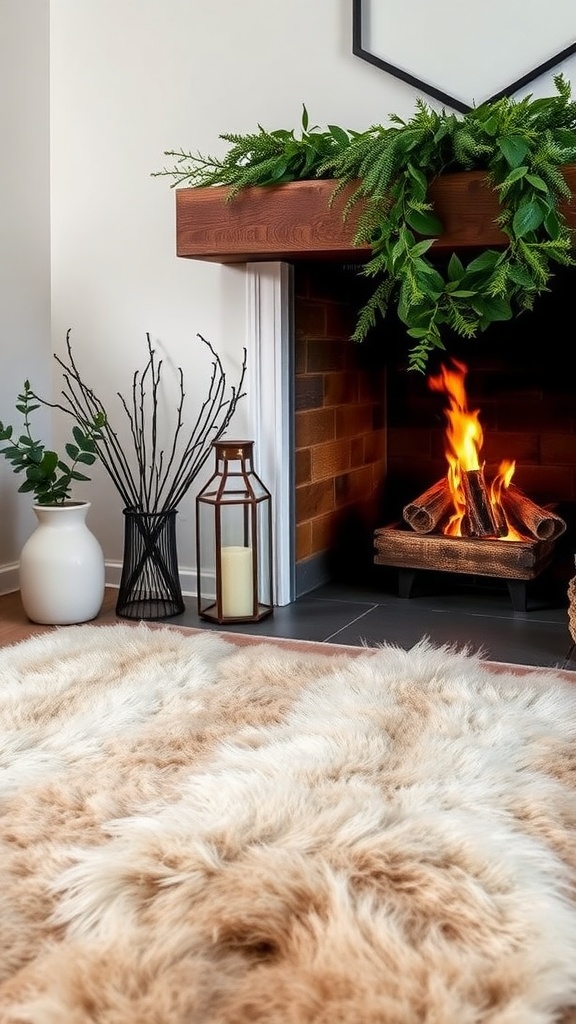
Faux fur area rugs can transform any room into a cozy retreat. The soft texture adds warmth and comfort underfoot, making them a delightful addition to living spaces. Imagine stepping onto one of these rugs after a long day—it feels like a little hug for your feet!
In the image, the faux fur rug complements a stylish fireplace scene. The tones of the rug blend beautifully with the surrounding decor, creating an inviting atmosphere. The flames flickering in the fireplace add a touch of warmth and ambiance, enhancing the overall charm of the space.
Using faux fur is also a smart choice for those who are mindful of animal welfare. It offers a similar aesthetic to real fur without any ethical concerns. Plus, these rugs are often easier to clean and maintain, making them practical for everyday use.
Whether you place it in the living room, bedroom, or even a cozy reading nook, a faux fur rug can enhance your decor effortlessly. Pair it with warm lighting and natural elements, like plants or wood accents, to create a harmonious and inviting environment.
Upcycled Ladder Bookcase
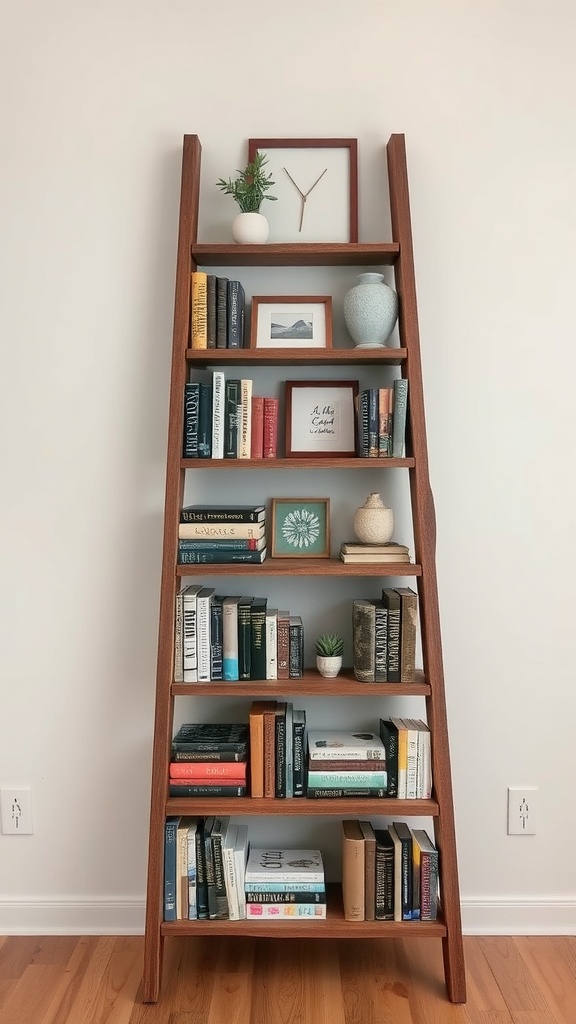
Transforming an old ladder into a bookcase is a fun and creative way to add storage to your space. This DIY project not only gives a new life to something you might otherwise discard but also adds a unique touch to your room decor.
The image showcases a beautiful upcycled ladder bookcase against a simple wall. The warm wood tones of the ladder contrast nicely with the vibrant books and decorative items placed on each shelf. You can see various sizes of books, adding character to the display.
On the top shelf, there’s a small plant and a framed art piece, which introduces a touch of greenery and personality to the arrangement. Each shelf is utilized effectively, with a mix of books and small decor items, creating a balanced and inviting look.
This project is not just practical but also a statement piece that can spark conversations among guests. If you’re looking for a way to organize your books and showcase personal items, this DIY upcycled ladder bookcase is a charming choice.
Hand-Painted Terracotta Pots
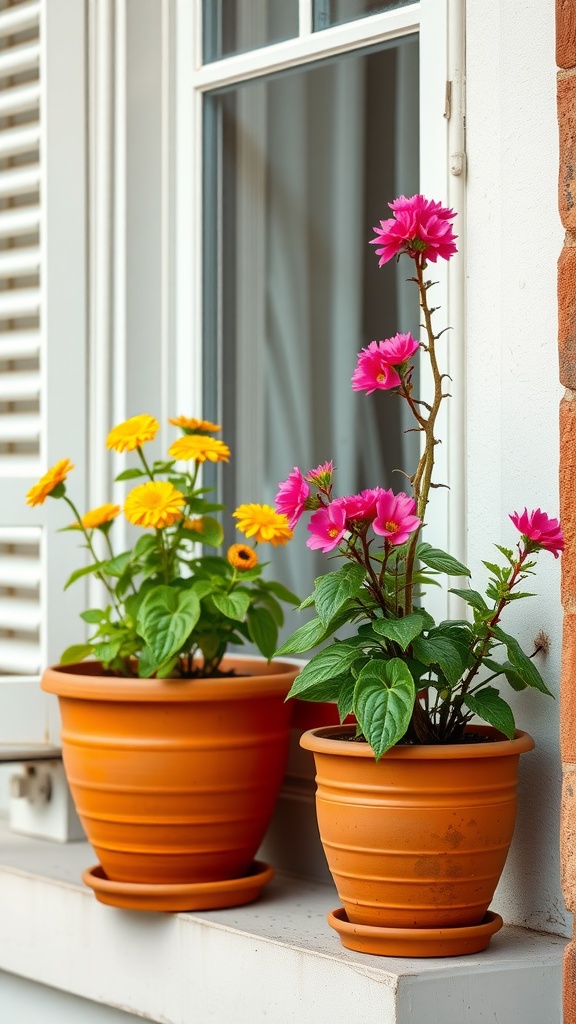
Hand-painted terracotta pots can transform your space in a delightful way. These pots, featured in the image, showcase vibrant flowers that add a cheerful touch to any window. The warm tones of terracotta provide a lovely contrast to the bright blooms, creating a lively atmosphere.
Creating your own hand-painted pots is a fun and easy DIY project. Start with plain terracotta pots, then gather some acrylic paints and brushes. Consider painting simple patterns or your favorite quotes to personalize them. Once painted, make sure to seal the pots to protect your artwork from the elements.
Placing these beautiful pots on a windowsill, like in the image, not only enhances your decor but also allows sunlight to reach your plants. Choose flowers that thrive in sunlight, such as marigolds and begonias, for a burst of color that brings joy to your home.
Decorative Ladder Shelf
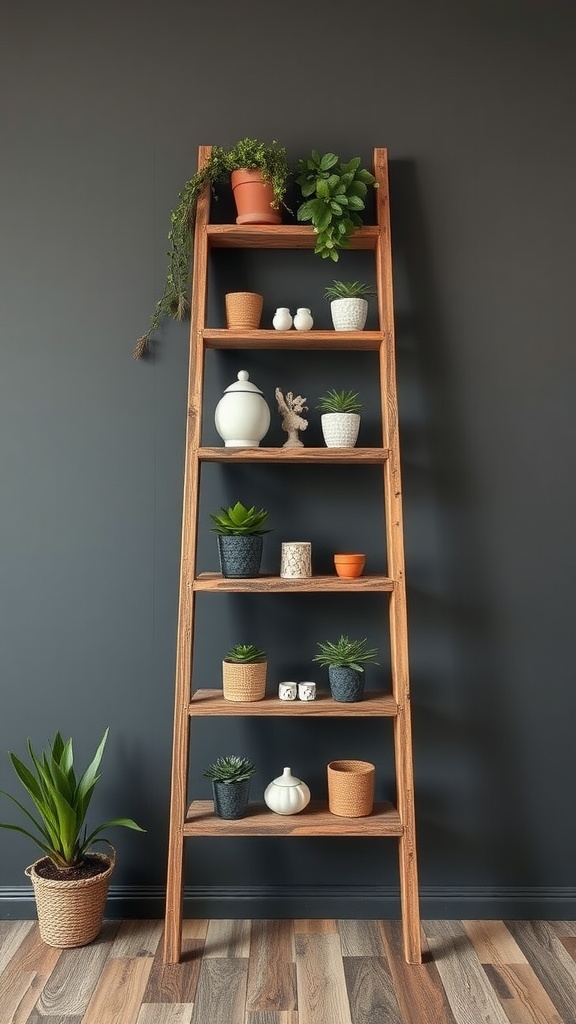
A decorative ladder shelf is a stylish way to showcase your favorite items while adding a touch of personality to your space. The image features a wooden ladder shelf leaning against a dark wall, creating a warm contrast. This setup is not only functional but also an eye-catching element in any room.
The shelves are adorned with a variety of plants and decorative pieces, like ceramic pots and small sculptures. This assortment brings life and color to the shelf, making it a perfect focal point in a living room or bedroom. The use of greenery adds a fresh vibe, making the atmosphere feel inviting and cheerful.
Building your own ladder shelf is quite simple. You can use reclaimed wood for a rustic touch or opt for new wood for a cleaner look. Once you have your materials, cut the wood to size and assemble it in a ladder shape. Finish it with a stain or paint of your choice to match your decor.
Once your shelf is ready, consider what to display. Mix different textures and heights for visual interest. You can include small potted plants, decorative vases, or even books. The key is to create a balance that feels organized yet relaxed.
Chalkboard Wall Art
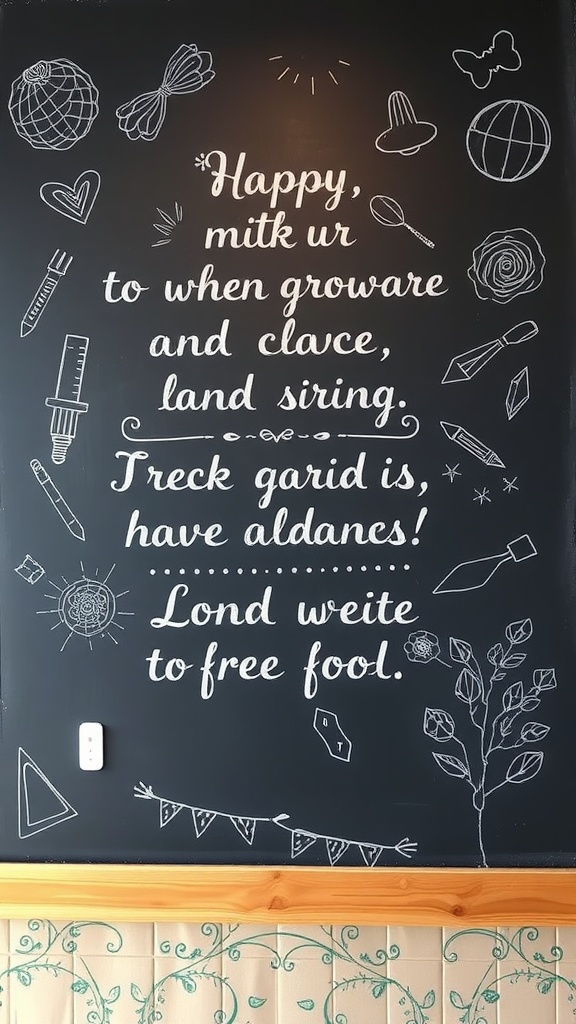
Chalkboard wall art is a fun and creative way to personalize your space. The image showcases a large black chalkboard filled with playful doodles and a whimsical message. It invites everyone to express their thoughts and creativity, making it a perfect addition to any room.
The text on the wall, while quirky, reflects a lighthearted sentiment that can brighten up your day. Surrounding the message are charming drawings of various objects, like globes, utensils, and decorative elements. This combination brings a sense of warmth and joy to the environment.
Creating a chalkboard wall is simple! All you need is some chalkboard paint and a blank wall. Once painted, you can use chalk to write messages, draw designs, or even create lists. This gives you the flexibility to change the look whenever you want.
Whether in a kitchen, living room, or kids’ play area, chalkboard walls encourage creativity and interaction. They can be used for family notes, artistic expression, or just for fun. It’s a DIY decor idea that fits any style!
Vintage Suitcase Storage
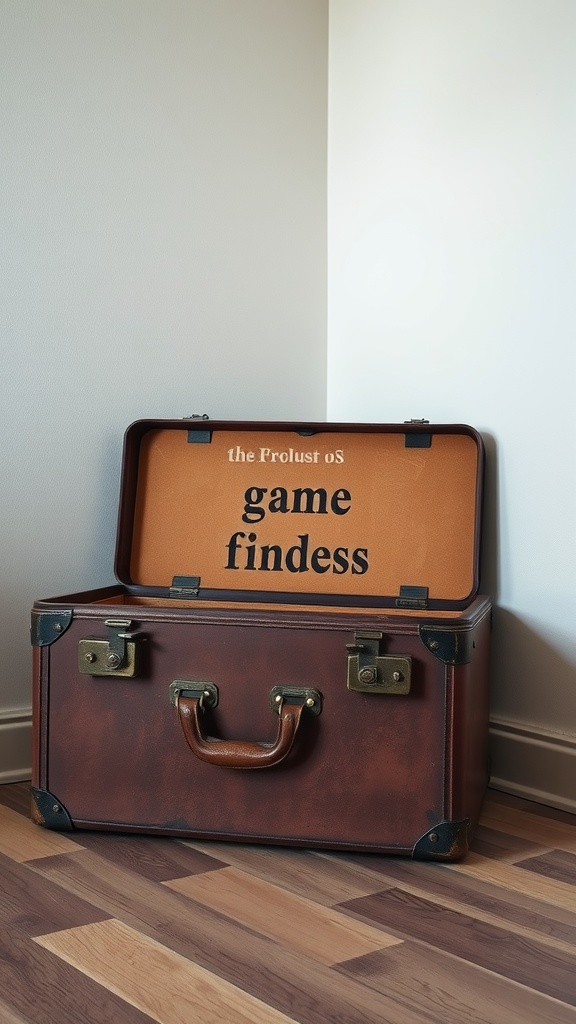
If you’re looking for a charming way to add storage to your space, vintage suitcases are a delightful option. These timeless pieces not only serve a purpose but also bring a touch of nostalgia to your decor.
The image showcases a beautifully worn suitcase with a rich brown color and brass hardware. It’s perfect for storing items while adding character to your room. Imagine placing it at the foot of your bed or in a cozy corner of your living room. It can hold everything from blankets to books, making it both functional and stylish.
To incorporate vintage suitcases into your home, try stacking a couple of them together for a unique display. You can place small decorative items on top or use the top suitcase as a makeshift coffee table. The options are endless!
Overall, vintage suitcases are an easy and fun way to elevate your storage solutions. They blend well with various styles, be it rustic, modern, or eclectic, making them a versatile addition to your home decor.
Paper Flower Bouquets
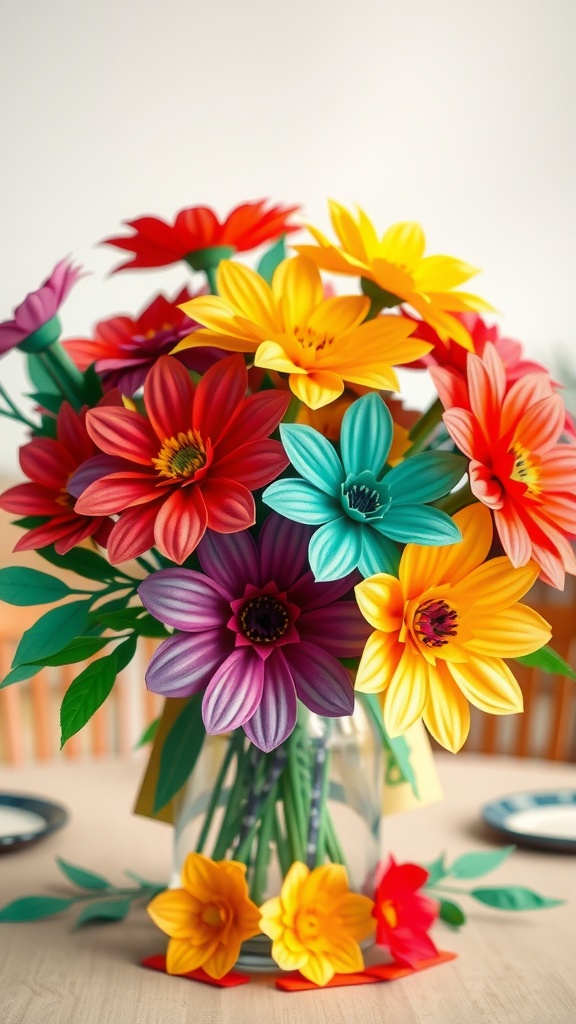
Paper flower bouquets are a delightful way to add a pop of color to your home decor. They are easy to make and can brighten up any space without the upkeep of real flowers.
The vibrant colors in the image showcase a mix of red, yellow, purple, and blue flowers, all crafted from paper. These blooms are arranged in a clear vase, making them a charming centerpiece for a dining table or a side table.
Creating paper flowers can be a fun DIY project. Gather some colored paper, scissors, and glue. There are plenty of tutorials online that guide you through the process of crafting each type of flower.
Once you have your flowers ready, arrange them in a vase of your choice. You can even personalize the bouquet by adding leaves or other decorative elements. This gives your home a unique touch that reflects your style.
Corkboard Picture Frames
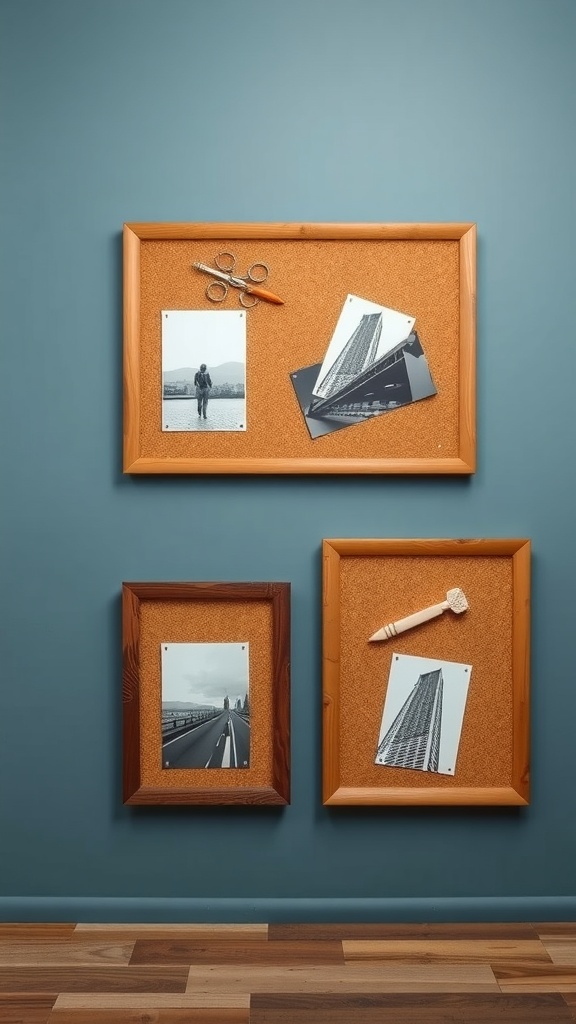
Corkboard picture frames add a unique touch to your home decor. They are not just functional but also stylish. You can use them to display your favorite photos, notes, or even artwork. The image shows a set of corkboard frames mounted on a blue wall, creating a chic and organized space.
The larger frame features a few black-and-white photos casually pinned up alongside scissors and an orange pen. This setup invites creativity, making it easy to switch out pictures whenever you want. The smaller frames next to it are just as appealing, showcasing more images while keeping everything neat.
Using corkboard in picture frames allows for endless customization. You can choose different frame styles to match your room’s theme, whether it’s rustic, modern, or eclectic. Add some colorful pins or clips to bring in more personality and flair.
DIY Window Treatments
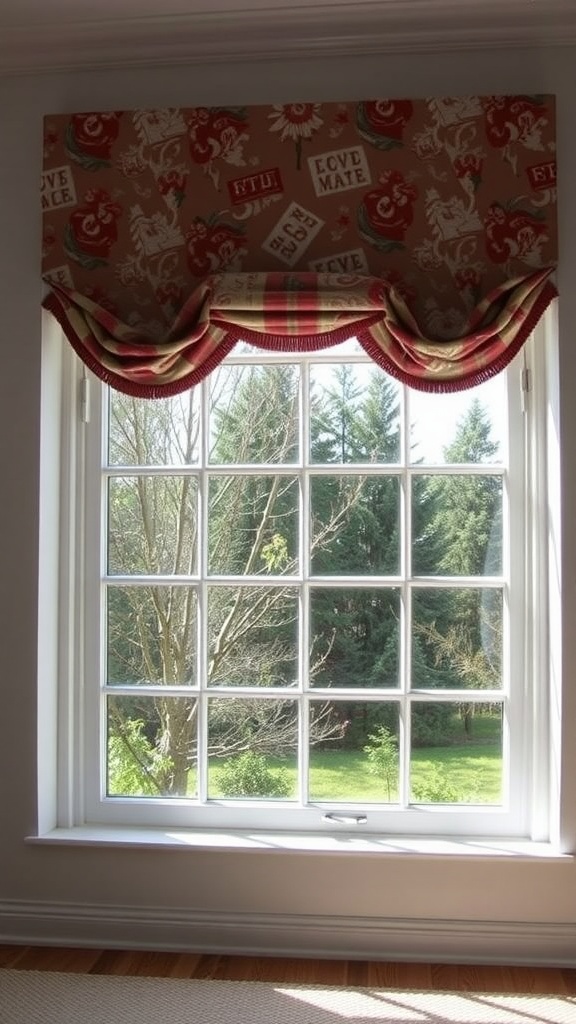
Window treatments can transform a room, adding both style and function. This image showcases a beautifully designed window valance that fits snugly over a bright, airy window. The valance features a playful pattern that adds a pop of color to the space, creating a cheerful ambiance.
Choosing DIY window treatments allows you to customize your decor while saving money. You can select fabrics that match your personal style and coordinate with other elements in your home. This particular design combines floral and geometric patterns, which can inspire you to mix and match fabrics for a unique look.
To create something similar, start by measuring your window and determining the fabric needed. You can sew or use fabric glue for simpler projects. Don’t shy away from experimenting with different styles, like pleated or gathered valances, to find what works best in your space. Adding a touch of trim or contrasting fabric can elevate the design further.
Remember, window treatments aren’t just about aesthetics; they also help control light and privacy. So, have fun with your DIY project while considering how the final look will enhance your room.
Repurposed Door Headboard
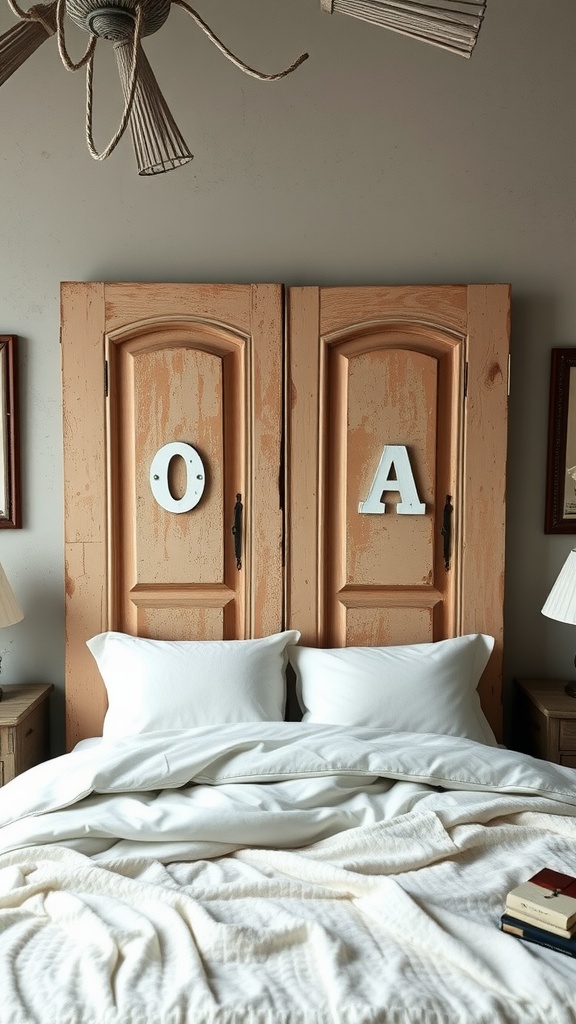
Transforming an old door into a headboard is a fun and creative way to add character to a bedroom. The image shows a charming headboard made from two repurposed doors, which create a unique focal point behind the bed. The soft colors of the doors, combined with the simplicity of the white bedding, give the room a cozy and inviting feel.
Using reclaimed materials not only helps in recycling, but it adds a personal touch to your decor. The doors are adorned with letters, which can represent initials or just be a playful addition. This customization can make the headboard feel even more special.
To create your own repurposed door headboard, start by sourcing old doors from thrift stores or garage sales. Sand them down to remove any rough edges and paint them in colors that match your room. Secure them together, and then attach them to the wall or the bed frame. It’s a straightforward DIY project that can make your bedroom feel fresh and unique.
Succulent Terrarium
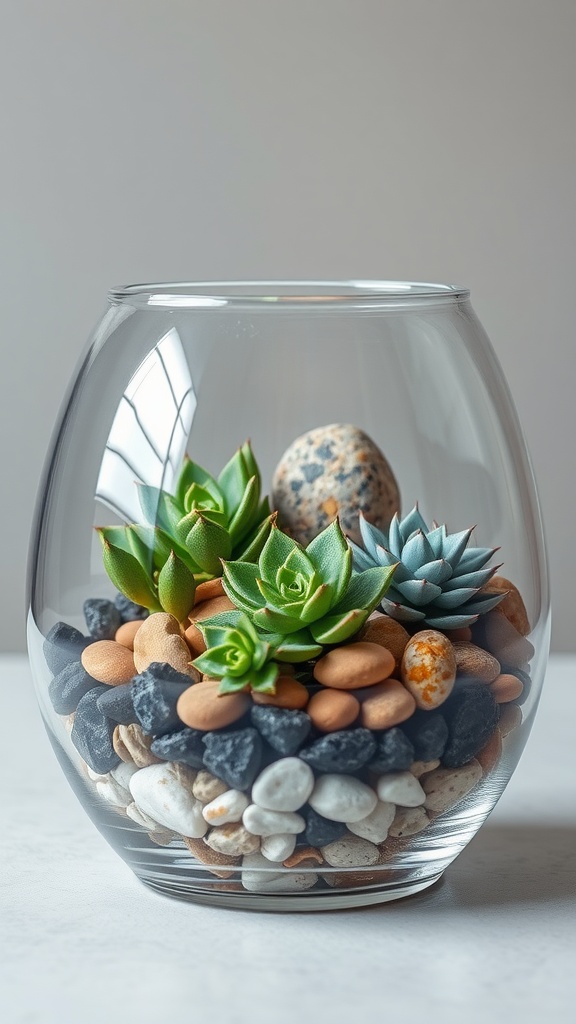
Creating a succulent terrarium is a fun and easy way to add some greenery to your space. This charming glass container showcases a mix of vibrant succulents, each bringing its unique texture and color. The arrangement includes smooth pebbles and decorative stones, adding a natural touch to the design.
To make your own, start with a clear glass container, which allows light to reach the plants. Layer the bottom with small stones for drainage, then add a layer of potting soil. Place your chosen succulents in the soil, arranging them for visual appeal. Finally, top it off with more decorative stones to finish the look.
Succulent terrariums are low-maintenance, making them perfect for busy lifestyles. They thrive in bright, indirect sunlight and only need watering once every few weeks. Plus, they’re a fantastic conversation starter when guests come over!
Hanging Planter Installation
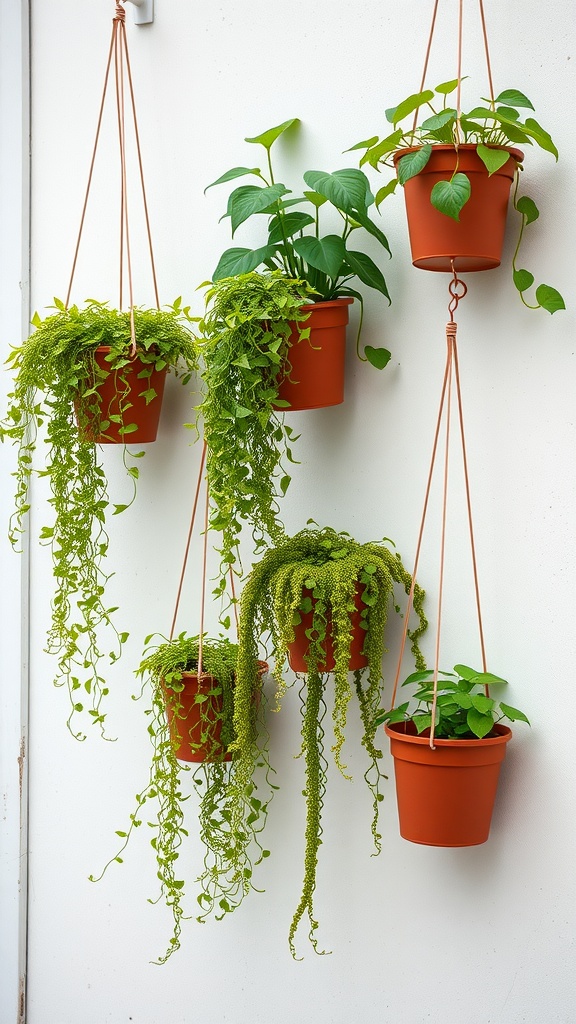
Adding hanging planters to your space can really brighten things up. They not only introduce greenery into your home but also add a fun visual element to your decor. Picture a wall adorned with various plants, each gracefully suspended in terracotta pots. It’s a great way to showcase your favorite plants without taking up floor space.
In the image, you can see multiple hanging planters, each featuring different types of lush greenery. The combination of cascading vines and structured leaves creates an appealing contrast. If you’re looking for a way to bring nature indoors, this setup is simple yet effective.
For your own hanging planter installation, start by selecting a mix of plants that vary in height and texture. This will create an interesting display. Ensure you have sturdy hooks and strong rope or macramé hangers to support the pots. Hang them at different heights for a more dynamic look. Don’t forget to consider the light needs of your plants as well!
DIY Floating Shelves
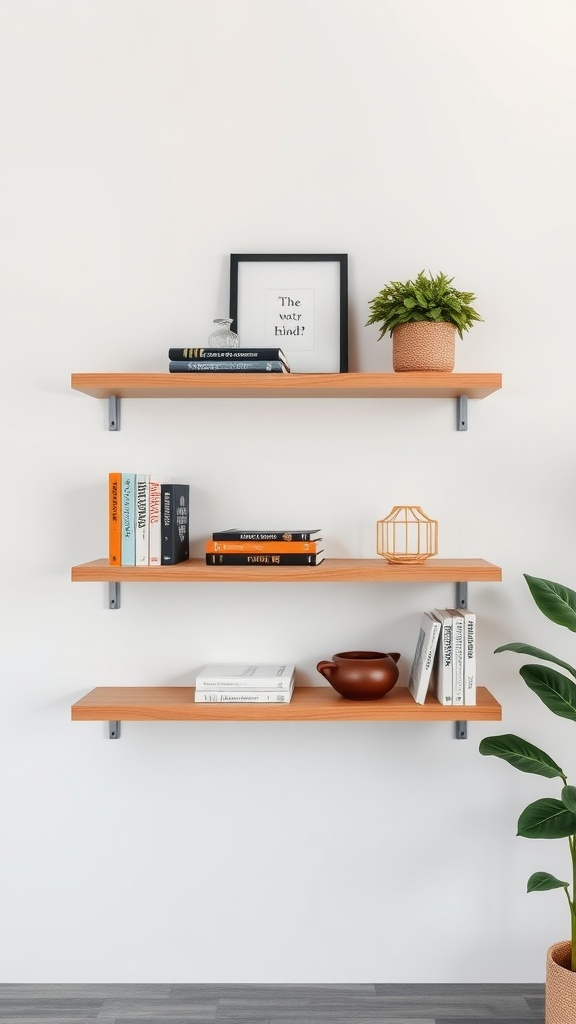
Floating shelves are a simple way to add style and functionality to your space. In the image, you can see three wooden shelves mounted on a clean wall, creating an organized and airy feel. The warm wood tone contrasts nicely with the minimalistic design, making it perfect for any room.
These shelves can hold anything from books to decorative items. On the top shelf, there are some books stacked neatly, along with a framed quote that adds a personal touch. A small potted plant on the second shelf brings in a bit of greenery, making the space feel alive and inviting.
The lower shelf features a charming teapot and more books, showing how these shelves can be both functional and decorative. Incorporating floating shelves into your home not only helps reduce clutter but also allows you to showcase your personality through your favorite items.
If you’re interested in creating your own floating shelves, it’s a straightforward DIY project. All you need are some wooden boards, brackets, and screws. Just measure your space, cut the wood to size, and secure them to the wall. In no time, you’ll have a stylish display area that fits your needs!
Embellished Mirror Frame
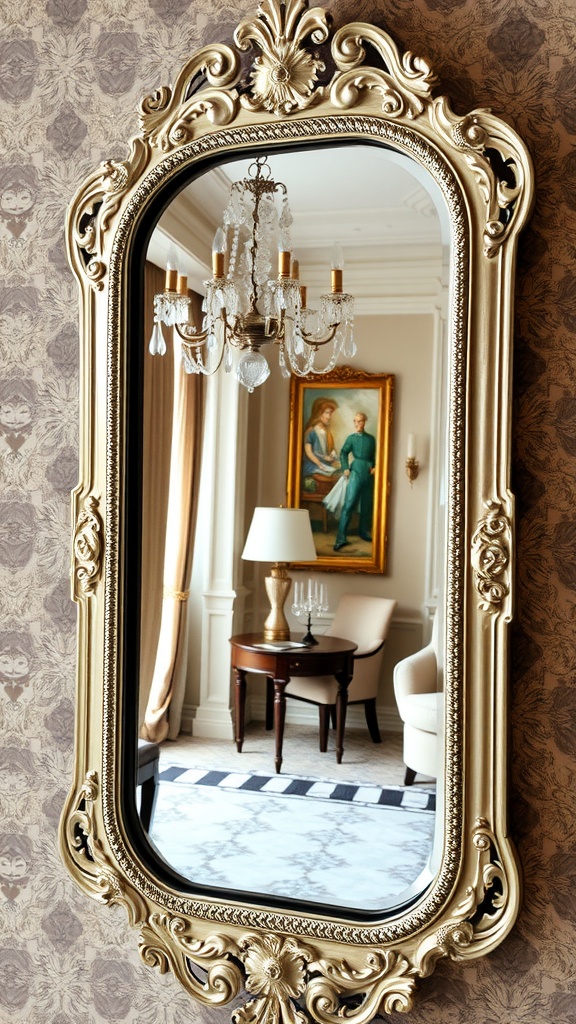
Transforming a simple mirror into a statement piece can be done easily with an embellished mirror frame. The image showcases a beautifully ornate frame that adds character and elegance to any room.
The frame’s intricate details, like floral motifs and a gold finish, create a rich visual texture. This style complements various decor themes, from traditional to modern. Placing such a mirror in your space can enhance its overall aesthetic and make it feel more inviting.
To create your own embellished mirror frame, consider using materials like paint, wood, or even faux gems. Start with a basic mirror and let your creativity run wild. Add elements that resonate with your personal style, whether it’s a rustic wooden trim or a glamorous metallic finish. The result will be a unique piece that reflects not only your style but also light, making the space feel larger and more open.
Washi Tape Wall Design
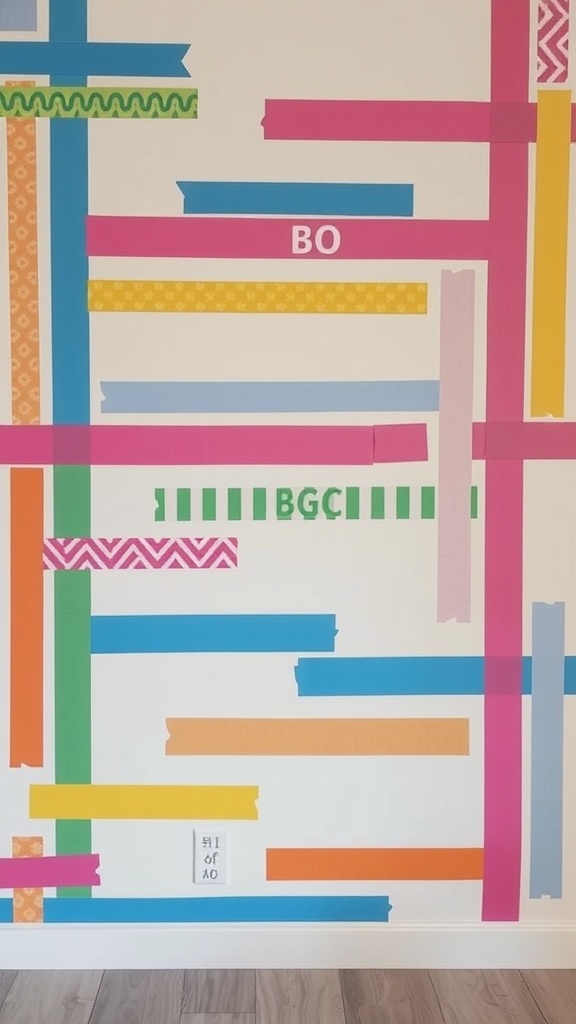
Washi tape can be a fun way to add personality to your walls without the commitment of paint. In the image, you can see a creative wall design made entirely from different colors and patterns of washi tape. This technique makes it easy to create unique patterns that suit your style.
The vibrant colors, including pink, blue, green, and orange, create a lively and cheerful atmosphere. You can experiment with different widths and patterns to find what works best for your space. Consider using washi tape to highlight certain areas of a room or to create a focal point on an otherwise plain wall.
One of the best things about this idea is that it’s easy to change. If you decide you want a new look, all you need to do is peel off the tape and start over. This makes it a great option for kids’ rooms or any space that you like to refresh regularly. Use it to frame artwork or create stripes and geometric shapes that can add depth and interest to your room.
Personalized Name Sign

Adding a personalized name sign to your room decor is a fun way to make your space truly yours. The image shows a beautifully crafted wooden name sign that reads ‘Eunnid’. This piece is mounted above a cozy bed, giving the room a personal touch.
Creating a name sign can be a simple DIY project. You can choose different materials, such as wood, acrylic, or even metal, depending on your style. The color of the sign can match your room’s theme, which enhances the overall vibe.
To make your own, start by measuring the space above your bed or wherever you’d like to display the sign. Sketch out your design and select your materials. Cutting the letters can be done by hand or with a cutting machine, making it accessible for everyone. Once you have your letters, paint or stain them to fit your decor.
Finally, hang the sign securely. A personalized name sign not only adds a unique element to your room but also showcases your identity. It’s an easy project that adds warmth and character to your living space.
Natural Wood Slice Coasters
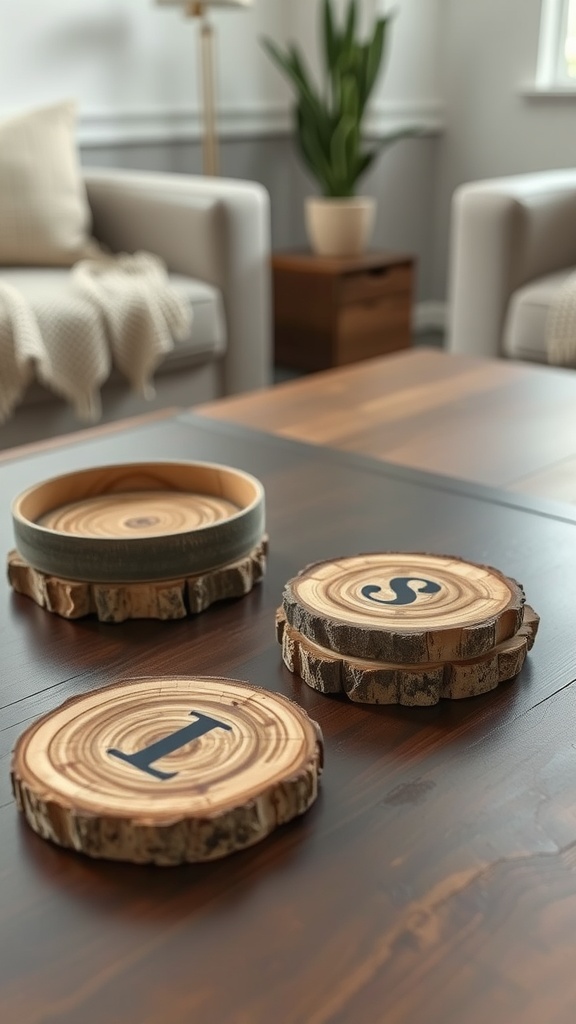
Natural wood slice coasters bring a touch of nature indoors. They are simple yet stylish, making them a lovely addition to any coffee table. Each coaster is unique, showcasing the natural patterns of the wood. This adds character to your space and makes a conversation starter when guests come over.
In the image, you can see a few wooden coasters with letters painted on them. This not only personalizes the coasters but also adds a decorative element. You can easily customize your own coasters using stencils or freehand painting. Choose letters that represent your family, initials, or fun words.
Creating these coasters is a fun DIY project. Start by selecting slices from a fallen tree branch, ensuring they are dry and smooth. Sand them down for a polished look. Once they’re ready, paint your designs or initials on them, and seal with a clear coat for durability. This will give your coasters a longer life and protect them from moisture.
These natural wood slice coasters are not just for looks. They provide a protective layer for your surfaces, preventing rings from coffee or tea cups. Plus, they blend well with various decor styles, whether your home is rustic, modern, or something in between.
Colorful Quilted Wall Hanging
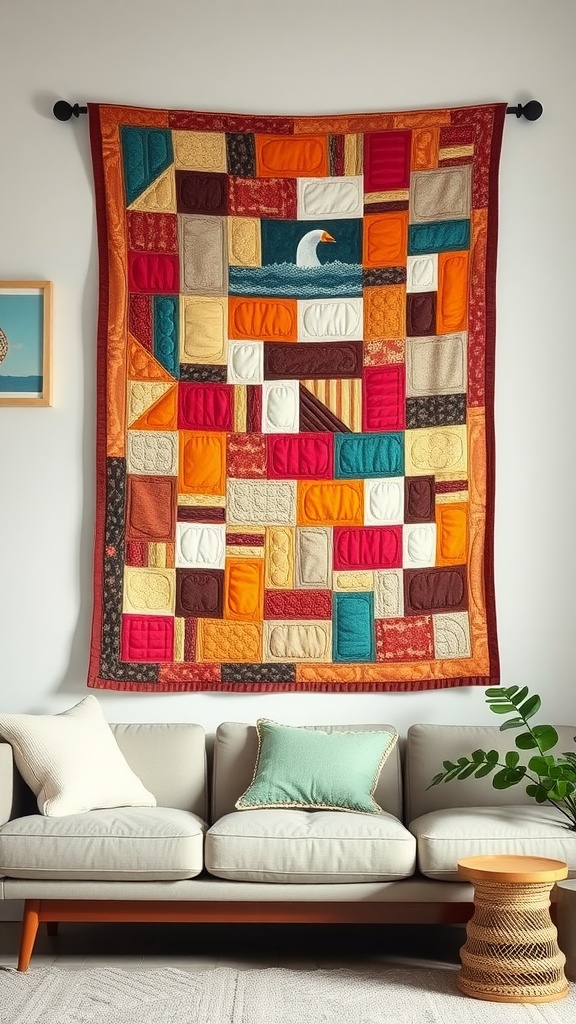
Quilted wall hangings are a delightful way to add a splash of color and texture to your living space. This particular piece showcases an array of vibrant patches, each telling its own story through different fabrics and patterns. From deep oranges to soothing blues, the colors work together to create a warm, inviting atmosphere.
At the center, an artistic depiction of a swan gliding over gentle waves adds a touch of elegance. This not only draws the eye but also serves as a conversation starter for guests. Surrounding this focal point are various textured squares that add depth and interest to the piece.
Hanging a quilted wall piece like this can transform a plain wall into a vibrant display. Pair it with a cozy sofa or a simple side table, and you create a welcoming nook perfect for relaxation. It’s a simple DIY project that can be achieved with fabrics you love, making it a personal touch in your home decor.
Creative Bookends
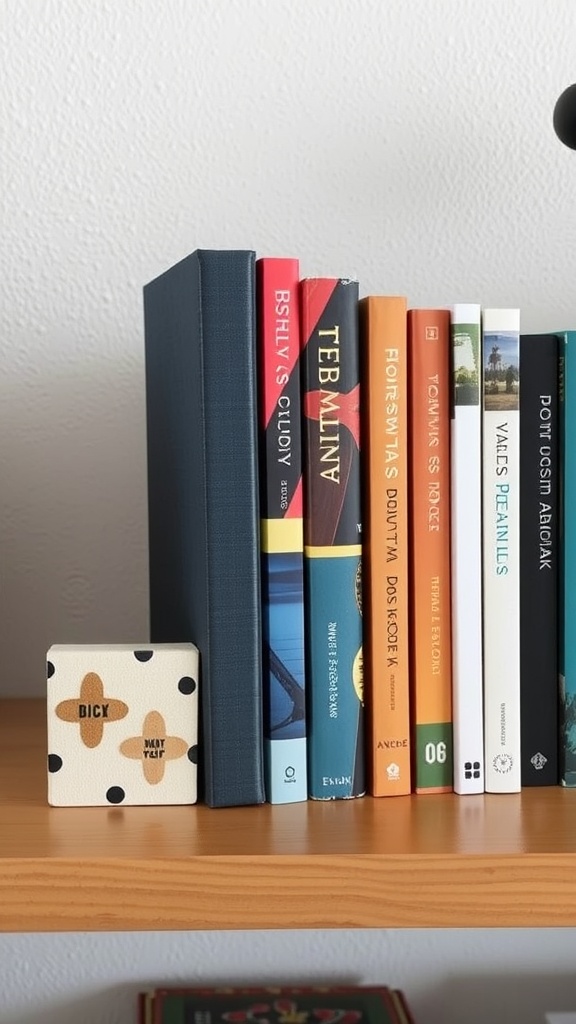
When it comes to organizing your books, creative bookends can add a personal touch to your space. The image showcases a clever use of a decorative bookend alongside a collection of colorful books. The bookend features a playful design with dots and a fun phrase, making it not just functional but also a quirky conversation starter.
These bookends help keep your books upright while adding a splash of style to your shelf. You can find or create bookends in various materials like wood, metal, or even fabric. If you’re feeling crafty, why not try making your own? A simple DIY project could involve painting wooden blocks or using repurposed items that reflect your personality.
Incorporating unique bookends into your decor not only serves a practical purpose but also enhances the overall look of your bookshelf. So, whether you prefer something minimalist or bold, there’s a bookend style that can perfectly complement your home decor.
Personalized Family Tree Art
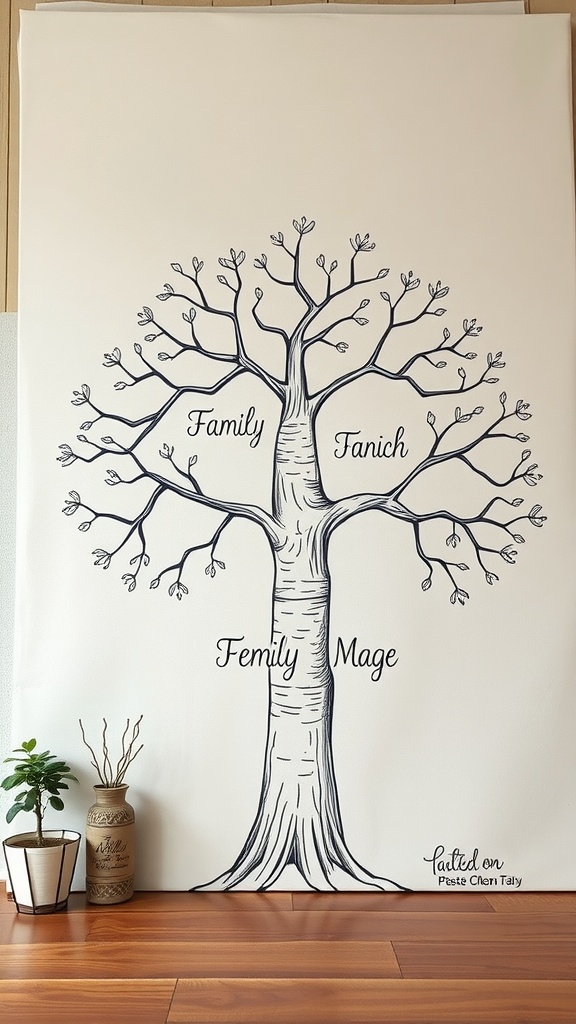
Creating a personalized family tree art piece can add a special touch to your home decor. This simple yet elegant design showcases the branches of your family, making it a lovely focal point for any room.
The art features a beautifully drawn tree with names representing family members at the ends of the branches. It’s a great way to celebrate your heritage and keep your loved ones close, even if they are far away.
You can choose to customize the names and even add some personal touches, like dates or small drawings that represent family events. This can be a fun project for the whole family, allowing everyone to contribute their ideas for the design.
To create your own family tree art, start by gathering the names you want to include. You can sketch the tree yourself or use a template. Then, select your colors and materials. Whether you’re using paint, markers, or digital design tools, the sky’s the limit!
Once it’s complete, hang it prominently in your home. It’s not just decor; it’s a piece of your family history that adds warmth and meaning to your space.
Seasonal Decor Swap
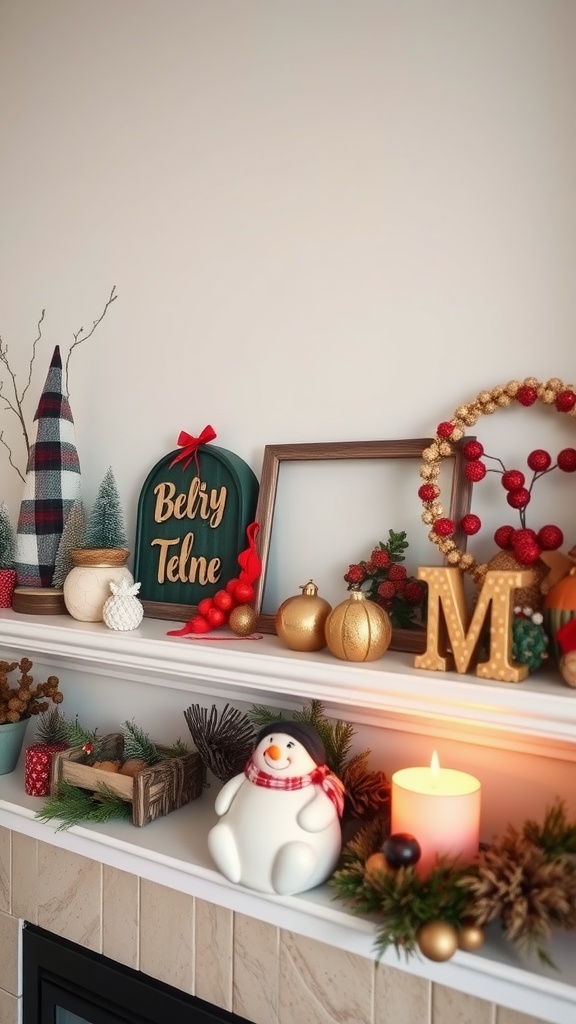
Swapping out decor with the seasons is a fun way to keep your space feeling fresh and inviting. In the image, you can see a lovely arrangement that blends winter vibes with seasonal charm. The shelf features festive elements such as a cheerful snowman and a warm candle, creating a cozy atmosphere.
The mix of colors and textures adds depth to the display. The wooden elements, like the sign and the small crate, contrast nicely with the shiny ornaments and greenery. This balance makes the decor visually appealing while maintaining a homey feel.
Incorporating seasonal pieces is easy. Look for items like small trees, wreaths, and decorative signs that reflect the current season. You can even DIY some elements to add a personal touch. As the seasons change, simply update your decor with new themes, colors, and styles to keep your home looking lively.
DIY Outdoor Lanterns
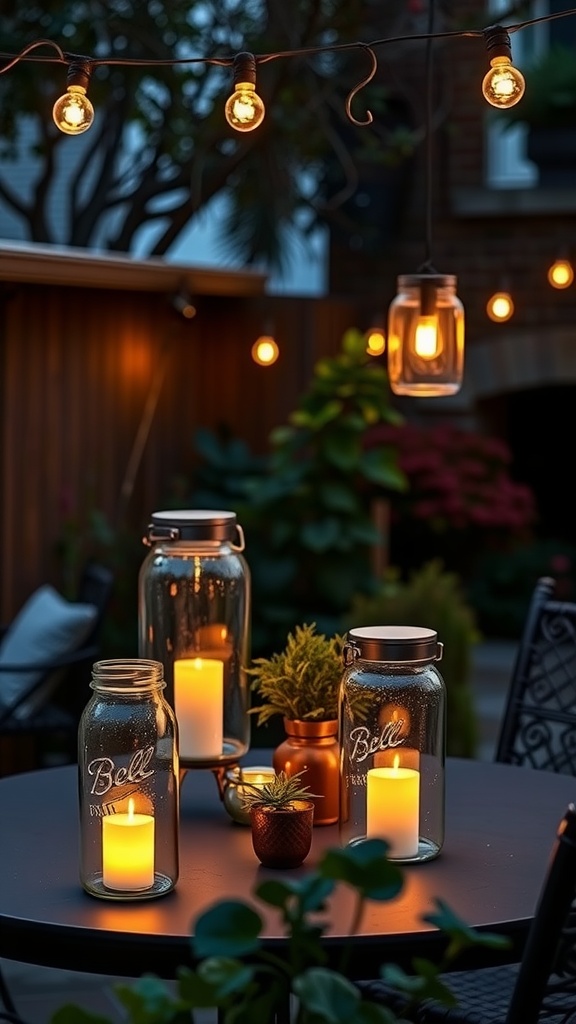
Creating DIY outdoor lanterns is a fun way to brighten up your space. The image shows a cozy outdoor setting with various lanterns and string lights, perfect for any gathering. You can easily replicate this look with a few simple materials.
One great idea is to use mason jars as your lanterns. Fill them with LED candles for a safe, flickering glow. This not only looks charming but also adds a warm ambiance to your outdoor area. You can personalize these jars with paint or twine to fit your style.
In the image, the lanterns are placed on a black table, surrounded by greenery and soft lighting. To create a similar vibe, consider placing your lanterns in clusters of different heights. Mixing larger jars with smaller ones can add depth and interest to your decor.
Don’t forget about string lights! These can be hung above or around your seating area to enhance the atmosphere. Choose bulbs that complement your lanterns for a cohesive look.
With just a bit of creativity, you can transform your outdoor space into an inviting oasis. So gather your materials and get started on your DIY lantern project!
